Introduction
Apache NiFi Registry—a subproject of Apache NiFi—is a complementary application that provides a central location for storage and management of shared resources across one or more instances of NiFi and/or MiNiFi.
The first implementation of the Registry supports versioned flows. Process group level dataflows created in NiFi can be placed under version control and stored in a registry. The registry organizes where flows are stored and manages the permissions to access, create, modify or delete them.
See the System Administrator’s Guide for information about Registry system requirements, installation, and configuration. Once NiFi Registry is installed, use a supported web browser to view the UI.
Browser Support
| Browser | Version |
|---|---|
Chrome |
Current and Current - 1 |
FireFox |
Current and Current - 1 |
Safari |
Current and Current - 1 |
Current and Current - 1 indicates that the UI is supported in the current stable release of that browser and the preceding one. For instance, if the current stable release is 62.X then the officially supported versions will be 62.X and 61.X.
For Safari, which releases major versions much less frequently, Current and Current - 1 simply represent the two latest releases.
The supported browser versions are driven by the capabilities the UI employs and the dependencies it uses. UI features will be developed and tested against the supported browsers. Any problem using a supported browser should be reported to Apache NiFi.
Unsupported Browsers
While the UI may run successfully in unsupported browsers, it is not actively tested against them. Additionally, the UI is designed as a desktop experience and is not currently supported in mobile browsers.
Viewing the UI in Variably Sized Browsers
In most environments, all of the UI is visible in your browser. However, the UI has a responsive design that allows you to scroll through screens as needed, in smaller sized browsers or tablet environments.
| The minimum recommended screen size is 1080px X 445px. |
Terminology
Flow: A process group level NiFi dataflow that has been placed under version control and saved to the Registry.
Bundle: A binary artifact containing one or more extensions that can be run in NiFi or MiNiFi.
Bucket: A container that stores and organizes versioned items, such as flows and bundles.
Policy: Defines a user or group’s ability to perform a given action.
NiFi Registry User Interface
The NiFi Registry UI displays the shared resources available and provides mechanisms for creating and administering users/groups, buckets and policies.
When the application is started, the user is able to navigate to the UI by going to the default address of http://<hostname>:18080/nifi-registry in a web browser. There are no permissions configured by default, so anyone is able to view and modify the flows and buckets. For information on securing the system, see the System Administrator’s Guide.
When an administrator navigates to the UI for the first time, the registry is empty as there are no flow resources available to share yet:
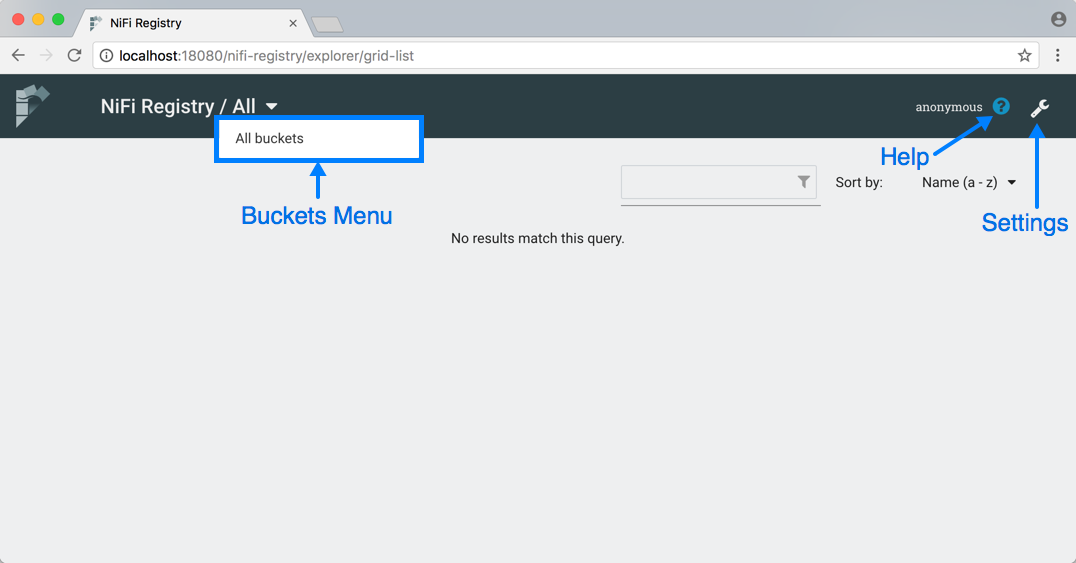
The Buckets menu is available at the top left of the screen. It allows the user to display flows based on which bucket they are contained in. On the top right of the screen is the Settings button ( ) which accesses functionality for managing users, groups, buckets and policies. Next to the Settings button is the Help button (
 ) which accesses the NiFi Registry Documentation.
Logging In
If NiFi Registry is configured to run securely, users will have to be granted permissions to buckets by an administrator. For information on configuring NiFi Registry to run securely, see the System Administrator’s Guide.
If the user is logging in with their username/password they will be presented with a screen to do so.

Manage Flows
View a Flow
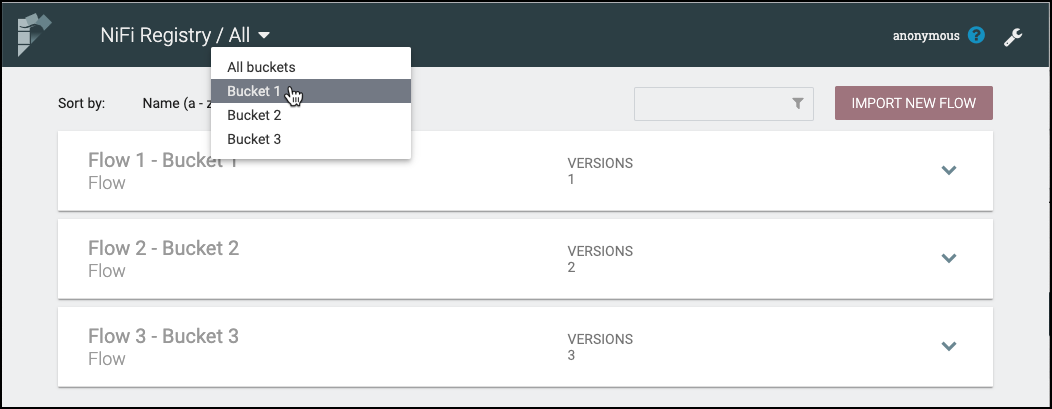
Flows in all buckets are listed in the main window of the UI by default. If the registry is secured, only the flows in the buckets that the user has access to are listed.

To see the flows in a particular bucket, select that bucket from the drop-down menu at the top left of the UI.
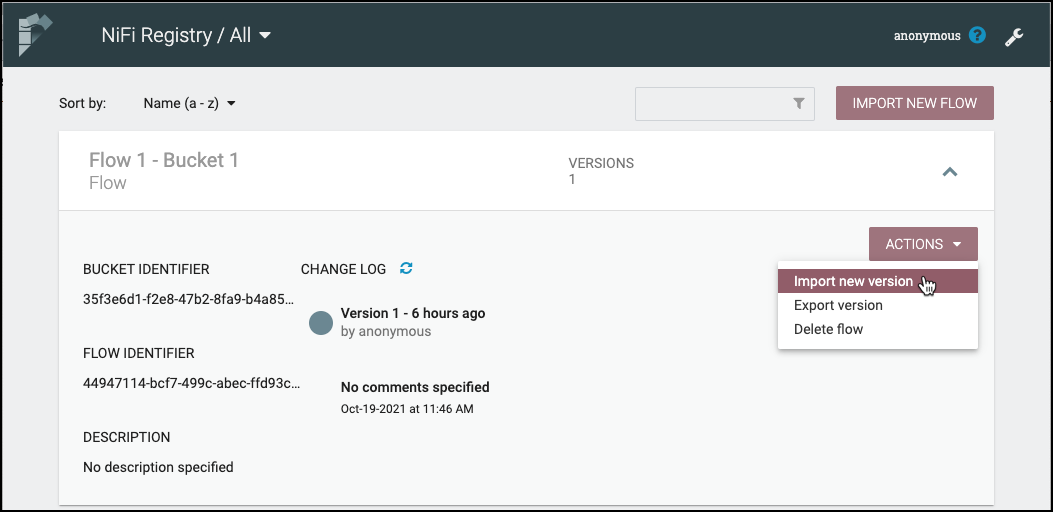
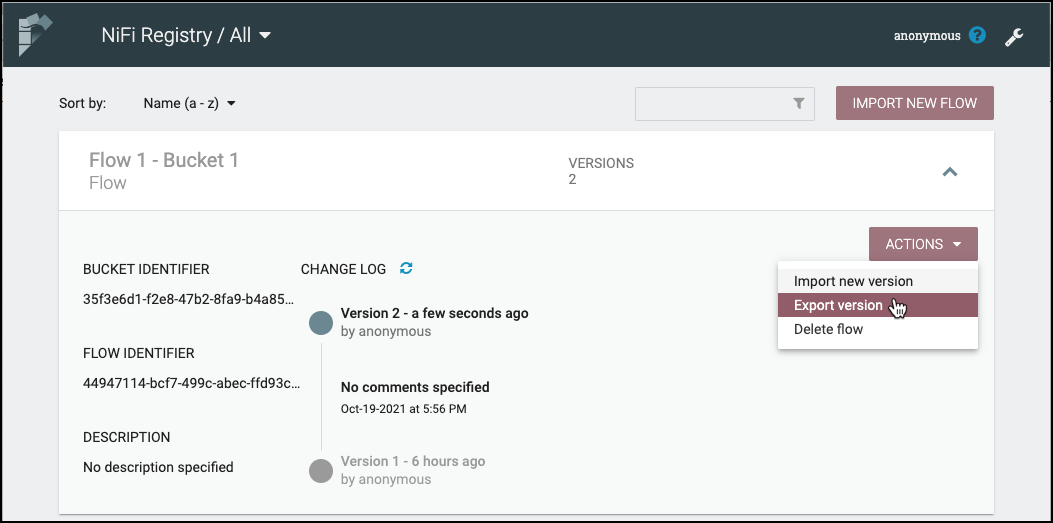
Click on a flow to see its Bucket Identifier, Flow Identifier, Description and Change Log:
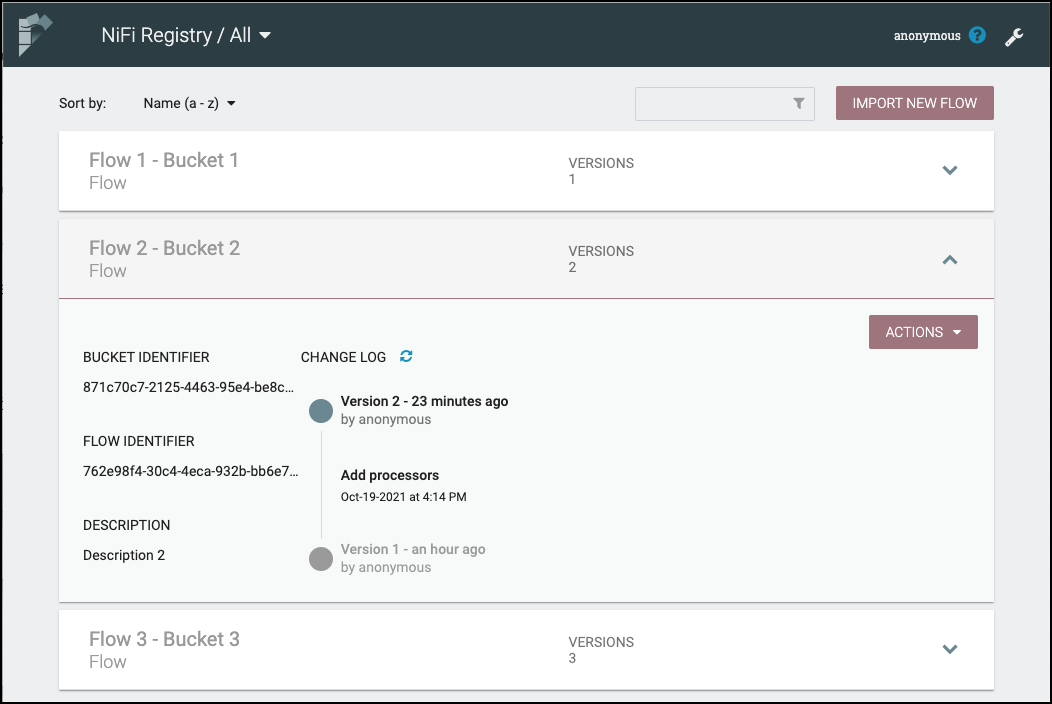
The Change Log includes all versions that were saved for a flow. Clicking on the version reveals details about when the version was saved, which user committed the save, and any comments entered by the user.
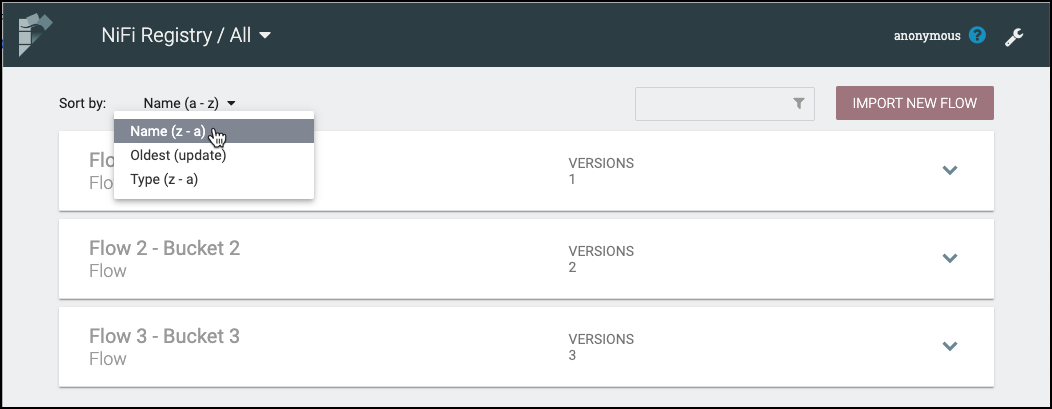
Sorting & Filtering Flows
Flows can be sorted alphabetically by Name (ascending or descending), by Update (newest or oldest) or by Type (ascending or descending) using the Sort By drop-down.
The flow list can be filtered by:
-
flow name
-
flow description
-
flow ID
-
bucket name
-
bucket ID
-
type
Here is an example filtering by flow name:
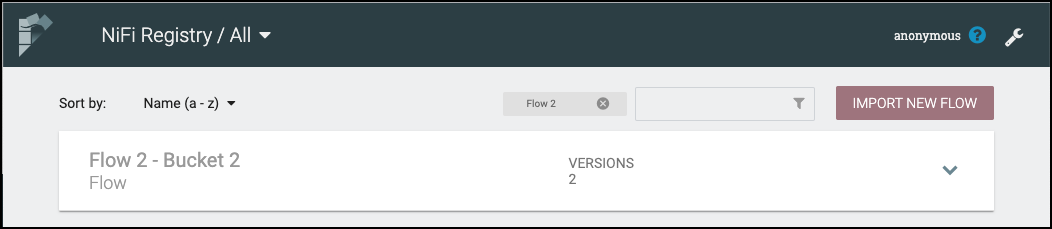
Import a Flow
To import a flow into the registry:
-
Click on the "Import New Flow" button. A bucket must exist for this button to be visible.

-
Enter a unique flow name and a flow description if desired.
-
Select the destination bucket.
-
Drop or select a flow definition file.
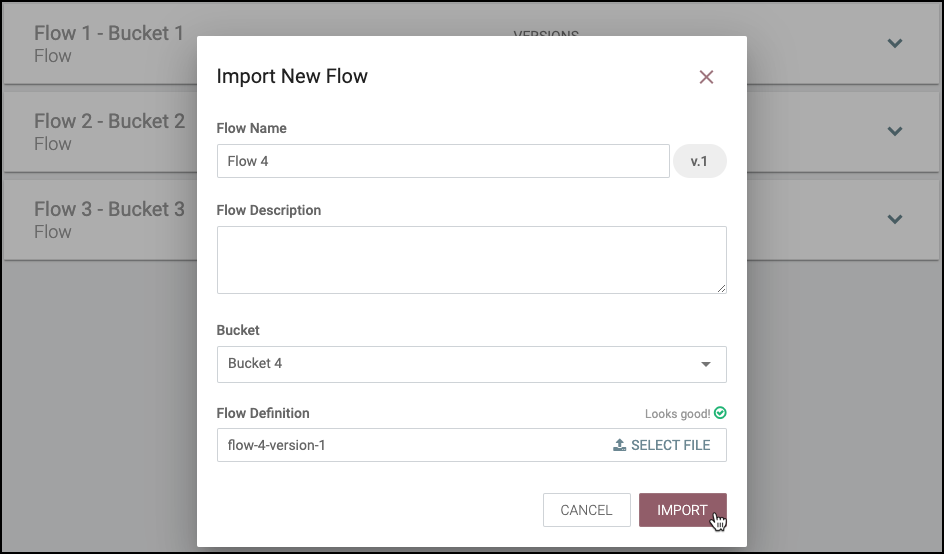
-
Select "Import".
Import New Version of a Flow
To import a new version of a flow:
-
Click on the flow to see its details.
-
Select the "Actions" drop-down and click the "Import new flow" menu option.
-
Drop or select a flow definition file.
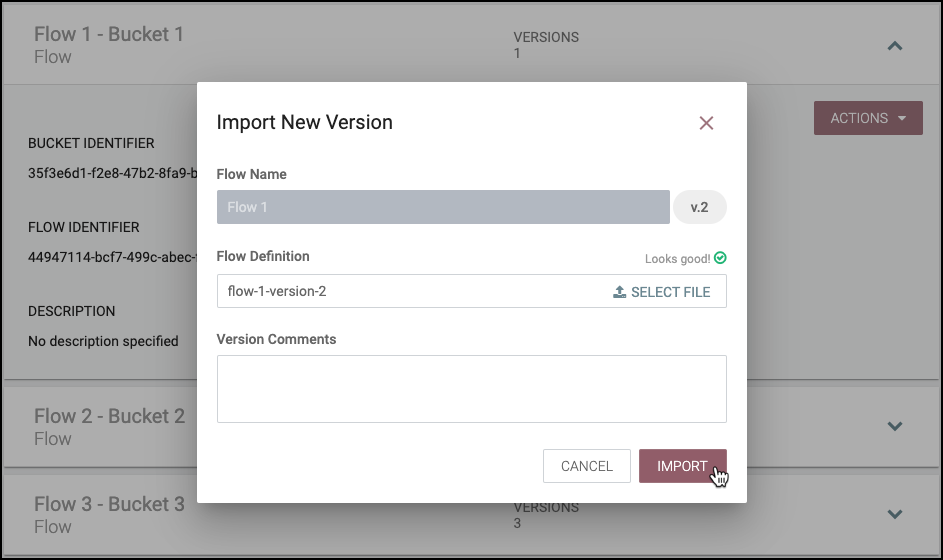
-
Select "Import".
Manage Buckets
To manage buckets, enter the Administration section of the Registry by clicking the Settings button () on the top right of the UI. The Buckets window appears by default.
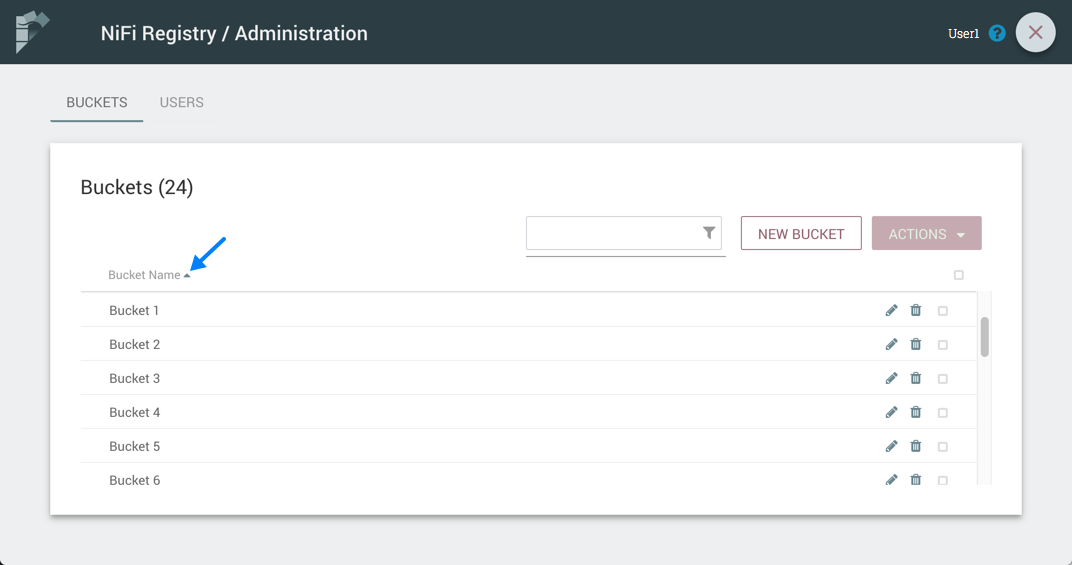
Sorting & Filtering Buckets
Buckets can be sorted alphabetically by Name (ascending or descending) using the up/down arrows.
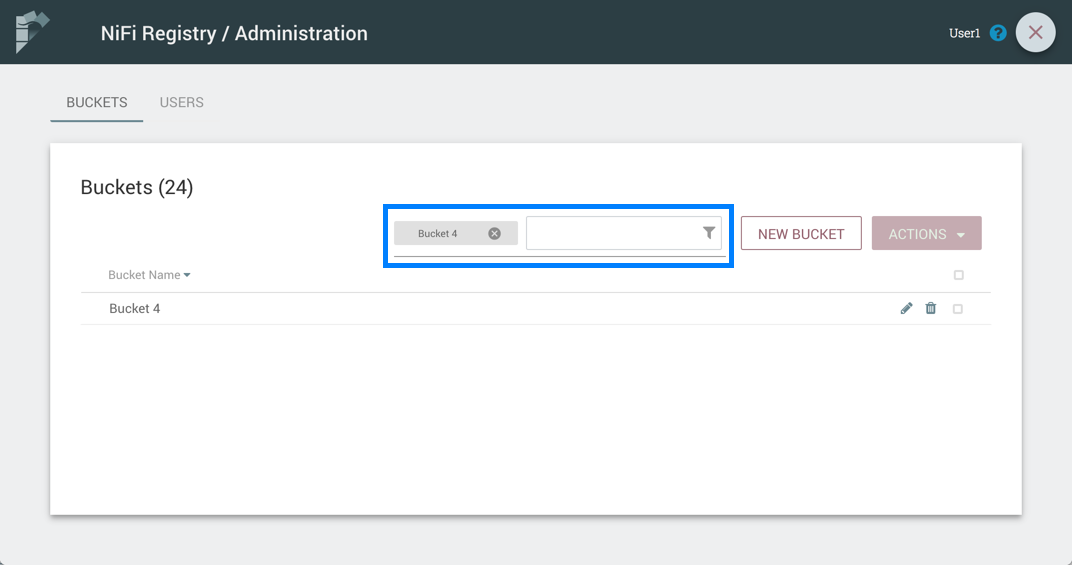
The buckets listed can be filtered by:
-
bucket name
-
bucket description
-
bucket ID
Here is an example filtering by bucket name:
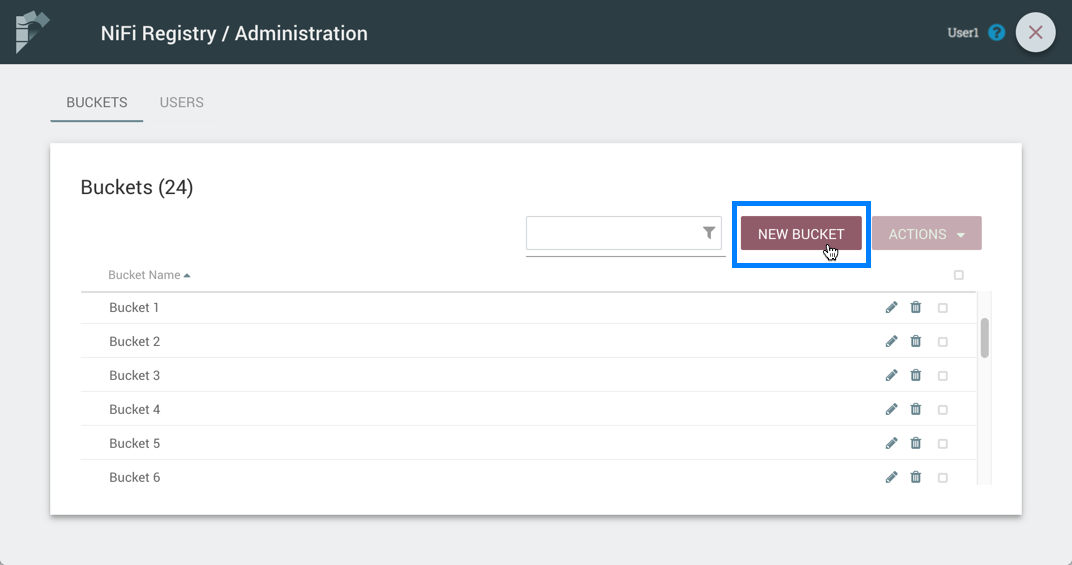
Create a Bucket
-
Select the "New Bucket" button.
-
Enter the desired bucket name and select the "Create" button.
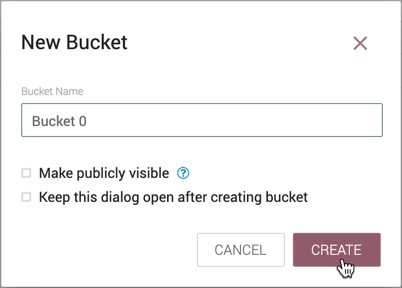
| Check "Make publicly available" to allow read access to items in the bucket by unauthenticated users. This will override any specific bucket policies granting read access. |
| To quickly create multiple buckets, check "Keep this dialog open after creating bucket". |
Delete a Bucket
-
Select the Delete button (
 ) in the row of the bucket.
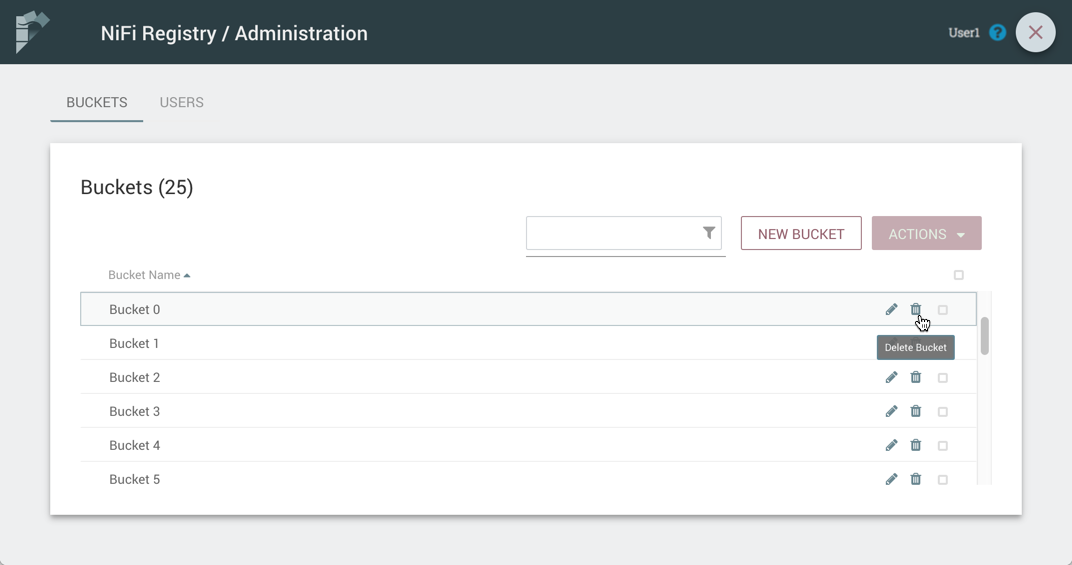
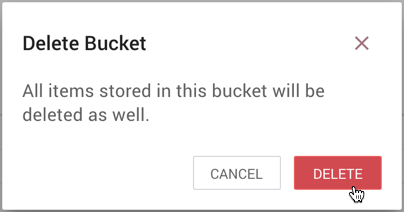
-
From the Delete Bucket dialog, select "Delete".
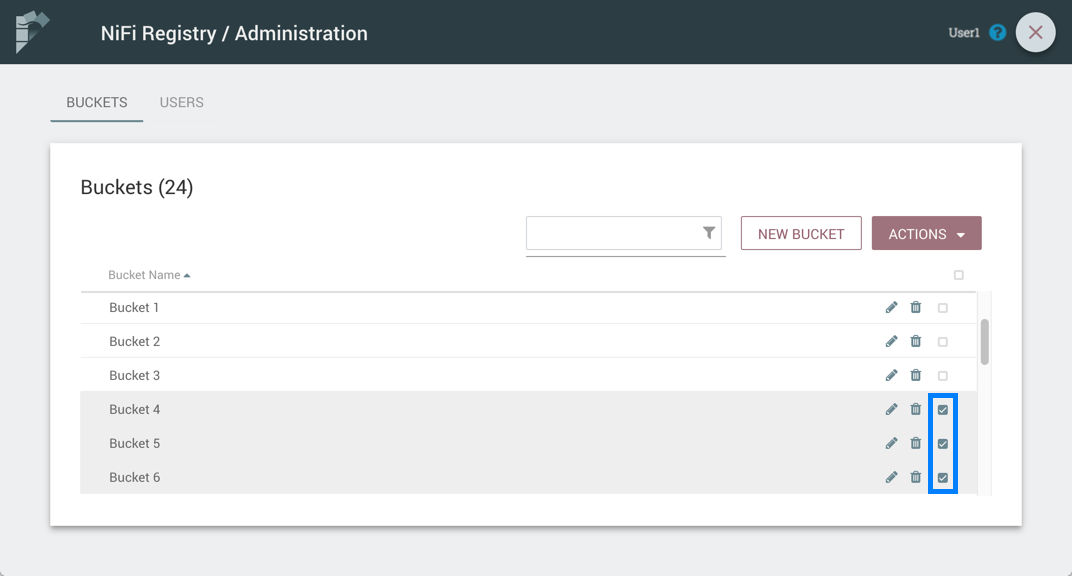
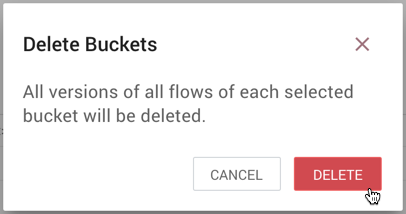
Delete Multiple Buckets
-
Select the checkboxes in the rows of the desired buckets to delete.
-
Select the "Actions" drop-down and click the "Delete" option.
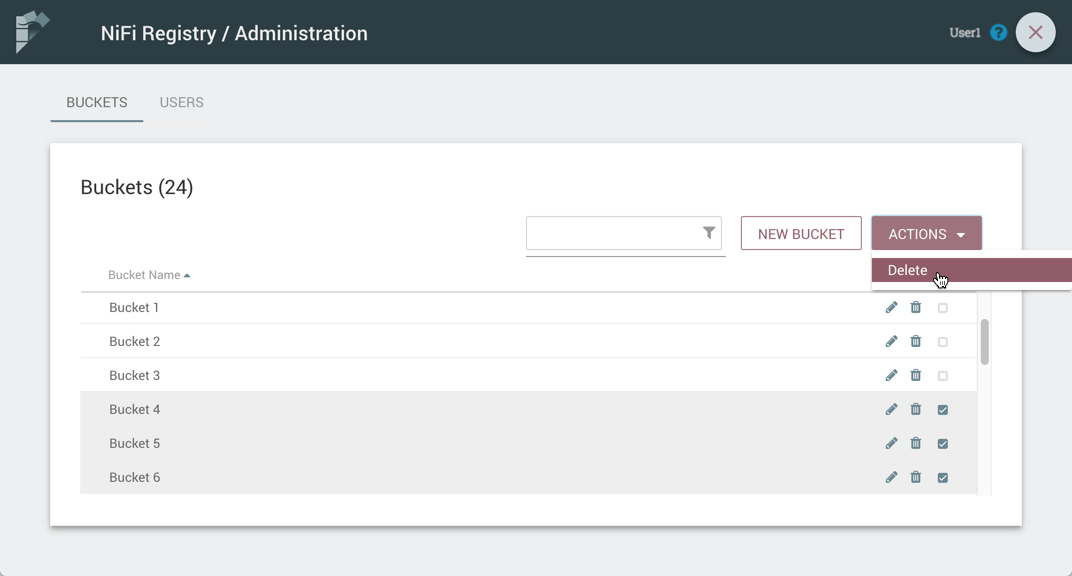
-
From the Delete Buckets dialog, select "Delete".
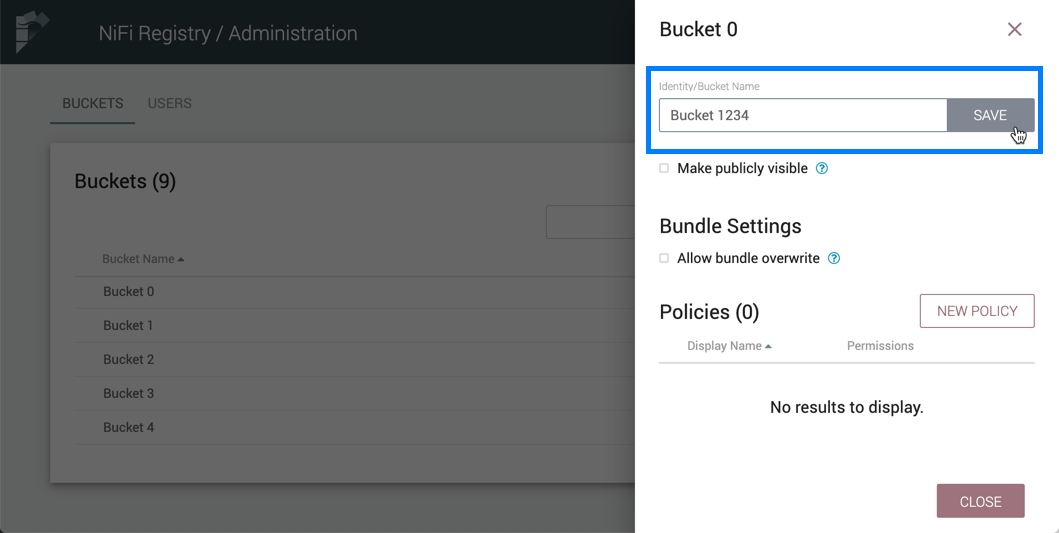
Edit a Bucket Name
-
Select the Manage button (
 ) in the row of the bucket.
-
Enter a new name for the bucket and select the "Save" button.
Make a Bucket Publicly Visible
To allow read access to items in a bucket by unauthenticated users, select the "Make publicly visible" checkbox.
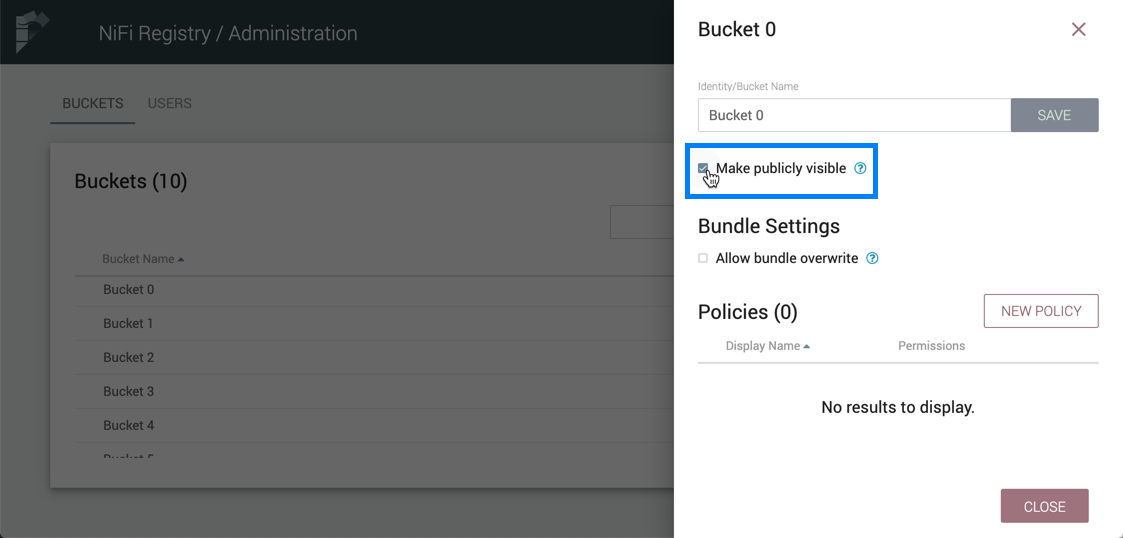
This setting will override any specific policies granting read access to the bucket.
Allow Bundles in a Bucket to be Overwritten
To allow released bundles in a bucket to be overwritten, select the "Allow bundle overwrite" checkbox.
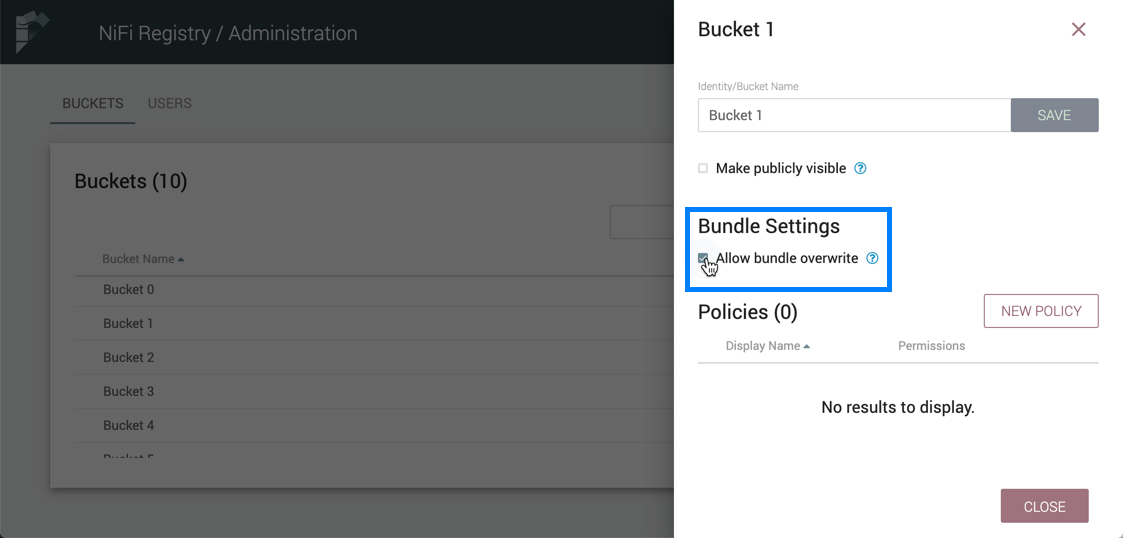
Currently, the only supported bundle type is a NiFi Archive (NAR). By default, buckets do not allow the re-release of released NARs. This setting explicitly allows the same version of a NAR to be uploaded to a bucket.
For more information on bundles, see the Manage Bundles section.
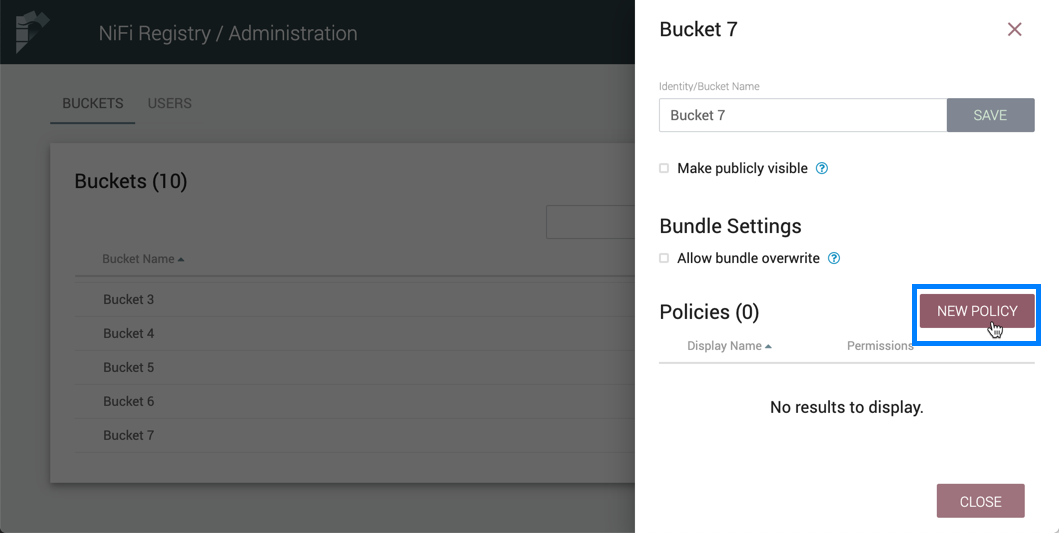
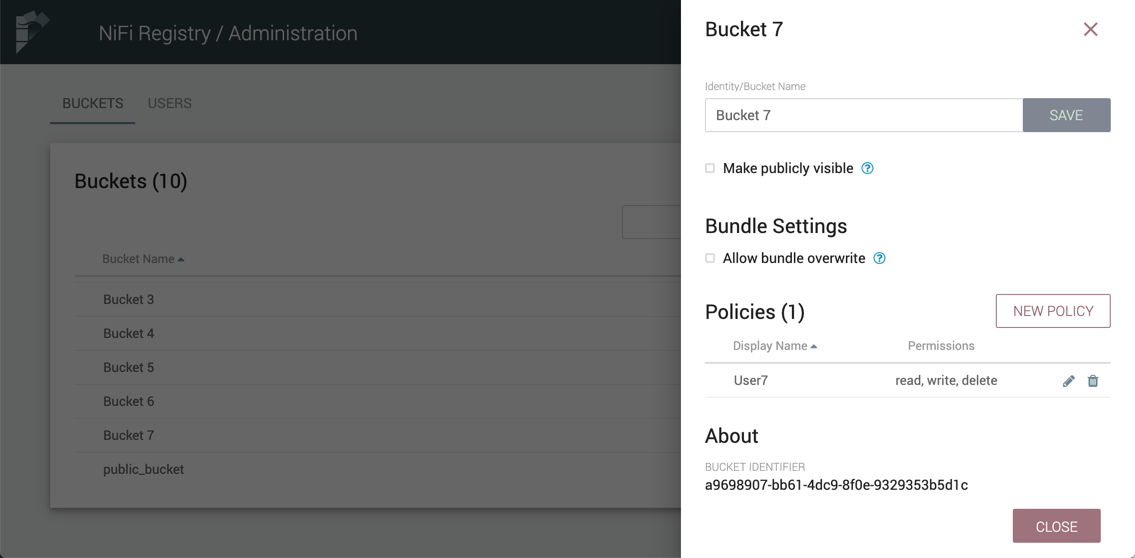
Bucket Policies
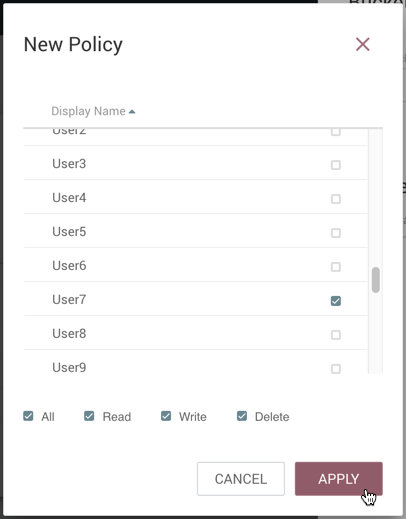
Bucket policies define user privileges on buckets/flows in the Registry and in NiFi. The available permissions are:
-
All - In the Registry, the assigned user is able to view and delete flows in the bucket. In NiFi, the selected user is able to import flows from the bucket and commit changes to flows in the bucket.
-
Read - In the Registry, the assigned user is able to view flows in the bucket. In NiFi, the selected user is able to import flows from the bucket.
-
Write - In NiFi, the assigned user is able to commit changes to flows in the bucket.
-
Delete - In the Registry, the assigned user is able to delete flows in the bucket.
| Users would typically have Read permissions at a minimum. A user with Write permission would not commit changes to a flow if they were not able to import it initially. A user with Delete permission would not delete a flow if they could not view it. |
| If a user has a bucket policy and the group that the user is in also has a policy, all policies are used to determine access. For example, assume User1 is in Group1, User1 has READ privileges on Bucket1 and Group1 has READ privileges on Bucket2. In this scenario, User1 will have READ privileges on both Bucket1 and Bucket2. |

Manage Users & Groups
To manage users/groups, enter the Administration section of the Registry by clicking the Settings button () on the top right of the UI. Select Users from the top menu to open the Users window.
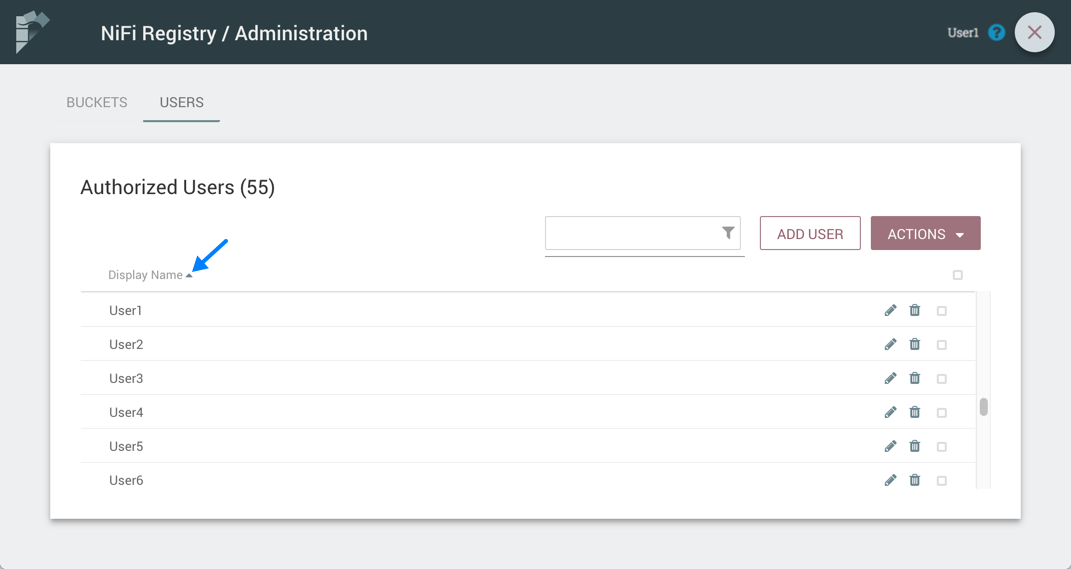
Sorting & Filtering Users/Groups
Users/groups can be sorted alphabetically by Name (ascending or descending) using the up/down arrows.
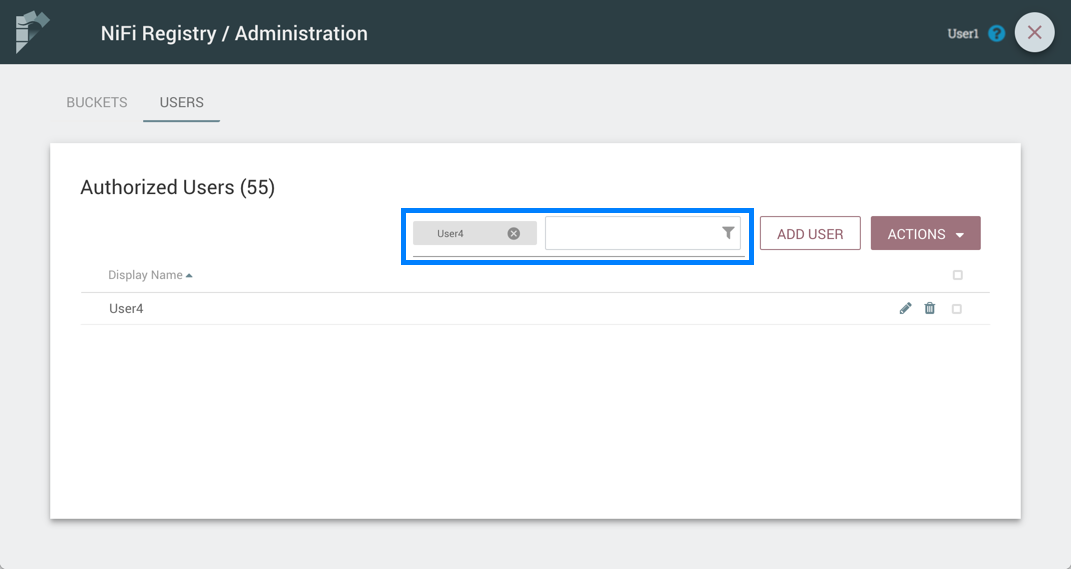
The Users/groups listed can be filtered by:
-
user name
-
user ID
-
group name
-
group ID
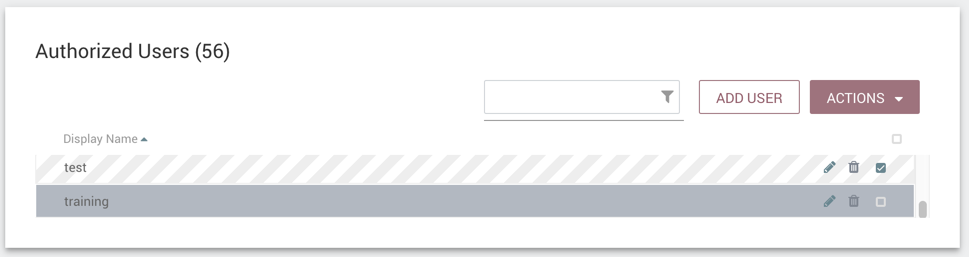
Here is an example of filtering by user name:
Add a User
-
Select the "Add User" button.
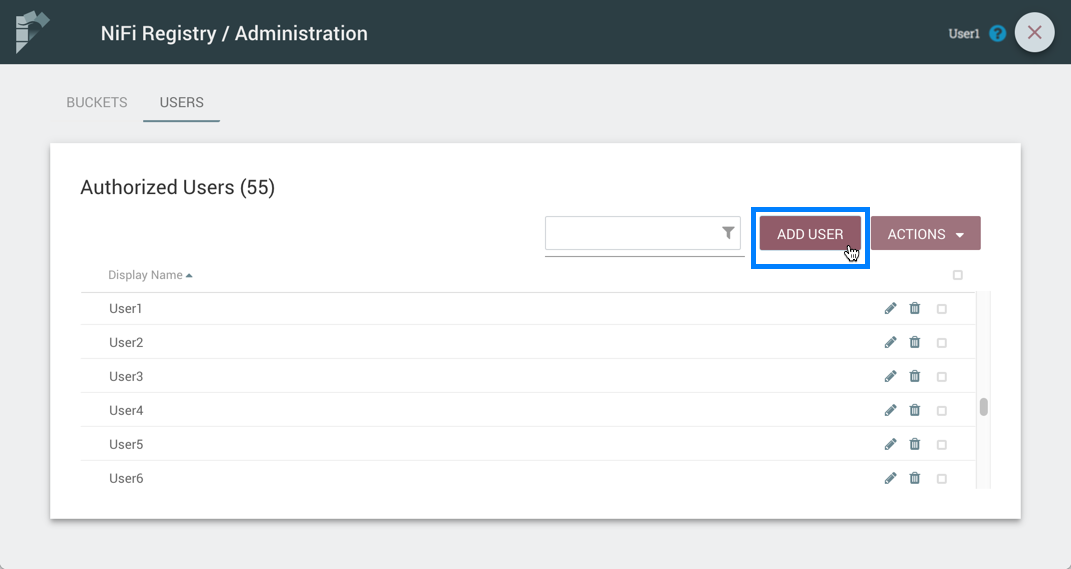
-
Enter the desired username or appropriate Identity information. Select the "Add" button.
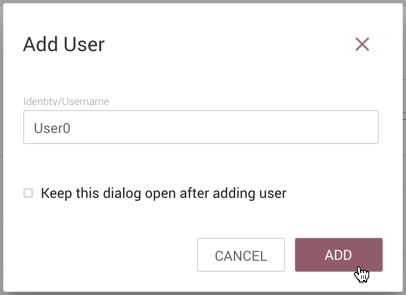
| To quickly create multiple users, check "Keep this dialog open after adding user". |
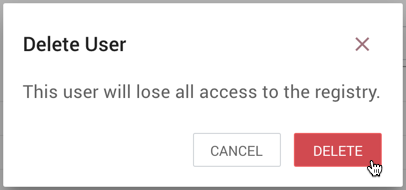
Delete a User
-
Select the Delete button (
) in the row of the user.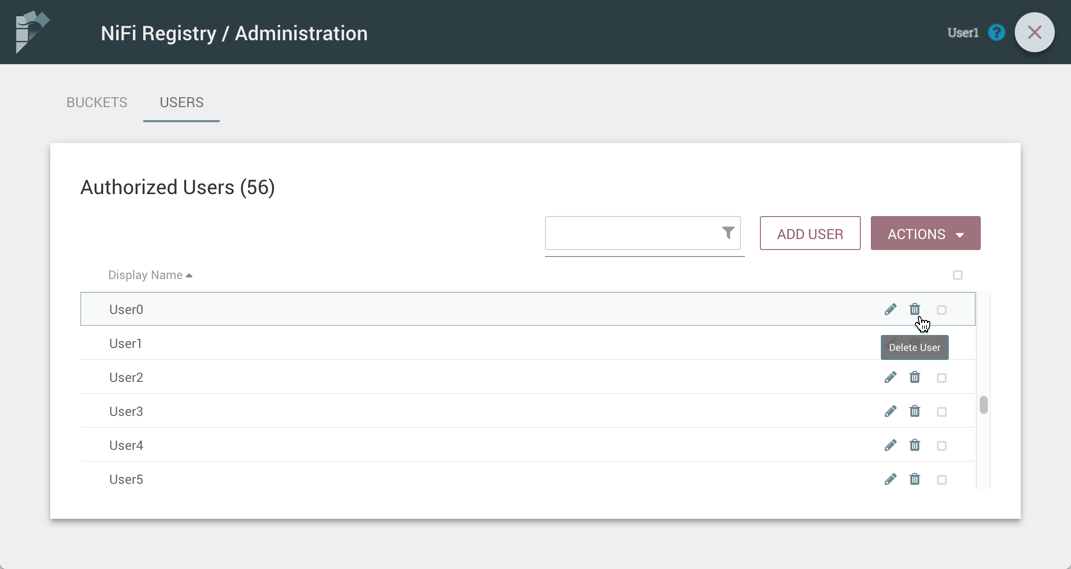
-
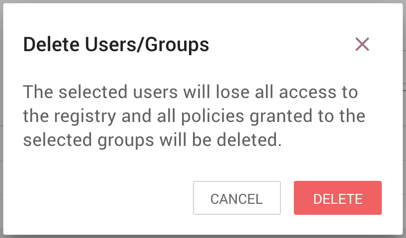
From the Delete User dialog, select "Delete".
Delete Multiple Users
-
Select the checkboxes in the rows of the desired users to delete.
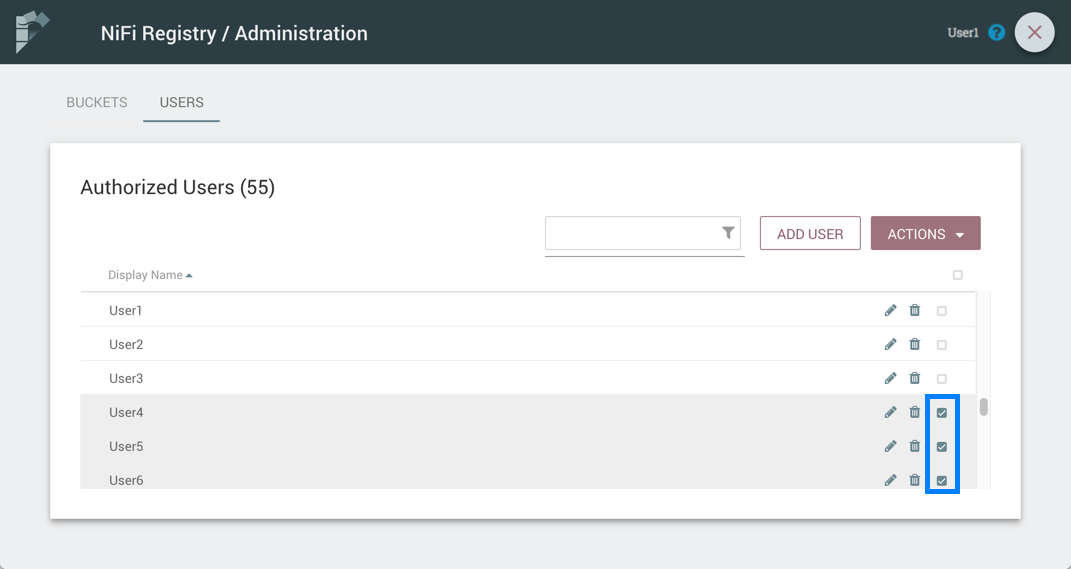
-
Select the "Actions" drop-down and click the "Delete" option.
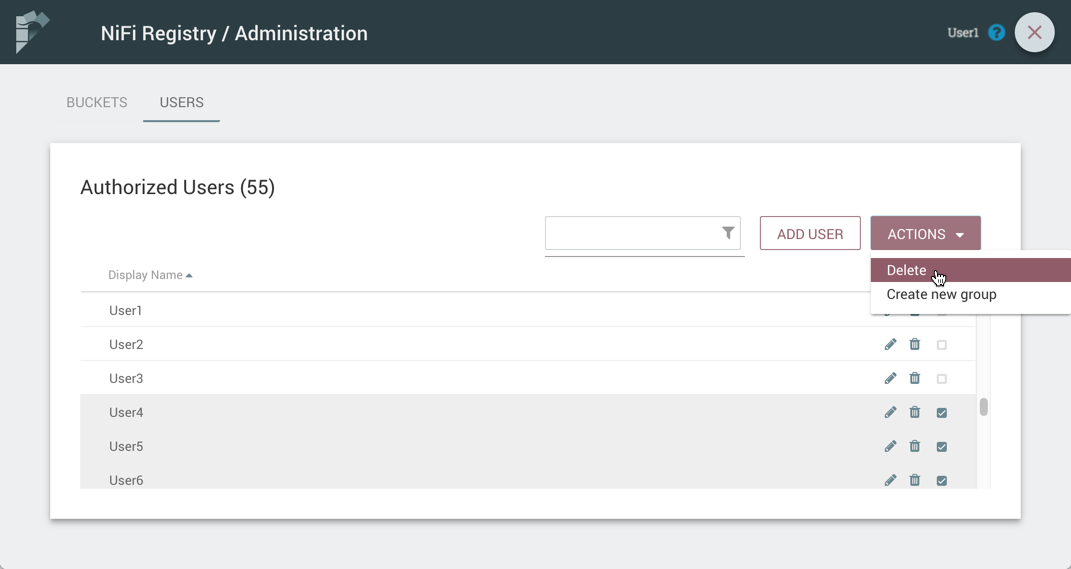
-
From the Delete Users dialog, select "Delete".
Edit a User Name
-
Select the Manage button (
) in the row of the user.
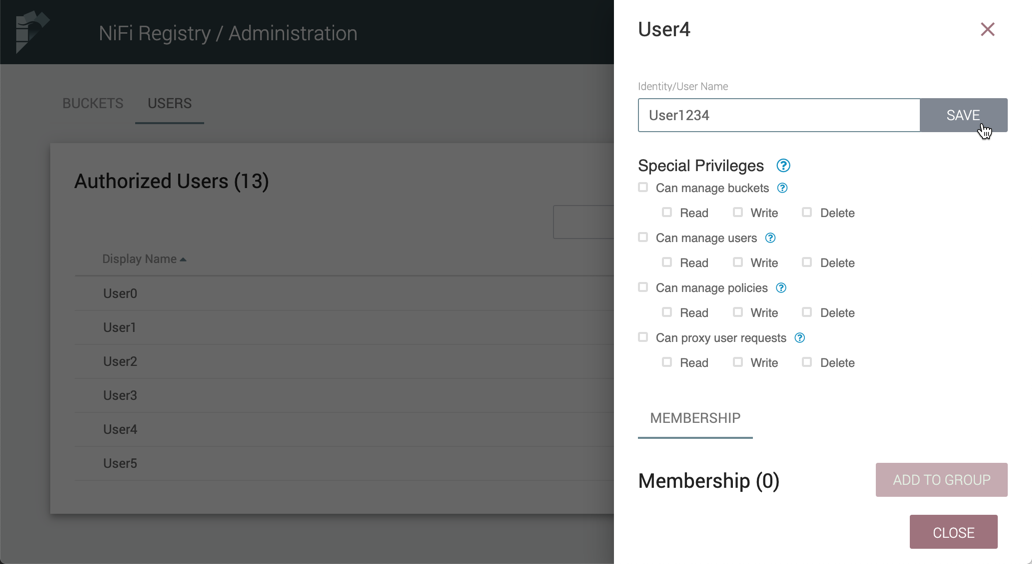
-
Enter a new user name and select the "Save" button.
| Some users cannot have their names edited. For example, those defined by LDAP. These users will be specially highlighted in the list. |
Special Privileges
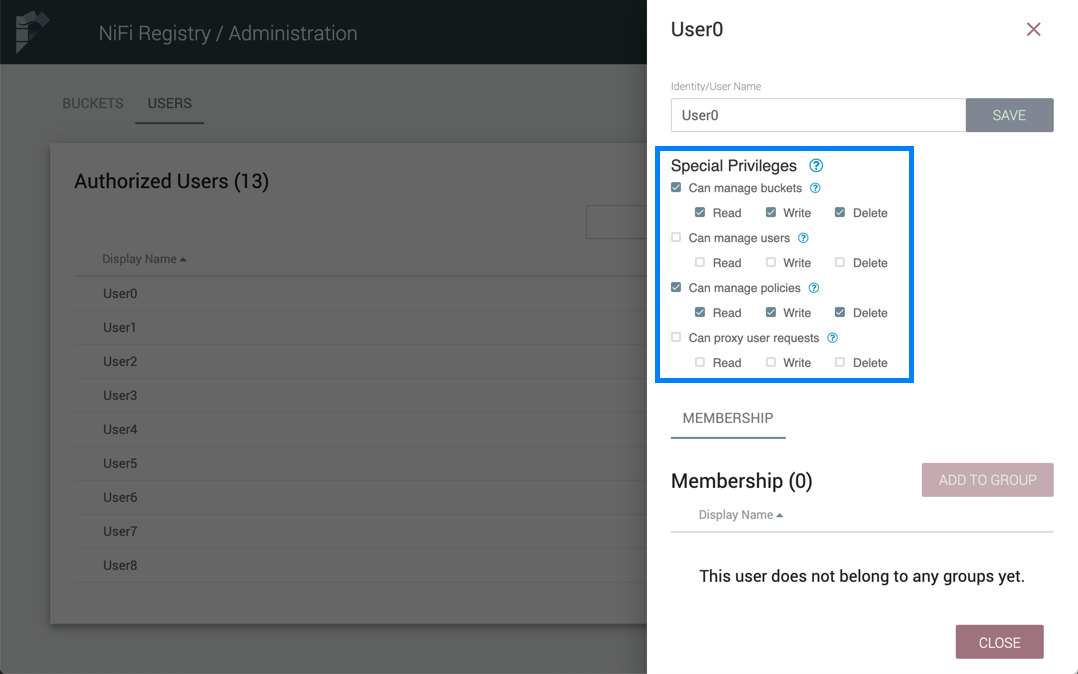
Special privileges are additional permissions that allow a user to manage or access certain aspects of the Registry. The special privileges are:
-
Can manage buckets - Allow a user to manage all buckets in the registry, as well as provide the user access to all buckets from a connected system (e.g., NiFi).
-
Can manage users - Allow a user to manage all registry users and groups.
-
Can manage policies - Allow a user to grant all registry users read, write, and delete permission to a bucket.
-
Can proxy user requests - Allow a connected system (e.g., NiFi) to process requests of authorized users of that system. For example, if dev and prod NiFi clusters are connected to the same NiFi Registry instance, privileges can be set to allow the dev NiFi cluster to only update versioned flows while limiting the prod NiFi to only download flows.
Manage Groups
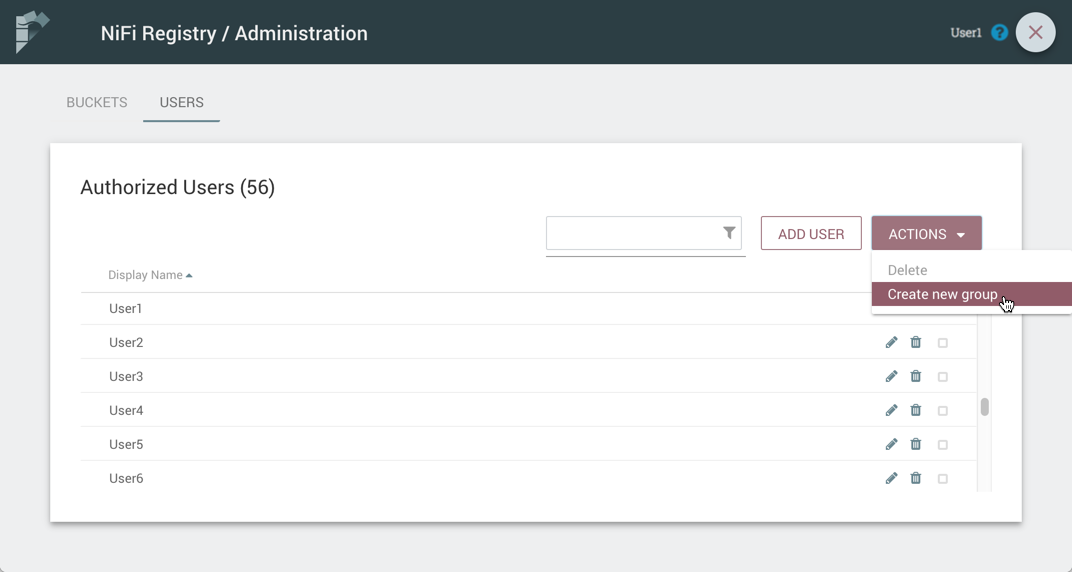
Add an Empty Group
-
With no users checked, select the "Actions" drop-down and click the "Create new group" option.
-
Enter a name for the Group and select the "Create" button.
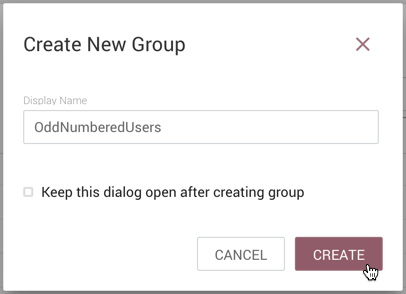
| To quickly create multiple empty groups, check "Keep this dialog open after creating group". |
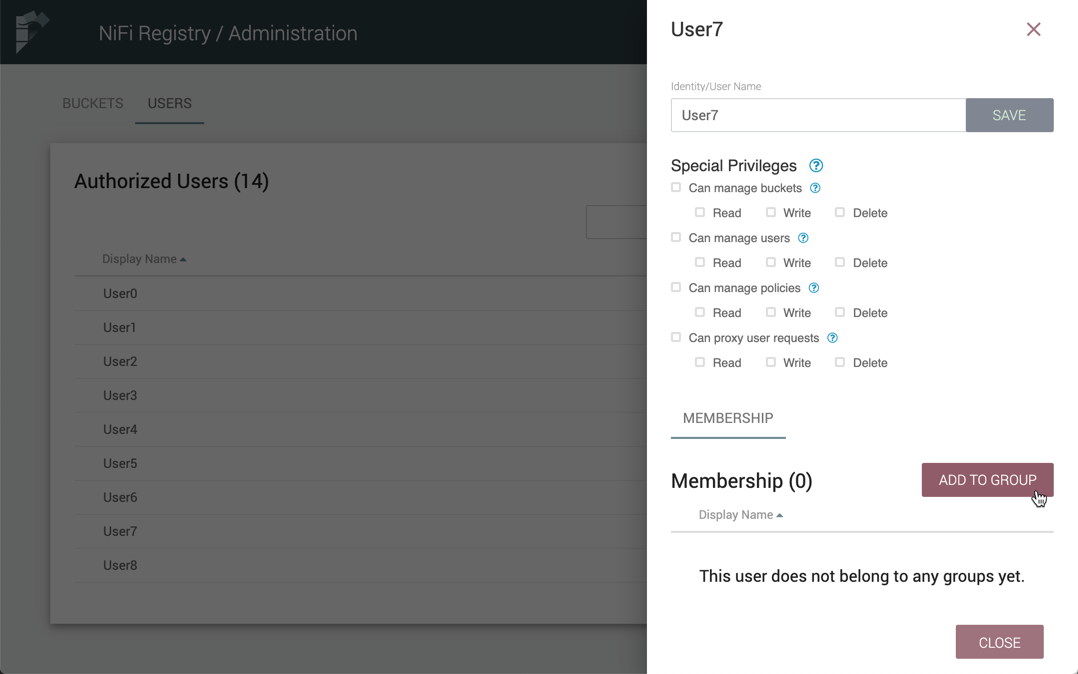
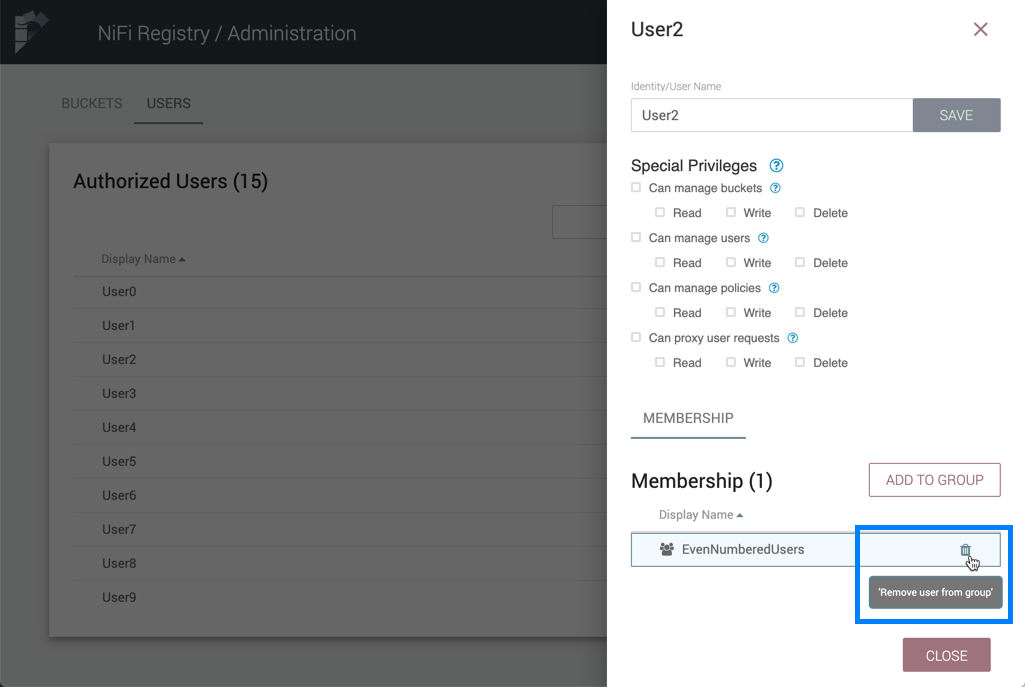
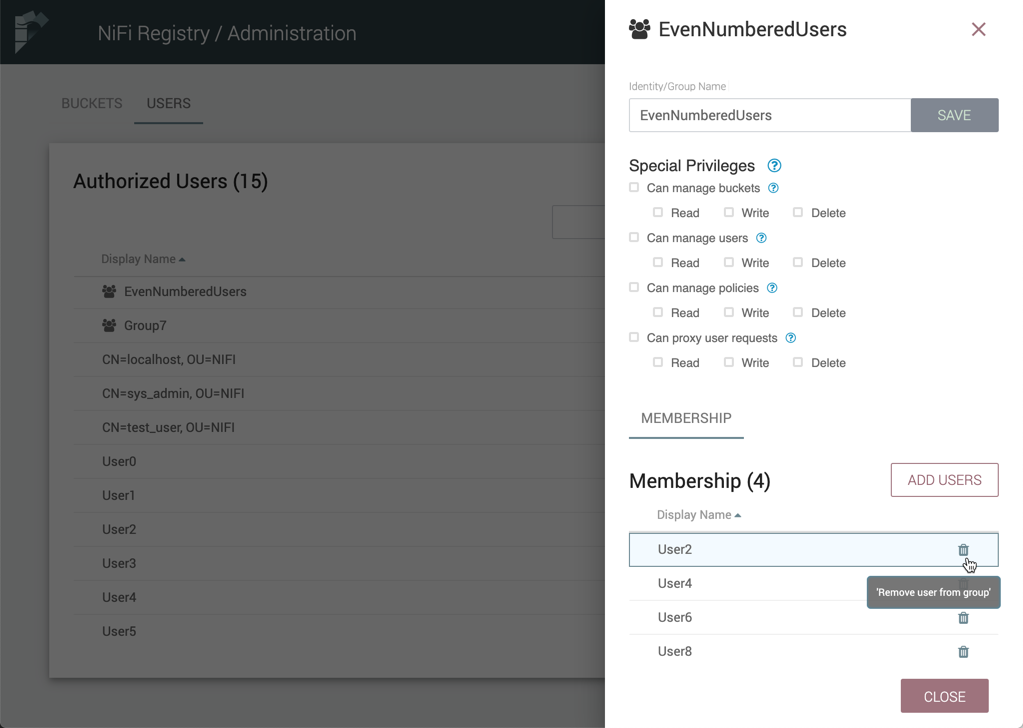
Add User to a Group
-
Select the Manage button (
) in the row of the user. -
Select the "Add To Group" button.
-
In the "Add User to Groups" dialog, select the group(s) to add the user to. Select the "Add" button when all desired groups have been selected.
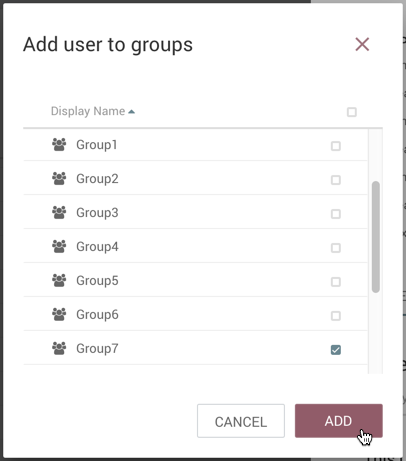
-
The user is added to the group:

| Groups cannot contain other groups. |
Create a New Group with Selected Users
-
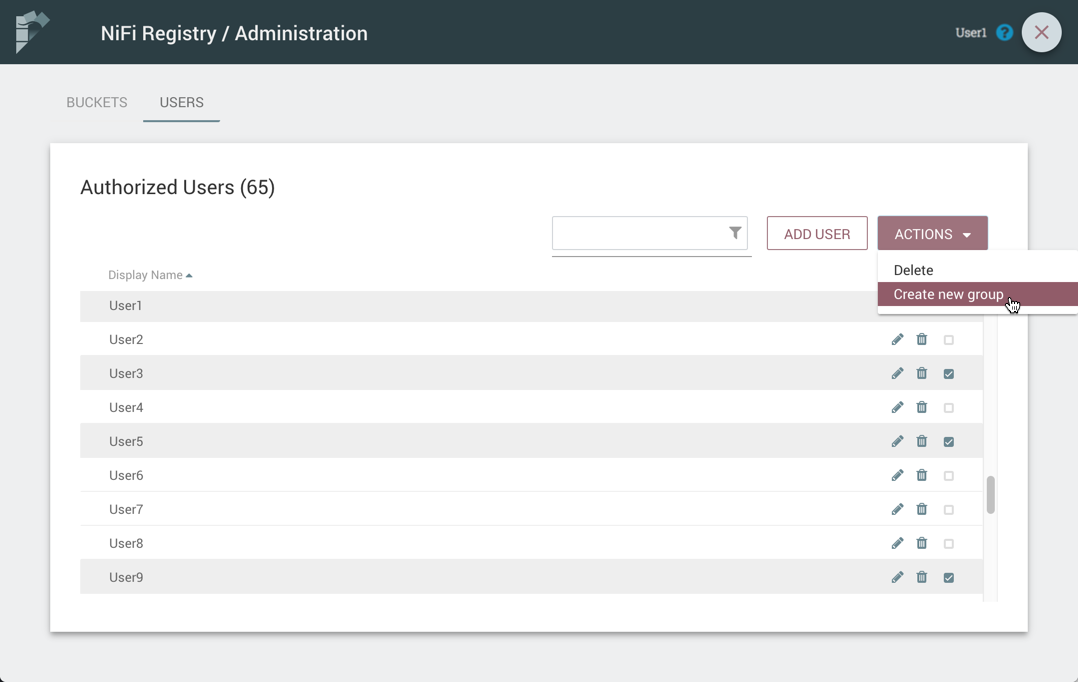
Select the checkboxes in the rows of the desired users. From the "Actions" drop-down, click the "Create new group" option.
-
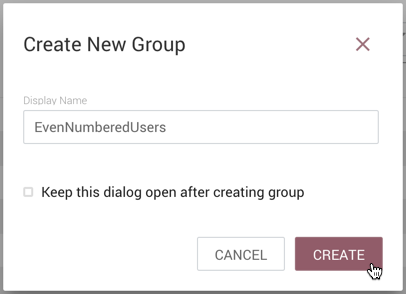
Enter a name for the Group and select the "Create" button.
-
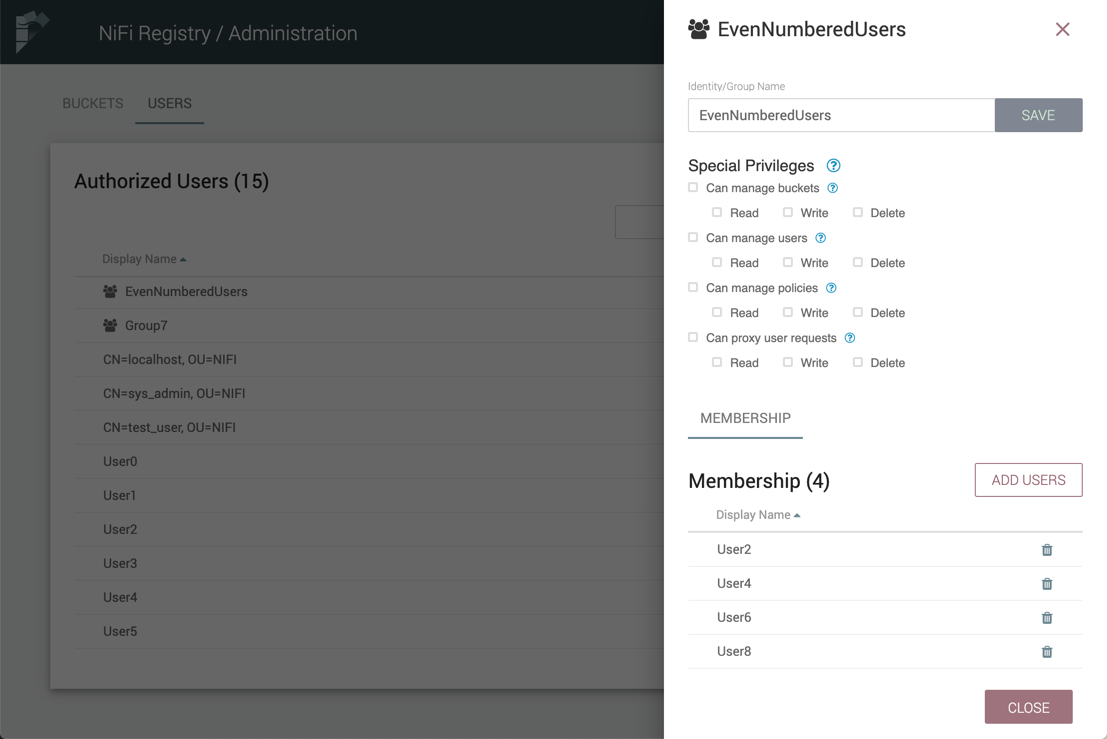
The new group is created with the selected users as members:
Manage Bundles
Bundles can be managed through the REST API.
Upload Bundle
A bundle can be uploaded to a bucket by making a POST request to the following REST end-point:
/nifi-registry-api/buckets/<bucketId>/bundles/<bundleType>
Replace bucketId with the id of the bucket where the bundle is being uploaded to and bundleType with the type of bundle being uploaded. Currently, the only supported bundle type is a NiFi Archive (NAR) which can be specified as nifi-nar.
The Content-Type of the request is expected to be multipart/form-data. An example of using curl to upload my-processors-1.0.0.nar would be the following:
curl -v -F file=@/path/to/my-processors-1.0.0.nar http://localhost:18080/nifi-registry-api/buckets/de8e08c9-592d-4e10-affe-b3752698f1d9/bundles/nifi-nar
| In order to upload a NAR to NiFi Registry, it must contain the file META-INF/docs/extension-manifest.xml which is produced by the NAR Maven plugin, starting with version 1.3.0. |
Download Bundle
There are two ways to download a bundle.
Bundle Coordinates
A bundle can be downloaded by using the combination of the bucket name and bundle coordinates, where bundle coordinates are the group, artifact, and version of the bundle.
To download a bundle by its coordinates, a GET request can be made to the following end-point:
/nifi-registry-api/extension-repository/{bucketName}/{groupId}/{artifactId}/{version}/content
The Content-Type of the response is application/octet-stream.
An example of using curl to download my-processors-1.0.0.nar from the Test bucket would be the following:
curl http://localhost:18080/nifi-registry-api/extension-repository/Test/com.test/my-processors/1.0.0/content > my-processors-1.0.0.nar
Bundle Id
A bundle can be downloaded by using the combination of its unique id and version. The unique id is an id assigned to the bundle when the first version of the bundle is uploaded to NiFi Registry. This id is returned in the response of a successful upload.
To download a bundle by its id and version, a GET request can be made to the following end-point:
/nifi-registry-api/bundles/{bundleId}/versions/{version}/content
The Content-Type of the response is application/octet-stream.
An example of using curl to download my-processors-1.0.0.nar by id and version would be the following:
curl http://localhost:18080/nifi-registry-api/bundles/3db78035-e3ba-4cbf-820e-022f292bd68c/versions/1.0.0/content > my-processors-1.0.0.nar
Additional Actions
For additional actions that can be performed related to bundles, please consult the REST API documentation.