Overview
The NiFi Toolkit contains several command line utilities to setup and support NiFi in standalone and clustered environments. The utilities include:
-
CLI — The
clitool enables administrators to interact with NiFi and NiFi Registry instances to automate tasks such as deploying versioned flows and managing process groups and cluster nodes. -
Encrypt Config — The
encrypt-configtool encrypts the sensitive keys in the nifi.properties file to facilitate the setup of a secure NiFi instance. -
File Manager — The
file-managertool enables administrators to backup, install or restore a NiFi installation from backup. -
Flow Analyzer — The
flow-analyzertool produces a report that helps administrators understand the max amount of data which can be stored in backpressure for a given flow. -
Node Manager — The
node-managertool enables administrators to perform status checks on nodes as well as the ability to connect, disconnect, or remove nodes from the cluster. -
Notify — The
notifytool enables administrators to send bulletins to the NiFi UI. -
S2S — The
s2stool enables administrators to send data into or out of NiFi flows over site-to-site. -
TLS Toolkit — The
tls-toolkitutility generates the required keystores, truststore, and relevant configuration files to facilitate the setup of a secure NiFi instance. -
ZooKeeper Migrator — The
zk-migratortool enables administrators to:-
move ZooKeeper information from one ZooKeeper cluster to another
-
migrate ZooKeeper node ownership
-
The utilities are executed with scripts found in the bin folder of your NiFi Toolkit installation.
| The NiFi Toolkit is downloaded separately from NiFi (see the Apache NiFi Downloads page). |
Prerequisites for Running in a Secure Environment
For secured nodes and clusters, two policies should be configured in advance:
-
Access the controller – A user that will have access to these utilities should be authorized in NiFi by creating an “access the controller” policy (
/controller) with both view and modify rights -
Proxy user request – If not previously set, node’s identity (the DN value of the node’s certificate) should be authorized to proxy requests on behalf of a user
When executing either the Notify or Node Manager tools in a secured environment the proxyDN flag option should be used in order to properly identify the user that was authorized to execute these commands. In non-secure environments, or if running the status operation on the Node Manager tool, the flag is ignored.
NiFi CLI
This tool offers a CLI focused on interacting with NiFi and NiFi Registry in order to automate tasks, such as deploying flows from a NIFi Registy to a NiFi instance or managing process groups and cluster nodes.
Usage
The CLI toolkit can be executed in standalone mode to execute a single command, or interactive mode to enter an interactive shell.
To execute a single command:
./bin/cli.sh <command> <args>
To launch the interactive shell:
./bin/cli.sh
To show help:
./bin/cli.sh -h
The following are available commands:
demo quick-import
nifi current-user
nifi cluster-summary
nifi connect-node
nifi delete-node
nifi disconnect-node
nifi get-root-id
nifi get-node
nifi get-nodes
nifi offload-node
nifi list-reg-clients
nifi create-reg-client
nifi update-reg-client
nifi get-reg-client-id
nifi pg-import
nifi pg-start
nifi pg-stop
nifi pg-create
nifi pg-get-vars
nifi pg-set-var
nifi pg-get-version
nifi pg-change-version
nifi pg-change-all-versions
nifi pg-get-all-versions
nifi pg-list
nifi pg-status
nifi pg-get-services
nifi pg-create-service
nifi pg-enable-services
nifi pg-disable-services
nifi pg-get-param-context
nifi pg-set-param-context
nifi pg-replace
nifi get-services
nifi get-service
nifi create-service
nifi enable-services
nifi disable-services
nifi get-reporting-tasks
nifi get-reporting-task
nifi create-reporting-task
nifi delete-reporting-task
nifi start-reporting-tasks
nifi stop-reporting-tasks
nifi list-users
nifi create-user
nifi list-user-groups
nifi create-user-group
nifi update-user-group
nifi get-policy
nifi update-policy
nifi list-templates
nifi download-template
nifi upload-template
nifi list-param-contexts
nifi get-param-context
nifi create-param-context
nifi delete-param-context
nifi set-inherited-param-contexts
nifi remove-inherited-param-contexts
nifi set-param
nifi delete-param
nifi export-param-context
nifi import-param-context
nifi merge-param-context
nifi list-param-providers
nifi get-param-provider
nifi create-param-provider
nifi delete-param-provider
nifi fetch-params
nifi set-param-provider-property
nifi get-access-token
nifi get-access-token-spnego
nifi logout-access-token
nifi get-controller-configuration
nifi update-controller-configuration
registry current-user
registry list-buckets
registry create-bucket
registry delete-bucket
registry list-flows
registry create-flow
registry delete-flow
registry list-flow-versions
registry export-flow-version
registry import-flow-version
registry sync-flow-versions
registry transfer-flow-version
registry diff-flow-versions
registry upload-bundle
registry upload-bundles
registry list-bundle-groups
registry list-bundle-artifacts
registry list-bundle-versions
registry download-bundle
registry get-bundle-checksum
registry list-extension-tags
registry list-extensions
registry list-users
registry create-user
registry update-user
registry list-user-groups
registry create-user-group
registry update-user-group
registry get-policy
registry update-policy
registry update-bucket-policy
registry get-access-token
registry get-access-token-spnego
registry logout-access-token
registry export-all-flows
registry import-all-flows
session keys
session show
session get
session set
session remove
session clear
exit
help
To display extensive help for a specific command:
./bin/cli.sh <command> -h
Property/Argument Handling
Most commands will require specifying a baseUrl for the NiFi or NiFi Registry instance.
An example command to list the buckets in a NiFi Registry instance would be the following:
./bin/cli.sh registry list-buckets -u http://localhost:18080
In order to avoid specifying the URL (and possibly other optional arguments for TLS) on every command, you can define a properties file containing the repetitive arguments.
An example properties file for a local NiFi Registry instance would look like the following:
 baseUrl=http://localhost:18080
 keystore=
 keystoreType=
 keystorePasswd=
 keyPasswd=
 truststore=
 truststoreType=
 truststorePasswd=
 proxiedEntity=
This properties file can then be used on a command by specifying -p:
./bin/cli.sh registry list-buckets -p /path/to/local-nifi-registry.properties
You could then maintain a properties file for each environment you plan to interact with, such as Dev, QA, and Prod.
In addition to specifying a properties file on each command, you can setup a default properties file to be used in the event that no properties file is specified.
The default properties file is specified using the session concept, which persists to the users home directory in a file called .nifi-cli.config.
An example of setting the default property files for NiFi would be the following:
./bin/cli.sh session set nifi.props /path/to/local-nifi.properties
An example for NiFi Registry would be the following:
./bin/cli.sh session set nifi.reg.props /path/to/local-nifi-registry.properties
This will write the above properties into the .nifi-cli.config in the user’s home directory and will allow commands to be executed without specifying a URL or properties file:
./bin/cli.sh registry list-buckets
The above command will now use the baseUrl from local-nifi-registry.properties.
The order of resolving an argument is the following:
-
A direct argument overrides anything in a properties file or session
-
A properties file argument (
-p) overrides the session -
The session is used when nothing else is specified
Security Configuration
If NiFi and NiFi Registry are secured, then commands executed from the CLI will need to make a TLS connection and authenticate as a user with permissions to perform the desired action.
Currently the CLI supports authenticating with a client certificate and an optional proxied-entity. A common scenario would be running the CLI from one of the nodes where NiFi or NiFi Registry is installed, which allows the CLI to use the same keystore and truststore as the NiFi/NiFi Registry instance.
The security configuration can be specified per-command, or in one of the properties files described in the previous section.
The examples below are for NiFi Registry, but the same concept applies for NiFi commands.
Example - Secure NiFi Registry without Proxied-Entity
Assuming we have a keystore containing the certificate for "CN=user1, OU=NIFI", an example properties file would be the following:
 baseUrl=https://localhost:18443
 keystore=/path/to/keystore.jks
 keystoreType=JKS
 keystorePasswd=changeme
 keyPasswd=changeme
 truststore=/path/to/truststore.jks
 truststoreType=JKS
 truststorePasswd=changeme
In this example, commands will be executed as "CN=user1, OU=NIFI". This user would need to be a user in NiFi Registry, and commands accessing buckets would be restricted to buckets this user has access to.
Example - Secure NiFi Registry with Proxied-Entity
Assuming we have access to the keystore of NiFi Registry itself, and that NiFi Registry is also configured to allow Kerberos or LDAP authentication, an example properties file would be the following:
 baseUrl=https://localhost:18443
 keystore=/path/to/keystore.jks
 keystoreType=JKS
 keystorePasswd=changeme
 keyPasswd=changeme
 truststore=/path/to/truststore.jks
 truststoreType=JKS
 truststorePasswd=changeme
 proxiedEntity=user1@NIFI.COM
In this example, the certificate in keystore.jks would be for the NiFi Registry server, for example "CN=localhost, OU=NIFI". This identity would need to be defined as a user in NiFi Registry and given permissions to 'Proxy'.
"CN=localhost, OU=NIFI" would be proxying commands to be executed as user1@NIFI.COM.
Interactive Usage
In interactive mode the tab key can be used to perform auto-completion.
For example, typing tab at an empty prompt should display possible commands for the first argument:
#>
demo       exit       help       nifi       registry   session
Typing "nifi " and then a tab will show the sub-commands for NiFi:
#> nifi
cluster-summary         enable-services         list-templates          pg-list
connect-node            export-param-context    list-user-groups        pg-set-param-context
create-param-context    get-node                list-users              pg-set-var
create-reg-client       get-nodes               merge-param-context     pg-start
create-reporting-task   get-param-context       offload-node            pg-status
create-service          get-policy              pg-change-version       pg-stop
create-user             get-reg-client-id       pg-create-service       set-param
create-user-group       get-reporting-task      pg-disable-services     start-reporting-tasks
current-user            get-reporting-tasks     pg-enable-services      stop-reporting-tasks
delete-node             get-root-id             pg-get-all-versions     update-policy
delete-param            get-service             pg-get-param-context    update-reg-client
delete-param-context    get-services            pg-get-services         update-user-group
disable-services        import-param-context    pg-get-vars             upload-template
disconnect-node         list-param-contexts     pg-get-version          delete-reporting-task
download-template       list-reg-clients        pg-import
Arguments that represent a path to a file, such as -p or when setting a properties file in the session, will auto-complete the path being typed:
#> session set nifi.props /tmp/
dir1/   dir2/   dir3/
Output
Most commands support the ability to specify an --outputType argument, or -ot for short.
Currently the output type may be simple or json.
The default output type in interactive mode is simple, and the default output type in standalone mode is json.
Example of simple output for list-buckets:
#> registry list-buckets -ot simple
My Bucket - 3c7b7467-0012-4d8f-a918-6aa42b6b9d39
Example of json output for list-buckets:
#> registry list-buckets -ot json
[ {
  "identifier" : "3c7b7467-0012-4d8f-a918-6aa42b6b9d39",
  "name" : "My Bucket",
  "createdTimestamp" : 1516718733854,
  "permissions" : {
    "canRead" : true,
    "canWrite" : true,
    "canDelete" : true
  },
  "link" : {
    "params" : {
      "rel" : "self"
    },
    "href" : "buckets/3c7b7467-0012-4d8f-a918-6aa42b6b9d39"
  }
} ]
Back-Referencing
When using the interactive CLI, a common scenario will be using an id from a previous result as the input to the next command. Back-referencing provides a shortcut for referencing a result from the previous command via a positional reference.
| Not every command produces back-references. To determine if a command supports back-referencing, check the usage. |
#> registry list-buckets help
Lists the buckets that the current user has access to.
PRODUCES BACK-REFERENCES
A common scenario for utilizing back-references would be the following:
-
User starts by exploring the available buckets in a registry instance
#> registry list-buckets
#   Name           Id                                     Description
-   ------------   ------------------------------------   -----------
1   My Bucket      3c7b7467-0012-4d8f-a918-6aa42b6b9d39   (empty)
2   Other Bucket   175fb557-43a2-4abb-871f-81a354f47bc2   (empty)
-
User then views the flows in one of the buckets using a back-reference to the bucket id from the previous result in position 1
#> registry list-flows -b &1
Using a positional back-reference for 'My Bucket'
#   Name      Id                                     Description
-   -------   ------------------------------------   ----------------
1   My Flow   06acb207-d2f1-447f-85ed-9b8672fe6d30   This is my flow.
-
User then views the version of the flow using a back-reference to the flow id from the previous result in position 1
#> registry list-flow-versions -f &1
Using a positional back-reference for 'My Flow'
Ver   Date                         Author                     Message
---   --------------------------   ------------------------   -------------------------------------
1     Tue, Jan 23 2018 09:48 EST   anonymous                  This is the first version of my flow.
-
User deploys version 1 of the flow using back-references to the bucket and flow id from step 2
#> nifi pg-import -b &1 -f &1 -fv 1
Using a positional back-reference for 'My Bucket'
Using a positional back-reference for 'My Flow'
9bd157d4-0161-1000-b946-c1f9b1832efd
The reason step 4 was able to reference the results from step 2, is because the list-flow-versions command in step 3 does not produce back-references, so the results from step 2 are still available.
Adding Commands
To add a NiFi command, create a new class that extends AbstractNiFiCommand:
public class MyCommand extends AbstractNiFiCommand {

  public MyCommand() {
      super("my-command");
  }

  @Override
  protected void doExecute(NiFiClient client, Properties properties)
          throws NiFiClientException, IOException, MissingOptionException, CommandException {
      // TODO implement
  }

  @Override
  public String getDescription() {
      return "This is my new command";
  }
}
Add the new command to NiFiCommandGroup:
commands.add(new MyCommand());To add a NiFi Registry command, perform the same steps, but extend from AbstractNiFiRegistryCommand, and add the command to NiFiRegistryCommandGroup.
Encrypt-Config Tool
The encrypt-config command line tool (invoked as ./bin/encrypt-config.sh or bin\encrypt-config.bat) reads from a nifi.properties file with plaintext sensitive configuration values, prompts for a root password or raw hexadecimal key, and encrypts each value. It replaces the plain values with the protected value in the same file, or writes to a new nifi.properties file if specified.
The default encryption algorithm utilized is AES/GCM 128/256-bit. 128-bit is used if the JCE Unlimited Strength Cryptographic Jurisdiction Policy files are not installed, and 256-bit is used if they are installed.
Usage
To show help:
./bin/encrypt-config.sh -h
NiFi
The following are available options when targeting NiFi:
-
-h,--helpShow usage information (this message) -
-v,--verboseSets verbose mode (default false) -
-n,--niFiProperties <file>The nifi.properties file containing unprotected config values (will be overwritten unless-ois specified) -
-o,--outputNiFiProperties <file>The destination nifi.properties file containing protected config values (will not modify input nifi.properties) -
-l,--loginIdentityProviders <file>The login-identity-providers.xml file containing unprotected config values (will be overwritten unless-iis specified) -
-i,--outputLoginIdentityProviders <file>The destination login-identity-providers.xml file containing protected config values (will not modify input login-identity-providers.xml) -
-a,--authorizers <file>The authorizers.xml file containing unprotected config values (will be overwritten unless-uis specified) -
-u,--outputAuthorizers <file>The destination authorizers.xml file containing protected config values (will not modify input authorizers.xml) -
-f,--flowXml <file>The flow.xml.gz file currently protected with old password (will be overwritten unless-gis specified) -
-g,--outputFlowXml <file>The destination flow.xml.gz file containing protected config values (will not modify input flow.xml.gz) -
-b,--bootstrapConf <file>The bootstrap.conf file to persist root key and to optionally provide any configuration for the protection scheme. -
-S,--protectionScheme <protectionScheme>Selects the protection scheme for encrypted properties. Valid values are: [AES_GCM, HASHICORP_VAULT_TRANSIT, HASHICORP_VAULT_KV, AWS_KMS, AWS_SECRETSMANAGER, AZURE_KEYVAULT_KEY, AZURE_KEYVAULT_SECRET, GCP_KMS] (default is AES_GCM) -
-k,--key <keyhex>The raw hexadecimal key to use to encrypt the sensitive properties -
-e,--oldKey <keyhex>The old raw hexadecimal key to use during key migration -
-H,--oldProtectionScheme <protectionScheme>The old protection scheme to use during encryption migration (see --protectionScheme for possible values). Default is AES_GCM -
-p,--password <password>The password from which to derive the key to use to encrypt the sensitive properties -
-w,--oldPassword <password>The old password from which to derive the key during migration -
-r,--useRawKeyIf provided, the secure console will prompt for the raw key value in hexadecimal form -
-m,--migrateIf provided, the nifi.properties and/or login-identity-providers.xml sensitive properties will be re-encrypted with the new scheme -
-x,--encryptFlowXmlOnlyIf provided, the properties in flow.xml.gz will be re-encrypted with a new key but the nifi.properties and/or login-identity-providers.xml files will not be modified -
-s,--propsKey <password|keyhex>The password or key to use to encrypt the sensitive processor properties in flow.xml.gz -
-A,--newFlowAlgorithm <algorithm>The algorithm to use to encrypt the sensitive processor properties in flow.xml.gz -
-P,--newFlowProvider <algorithm>The security provider to use to encrypt the sensitive processor properties in flow.xml.gz -
-c,--translateCliTranslates the nifi.properties file to a format suitable for the NiFi CLI tool
NiFi Registry
The following are available options when targeting NiFi Registry using the --nifiRegistry flag:
-
-h,--helpShow usage information (this message) -
-v,--verboseSets verbose mode (default false) -
-p,--password <password>Protect the files using a password-derived key. If an argument is not provided to this flag, interactive mode will be triggered to prompt the user to enter the password. -
-k,--key <keyhex>Protect the files using a raw hexadecimal key. If an argument is not provided to this flag, interactive mode will be triggered to prompt the user to enter the key. -
-S,--protectionScheme <protectionScheme>Selects the protection scheme for encrypted properties. Valid values are: [AES_GCM, HASHICORP_VAULT_TRANSIT, HASHICORP_VAULT_KV, AWS_KMS, AWS_SECRETSMANAGER, AZURE_KEYVAULT_KEY, AZURE_KEYVAULT_SECRET, GCP_KMS] (default is AES_GCM) -
--oldPassword <password>If the input files are already protected using a password-derived key, this specifies the old password so that the files can be unprotected before re-protecting. -
--oldKey <keyhex>If the input files are already protected using a key, this specifies the raw hexadecimal key so that the files can be unprotected before re-protecting. -
-H,`--oldProtectionScheme <protectionScheme>`The old protection scheme to use during encryption migration (see --protectionScheme for possible values). Default is AES_GCM. -
-b,--bootstrapConf <file>The bootstrap.conf file containing no root key or an existing root key, and any other protection scheme configuration properties. If a new password or key is specified (using -p or -k) and no output bootstrap.conf file is specified, then this file will be overwritten to persist the new master key. -
-B,--outputBootstrapConf <file>The destination bootstrap.conf file to persist root key. If specified, the input bootstrap.conf will not be modified. -
-r,--nifiRegistryProperties <file>The nifi-registry.properties file containing unprotected config values, overwritten if no output file specified. -
-R,--outputNifiRegistryProperties <file>The destination nifi-registry.properties file containing protected config values. -
-a,--authorizersXml <file>The authorizers.xml file containing unprotected config values, overwritten if no output file specified. -
-A,--outputAuthorizersXml <file>The destination authorizers.xml file containing protected config values. -
-i,--identityProvidersXml <file>The identity-providers.xml file containing unprotected config values, overwritten if no output file specified. -
-I,--outputIdentityProvidersXml <file>The destination identity-providers.xml file containing protected config values. -
--decryptCan be used with-rto decrypt a previously encrypted NiFi Registry Properties file. Decrypted content is printed to STDOUT.
Protection Schemes
The protection scheme can be selected during encryption using the --protectionScheme flag. During migration, the former protection scheme is specified using the --oldProtectionScheme flag. This distinction allows a set of protected configuration files to be migrated not only to a new key, but to a completely different protection scheme.
AES_GCM
The default protection scheme, AES-G/CM simply encrypts sensitive properties and marks their protection as either aes/gcm/256 or aes/gcm/256 as appropriate. This protection is all done within NiFi itself.
HASHICORP_VAULT_TRANSIT
This protection scheme uses HashiCorp Vault Transit Secrets Engine to outsource encryption to a configured Vault server. All HashiCorp Vault configuration is stored in the bootstrap-hashicorp-vault.conf file, as referenced in the bootstrap.conf of a NiFi or NiFi Registry instance. Therefore, when using the HASHICORP_VAULT_TRANSIT protection scheme, the nifi(.registry)?.bootstrap.protection.hashicorp.vault.conf property in the bootstrap.conf specified using the -b flag must be available to the Encrypt Configuration Tool and must be configured as described in the HashiCorp Vault providers section in the NiFi Administration Guide.
HASHICORP_VAULT_KV
This protection scheme uses HashiCorp Vault Key Value Secrets Engine Version 1 to store sensitive values as Vault Secrets. All HashiCorp Vault configuration is stored in the bootstrap-hashicorp-vault.conf file, as referenced in the bootstrap.conf of a NiFi or NiFi Registry instance. Therefore, when using the HASHICORP_VAULT_KV protection scheme, the nifi(.registry)?.bootstrap.protection.hashicorp.vault.conf property in the bootstrap.conf specified using the -b flag must be available to the Encrypt Configuration Tool and must be configured as described in the HashiCorp Vault providers section in the NiFi Administration Guide.
AWS_KMS
This protection scheme uses AWS Key Management Service for encryption and decryption. AWS KMS configuration properties can be stored in the bootstrap-aws.conf file, as referenced in the bootstrap.conf of NiFi or NiFi Registry. If the configuration properties are not specified in bootstrap-aws.conf, then the provider will attempt to use the AWS default credentials provider, which checks standard environment variables and system properties. Therefore, when using the AWS_KMS protection scheme, the nifi(.registry)?.bootstrap.protection.aws.conf property in the bootstrap.conf specified using the -b flag must be available to the Encrypt Configuration Tool and must be configured as described in the AWS KMS provider section in the NiFi Administration Guide.
AWS_SECRETSMANAGER
This protection scheme uses AWS Secrets Manager Service to store sensitive values as AWS Secrets. AWS Secrets Manager configuration properties can be stored in the bootstrap-aws.conf file, as referenced in the bootstrap.conf of NiFi or NiFi Registry. If the configuration properties are not specified in bootstrap-aws.conf, then the provider will attempt to use the AWS default credentials provider, which checks standard environment variables and system properties. Therefore, when using the AWS_SECRETS_MANAGER protection scheme, the nifi(.registry)?.bootstrap.protection.aws.conf property in the bootstrap.conf specified using the -b flag must be available to the Encrypt Configuration Tool and must be configured as described in the AWS Secrets Manager provider section in the NiFi Administration Guide.
Microsoft Azure Key Vault Sensitive Property Providers
Azure Key Vault configuration properties can be stored in the bootstrap-azure.conf file, as referenced in the
bootstrap.conf of NiFi or NiFi Registry.
Azure Key Vault providers will use the DefaultAzureCredential for authentication. The Azure Identity client library describes the process for credentials resolution, which leverages environment variables, system properties, and falls back to Managed Identity authentication.
When using Azure Key Vault providers, bootstrap.conf must contain the
nifi.bootstrap.protection.azure.keyvault.conf property. The bootstrap.conf file location must be specified using the
-b argument when running the Encrypt Config Tool.
AZURE_KEYVAULT_KEY
This protection scheme uses keys managed by Azure Key Vault Keys for encryption and decryption.
See Azure Key Vault Key Provider in the NiFi System Administrator’s Guide for required properties.
AZURE_KEYVAULT_SECRET
This protection scheme uses secrets managed by Azure Key Vault Secrets for storing and retrieving sensitive property values.
See Azure Key Vault Secret Provider in the NiFi System Administrator’s Guide for required properties.
GCP_KMS
This protection scheme uses Google Cloud Key Management Service (Google Cloud Key Management Service) for encryption and decryption. Google Cloud KMS configuration properties are to be stored in the bootstrap-gcp.conf file, as referenced in the bootstrap.conf of NiFi or NiFi Registry. Credentials must be configured as per the following documentation: Google Cloud KMS documentation. Therefore, when using the GCP_KMS protection scheme, the nifi(.registry)?.bootstrap.protection.gcp.kms.conf property in the bootstrap.conf specified using the -b flag must be available to the Encrypt Configuration Tool and must be configured as described in the Google Cloud KMS provider section in the NiFi Administration Guide.
Examples
NiFi
As an example of how the tool works, assume that you have installed the tool on a machine supporting 256-bit encryption and with the following existing values in the nifi.properties file:
# security properties #
nifi.sensitive.props.key=thisIsABadSensitiveKeyPassword
nifi.sensitive.props.algorithm=NIFI_PBKDF2_AES_GCM_256
nifi.sensitive.props.additional.keys=

nifi.security.keystore=/path/to/keystore.jks
nifi.security.keystoreType=JKS
nifi.security.keystorePasswd=thisIsABadKeystorePassword
nifi.security.keyPasswd=thisIsABadKeyPassword
nifi.security.truststore=
nifi.security.truststoreType=
nifi.security.truststorePasswd=
Enter the following arguments when using the tool:
encrypt-config.sh \
-b bootstrap.conf \
-k 0123456789ABCDEFFEDCBA98765432100123456789ABCDEFFEDCBA9876543210 \
-n nifi.properties
As a result, the nifi.properties file is overwritten with protected properties and sibling encryption identifiers (aes/gcm/256, the currently supported algorithm):
# security properties #
nifi.sensitive.props.key=n2z+tTTbHuZ4V4V2||uWhdasyDXD4ZG2lMAes/vqh6u4vaz4xgL4aEbF4Y/dXevqk3ulRcOwf1vc4RDQ==
nifi.sensitive.props.key.protected=aes/gcm/256
nifi.sensitive.props.algorithm=NIFI_PBKDF2_AES_GCM_256
nifi.sensitive.props.additional.keys=

nifi.security.keystore=/path/to/keystore.jks
nifi.security.keystoreType=JKS
nifi.security.keystorePasswd=oBjT92hIGRElIGOh||MZ6uYuWNBrOA6usq/Jt3DaD2e4otNirZDytac/w/KFe0HOkrJR03vcbo
nifi.security.keystorePasswd.protected=aes/gcm/256
nifi.security.keyPasswd=ac/BaE35SL/esLiJ||+ULRvRLYdIDA2VqpE0eQXDEMjaLBMG2kbKOdOwBk/hGebDKlVg==
nifi.security.keyPasswd.protected=aes/gcm/256
nifi.security.truststore=
nifi.security.truststoreType=
nifi.security.truststorePasswd=
Additionally, the bootstrap.conf file is updated with the encryption key as follows:
# Root key in hexadecimal format for encrypted sensitive configuration values
nifi.bootstrap.sensitive.key=0123456789ABCDEFFEDCBA98765432100123456789ABCDEFFEDCBA9876543210
Sensitive configuration values are encrypted by the tool by default, however you can encrypt any additional properties, if desired. To encrypt additional properties, specify them as comma-separated values in the nifi.sensitive.props.additional.keys property.
If the nifi.properties file already has valid protected values, those property values are not modified by the tool.
When applied to login-identity-providers.xml and authorizers.xml, the property elements are updated with an encryption attribute:
Example of protected login-identity-providers.xml:
   <!-- LDAP Provider -->
   <provider>
       <identifier>ldap-provider</identifier>
       <class>org.apache.nifi.ldap.LdapProvider</class>
       <property name="Authentication Strategy">START_TLS</property>
       <property name="Manager DN">someuser</property>
       <property name="Manager Password" encryption="aes/gcm/128">q4r7WIgN0MaxdAKM||SGgdCTPGSFEcuH4RraMYEdeyVbOx93abdWTVSWvh1w+klA</property>
       <property name="TLS - Keystore"></property>
       <property name="TLS - Keystore Password" encryption="aes/gcm/128">Uah59TWX+Ru5GY5p||B44RT/LJtC08QWA5ehQf01JxIpf0qSJUzug25UwkF5a50g</property>
       <property name="TLS - Keystore Type"></property>
       ...
   </provider>
Example of protected authorizers.xml:
   <!-- LDAP User Group Provider -->
   <userGroupProvider>
       <identifier>ldap-user-group-provider</identifier>
       <class>org.apache.nifi.ldap.tenants.LdapUserGroupProvider</class>
       <property name="Authentication Strategy">START_TLS</property>
       <property name="Manager DN">someuser</property>
       <property name="Manager Password" encryption="aes/gcm/128">q4r7WIgN0MaxdAKM||SGgdCTPGSFEcuH4RraMYEdeyVbOx93abdWTVSWvh1w+klA</property>
       <property name="TLS - Keystore"></property>
       <property name="TLS - Keystore Password" encryption="aes/gcm/128">Uah59TWX+Ru5GY5p||B44RT/LJtC08QWA5ehQf01JxIpf0qSJUzug25UwkF5a50g</property>
       <property name="TLS - Keystore Type"></property>
       ...
   </userGroupProvider>
NiFi Registry
As an example of how the tool works, assume that you have installed the tool on a machine supporting 256-bit encryption and with the following existing values in the nifi-registry.properties file:
# security properties #
nifi.registry.security.keystore=/path/to/keystore.jks
nifi.registry.security.keystoreType=JKS
nifi.registry.security.keystorePasswd=thisIsABadKeystorePassword
nifi.registry.security.keyPasswd=thisIsABadKeyPassword
nifi.registry.security.truststore=
nifi.registry.security.truststoreType=
nifi.registry.security.truststorePasswd=
Enter the following arguments when using the tool:
./bin/encrypt-config.sh --nifiRegistry \
-b bootstrap.conf \
-k 0123456789ABCDEFFEDCBA98765432100123456789ABCDEFFEDCBA9876543210 \
-r nifi-registry.properties
As a result, the nifi-registry.properties file is overwritten with protected properties and sibling encryption identifiers (aes/gcm/256, the currently supported algorithm):
# security properties #
nifi.registry.security.keystore=/path/to/keystore.jks
nifi.registry.security.keystoreType=JKS
nifi.registry.security.keystorePasswd=oBjT92hIGRElIGOh||MZ6uYuWNBrOA6usq/Jt3DaD2e4otNirZDytac/w/KFe0HOkrJR03vcbo
nifi.registry.security.keystorePasswd.protected=aes/gcm/256
nifi.registry.security.keyPasswd=ac/BaE35SL/esLiJ||+ULRvRLYdIDA2VqpE0eQXDEMjaLBMG2kbKOdOwBk/hGebDKlVg==
nifi.registry.security.keyPasswd.protected=aes/gcm/256
nifi.registry.security.truststore=
nifi.registry.security.truststoreType=
nifi.registry.security.truststorePasswd=
When applied to identity-providers.xml or authorizers.xml, the property elements are updated with an encryption attribute. For example:
<!-- LDAP Provider -->
<provider>
   <identifier>ldap-provider</identifier>
   <class>org.apache.nifi.registry.security.ldap.LdapProvider</class>
   <property name="Authentication Strategy">START_TLS</property>
   <property name="Manager DN">someuser</property>
   <property name="Manager Password" encryption="aes/gcm/128">q4r7WIgN0MaxdAKM||SGgdCTPGSFEcuH4RraMYEdeyVbOx93abdWTVSWvh1w+klA</property>
   <property name="TLS - Keystore">/path/to/keystore.jks</property>
   <property name="TLS - Keystore Password" encryption="aes/gcm/128">Uah59TWX+Ru5GY5p||B44RT/LJtC08QWA5ehQf01JxIpf0qSJUzug25UwkF5a50g</property>
   <property name="TLS - Keystore Type">JKS</property>
   ...
</provider>
Additionally, the bootstrap.conf file is updated with the encryption key as follows:
# Root key in hexadecimal format for encrypted sensitive configuration values
nifi.registry.bootstrap.sensitive.key=0123456789ABCDEFFEDCBA98765432100123456789ABCDEFFEDCBA9876543210
Sensitive configuration values are encrypted by the tool by default, however you can encrypt any additional properties, if desired.
To encrypt additional properties, specify them as comma-separated values in the nifi.registry.sensitive.props.additional.keys property.
If the nifi-registry.properties file already has valid protected values and you wish to protect additional values using the same root key already present in your bootstrap.conf, then run the tool without specifying a new key:
# bootstrap.conf already contains root key property
# nifi-registy.properties has been updated for nifi.registry.sensitive.props.additional.keys=...

./bin/encrypt-config.sh --nifiRegistry -b bootstrap.conf -r nifi-registry.properties
Sensitive Property Key Migration
In order to change the key used to encrypt the sensitive values, provide the new key or password using the -k or -p flags as usual,
and provide the existing key or password using --old-key or --old-password respectively. This will allow the toolkit to decrypt the
existing values and re-encrypt them, and update bootstrap.conf with the new key. Only one of the key or password needs to be specified
for each phase (old vs. new), and any combination is sufficient:
-
old key → new key
-
old key → new password
-
old password → new key
-
old password → new password
In order to change the protection scheme (e.g., migrating from AES encryption to Vault encryption), specify the --protectionScheme
and --oldProtectionScheme in the migration command.
The following is an example of the commands for protection scheme migration from AES_GCM to AWS_KMS then back. Execute these commands at the nifi directory with the nifi-toolkit directory as a sibling directory. In addition, make sure to update bootstrap-aws.conf with your AWS KMS Key ARN/ID and have your credentials and region configured.
This command encrypts nifi.properties with the AES_GCM protection scheme
./../nifi-toolkit-*-SNAPSHOT/bin/encrypt-config.sh \
-b conf/bootstrap.conf \
-n conf/nifi.properties \
-k 0123456789ABCDEFFEDCBA98765432100123456789ABCDEFFEDCBA9876543210 \
-v
This command migrates nifi.properties from using AES_GCM to using AWS_KMS protection scheme
./../nifi-toolkit-*-SNAPSHOT/bin/encrypt-config.sh \
-b conf/bootstrap.conf \
-n conf/nifi.properties \
-S AWS_KMS \
-H AES_GCM \
-e 0123456789ABCDEFFEDCBA98765432100123456789ABCDEFFEDCBA9876543210 \
-m \
-v
This command migrates nifi.properties back from AWS_KMS to AES_GCM protection scheme
./../nifi-toolkit-*-SNAPSHOT/bin/encrypt-config.sh \
-b conf/bootstrap.conf \
-n conf/nifi.properties \
-S AES_GCM \
-k 0123456789ABCDEFFEDCBA98765432100123456789ABCDEFFEDCBA9876543210 \
-H AWS_KMS \
-m \
-v
Export All Flows
You can use the export-all-flows to perform the following tasks:
-
List all the buckets
-
For each bucket, list all flows
-
For each flow, list all versions
-
Export each version into a provided directory
Running the command requires an --outputDirectory parameter. The directory must exist and permissions correctly set.
Import All Flows
You can use the import-all-flows to perform the following tasks:
-
List all files, representing a flow version, from a directory created by export-all-flows
-
Create all the corresponding buckets
-
Create all the corresponding flows
-
Import all the corresponding flow versions
Running the command requires 2 parameters:
-
--inputparameter represents a directory to read files from -
--skipExistingoptional parameter, configuring how to handle existing flow and flow version creation. If provided the flow and flow version creation will be skipped regardless of there are missing flow versions. If not provided the missing flow versions will be created.
Usage
The input source for an import-all-flows command must be created by an export-all-flows command. To avoid migration conflicts, no modification should be performed in the NiFi Registry during this activity. Buckets and flows with the same name are considered equal.
-
Export all flow versions:
./bin/cli.sh registry export-all-flows -u http://localhost:18080 --outputDirectory "/my_dir/flow_exports"
-
Import all flow versions:
./bin/cli.sh registry import-all-flows -u http://localhost:18080 --input "/my_dir/flow_exports" --skipExisting
Use case 1: reconfiguring an existing NiFi Registry
NiFi is connecting to NiFi Registry, the NiFi Registry does not change, only its configuration. All the data will be created.
-
Export versions:
./bin/cli.sh registry export-all-flows -u http://localhost:18080 --outputDirectory "/my_dir/flow_exports"
-
Stop registry
-
Switch provider
-
Start registry
-
Import versions
./bin/cli.sh registry import-all-flows -u http://localhost:18080 --input "/my_dir/flow_exports" --skipExisting
Use case 2: data replication
NiFi_1 is connecting to NiFi Registry_1 and NiFi_2 is connecting to NiFi Registry_2.
For disaster recovery purposes the data from NiFi Registry_1 needs to be periodically replicated to NiFi Registry_2 via a scheduled job.
The initial version of Nifi Registry_2 needs to be created by this tool.
The missing buckets, flows and versions will be created. If bucket and flow exist the missing versions will be created.
-
Export versions:
./bin/cli.sh registry export-all-flows -u http://nifi-registry-1:18080 --outputDirectory "/my_dir/flow_exports"
-
Import versions:
./bin/cli.sh registry import-all-flows -u http://nifi-registry-2:18080 --input "/my_dir/flow_exports"
File Manager
The File Manager utility (invoked as ./bin/file-manager.sh or bin\file-manager.bat) allows system administrators to take a backup of an existing NiFi installation, install a new version of NiFi in a designated location (while migrating any previous configuration settings) or restore an installation from a previous backup. File Manager supports NiFi version 1.0.0 and higher.
Usage
To show help:
./bin/file-manager.sh -h
The following are available options:
-
-b,--backupDir <arg>Backup NiFi Directory (used with backup or restore operation) -
-c,--nifiCurrentDir <arg>Current NiFi Installation Directory (used optionally with install or restore operation) -
-d,--nifiInstallDir <arg>NiFi Installation Directory (used with install or restore operation) -
-h,--helpPrint help info (optional) -
-i,--installFile <arg>NiFi Install File (used with install operation) -
-m,--moveRepositoriesAllow repositories to be moved to new/restored nifi directory from existing installation, if available (used optionally with install or restore operation) -
-o,--operation <arg>File operation (install | backup | restore) -
-r,--nifiRollbackDir <arg>NiFi Installation Directory (used with install or restore operation) -
-t,--bootstrapConf <arg>Current NiFi Bootstrap Configuration File (used optionally) -
-v,--verboseVerbose messaging (optional) -
-x,--overwriteConfigsOverwrite existing configuration directory with upgrade changes (used optionally with install or restore operation)
Example usage on Linux:
# backup NiFi installation
# option -t may be provided to ensure backup of external boostrap.conf file
./file-manager.sh
-o backup
–b /tmp/nifi_bak
–c /usr/nifi_old
-v
# install NiFi using compressed tar file into /usr/nifi directory (should install as /usr/nifi/nifi-1.3.0).
# migrate existing configurations with location determined by external bootstrap.conf and move over repositories from nifi_old
# options -t and -c should both be provided if migration of configurations, state and repositories are required
./file-manager.sh
-o install
–i nifi-1.3.0.tar.gz
–d /usr/nifi
–c /usr/nifi/nifi_old
-t /usr/nifi/old_conf/bootstrap.conf
-v
-m
# restore NiFi installation from backup directory and move back repositories
# option -t may be provided to ensure bootstrap.conf is restored to the file path provided, otherwise it is placed in the
# default directory under the rollback path (e.g. /usr/nifi_old/conf)
./file-manager.sh
-o restore
–b /tmp/nifi_bak
–r /usr/nifi_old
–c /usr/nifi
-m
-v
Expected Behavior
Backup
During the backup operation a backup directory is created in a designated location for an existing NiFi installation. Backups will capture all critical files (including any internal or external configurations, libraries, scripts and documents) however it excludes backing up repositories and logs due to potential size. If configuration/library files are external from the existing installation folder the backup operation will capture those as well.
Install
During the install operation File Manager will perform installation using the designated NiFi binary file (either tar.gz or zip file) to create a new installation or migrate an existing nifi installation to a new one. Installation can optionally move repositories (if located within the configuration folder of the current installation) to the new installation as well as migrate configuration files to the newer installation.
Restore
The restore operation allows an existing installation to revert back to a previous installation. Using an existing backup directory (created from the backup operation) the FileManager utility will restore libraries, scripts and documents as well as revert to previous configurations.
If repositories were changed due to the installation of a newer version of NiFi these may no longer be compatible during restore. In that scenario exclude the -m option to ensure new repositories will be created or, if repositories live outside of the NiFi directory, remove them so they can be recreated on startup after restore.
|
Flow Analyzer
The flow-analyzer tool (invoked as ./bin/flow-analyzer.sh or bin\flow-analyzer.bat) analyzes the flow.xml.gz file and reports:
-
Total Bytes Utilized by the System
-
Min/Max Back Pressure Size
-
Average Back Pressure Size
-
Min/Max Flowfile Queue Size
-
Average Flowfile Queue Size
Usage
To execute the flow-analyzer tool:
flow-analyzer.sh <path to flow.xml.gz>
Example:
$ ./flow-analyzer.sh /Users/nifiuser/nifi-1.8.0/conf/flow.xml.gz
Using flow=/Users/nifiuser/nifi-1.8.0/conf/flow.xml.gz
Total Bytes Utilized by System=1518 GB
Max Back Pressure Size=1 GB
Min Back Pressure Size=1 GB
Average Back Pressure Size=2.504950495 GB
Max Flowfile Queue Size=10000
Min Flowfile Queue Size=10000
Avg Flowfile Queue Size=10000.000000000
Node Manager
Node manager (invoked as ./bin/node-manager.sh or bin\node-manager.bat) supports connecting, disconnecting and removing a node when in a cluster (an error message displays if the node is not part of a cluster) as well as obtaining the status of a node. When nodes are disconnected from a cluster and need to be connected or removed, a list of urls of connected nodes should be provided to send the required command to the active cluster. Node Manager supports NiFi version 1.0.0 and higher.
Usage
To show help:
./bin/node-manager.sh -h
The following are available options:
-
-b,--bootstrapConf <arg>Existing Bootstrap Configuration file (required) -
-d,--nifiInstallDir <arg>NiFi Root Folder (required) -
-h,--helpHelp Text (optional) -
-o,--operation <arg>Operations supported: status, connect (cluster), disconnect (cluster), remove (cluster) -
-p,--proxyDN <arg>Proxy or User DN (required for secured nodes doing connect, disconnect and remove operations) -
-u,--clusterUrls <arg>Comma delimited list of active urls for cluster (optional). Not required for disconnecting a node yet will be needed when connecting or removing from a cluster -
-v,--verboseVerbose messaging (optional)
To connect, disconnect, or remove a node from a cluster:
node-manager.sh -d {$NIFI_HOME} –b { nifi bootstrap file path}
-o {remove|disconnect|connect|status} [-u {url list}] [-p {proxy name}] [-v]
Example usage on Linux:
# disconnect without cluster url list
./node-manager.sh
-d /usr/nifi/nifi_current
-b /usr/nifi/nifi_current/conf/bootstrap.conf
-o disconnect
–p ydavis@nifi
-v
#with url list
./node-manager.sh
-d /usr/nifi/nifi_current
-b /usr/nifi/nifi_current/conf/bootstrap.conf
-o connect
-u 'http://nifi-server-1:8080,http://nifi-server-2:8080'
-v
Example usage on Windows:
node-manager.bat
-d "C:\\Program Files\\nifi\\nifi-1.2.0-SNAPSHOT"
-b "C:\\Program Files\\nifi\\nifi-1.2.0-SNAPSHOT\\conf\\bootstrap.conf"
-o disconnect
–v
Expected Behavior
Status
To obtain information on UI availability of a node, the status operation can be used to determine if the node is running. If the –u (clusterUrls) option is not provided the current node url is checked otherwise the urls provided will be checked.
Disconnect
When a node is disconnected from the cluster, the node itself should appear as disconnected and the cluster should have a bulletin indicating the disconnect request was received. The cluster should also show n-1/n nodes available in the cluster. For example, if 1 node is disconnected from a 3-node cluster, then "2 of 3" nodes should show on the remaining nodes in the cluster. Changes to the flow should not be allowed on the cluster with a disconnected node.
Connect
When the connect command is executed to reconnect a node to a cluster, upon completion the node itself should show that it has rejoined the cluster by showing n/n nodes. Previously it would have shown Disconnected. Other nodes in the cluster should receive a bulletin of the connect request and also show n/n nodes allowing for changes to be allowed to the flow.
Remove
When the remove command is executed the node should show as disconnected from a cluster. The nodes remaining in the cluster should show n-1/n-1 nodes. For example, if 1 node is removed from a 3-node cluster, then the remaining 2 nodes should show "2 of 2" nodes. The cluster should allow a flow to be adjusted. The removed node can rejoin the cluster if restarted and the flow for the cluster has not changed. If the flow was changed, the flow template of the removed node should be deleted before restarting the node to allow it to obtain the cluster flow (otherwise an uninheritable flow file exception may occur).
Notify
Notify (invoked as ./bin/notify.sh or bin\notify.bat) allows administrators to send messages as bulletins to NiFi. Notify is supported on NiFi version 1.2.0 and higher.
Usage
To show help:
./bin/notify.sh -h
The following are available options:
-
-b,--bootstrapConf <arg>Existing Bootstrap Configuration file (required) -
-d,--nifiInstallDir <arg>NiFi Root Folder (required) -
-h,--helpHelp Text (optional) -
-l,--level <arg>Status level of bulletin –INFO,WARN,ERROR -
-m,--message <arg>Bulletin message (required) -
-p,--proxyDN <arg>Proxy or User DN (required for secured nodes) -
-v,--verboseVerbose messaging (optional)
To send notifications:
notify.sh -d {$NIFI_HOME} –b {nifi bootstrap file path} -m {message} [-l {level}] [-v]
Example usage on Linux:
./notify.sh -d /usr/nifi/nifi_current -b /usr/nifi/nifi_current/conf/bootstrap.conf -m "Test Message Server 1" -l "WARN" –p “ydavis@nifi” -v
Example usage on Windows:
notify.bat -v -d "C:\\Program Files\\nifi\\nifi-1.2.0-SNAPSHOT" -b "C:\\Program Files\\nifi\\nifi-1.2.0-SNAPSHOT\\conf\\bootstrap.conf" -m "Test Message Server 1" -v
Executing the above command line should result in a bulletin appearing in NiFi:
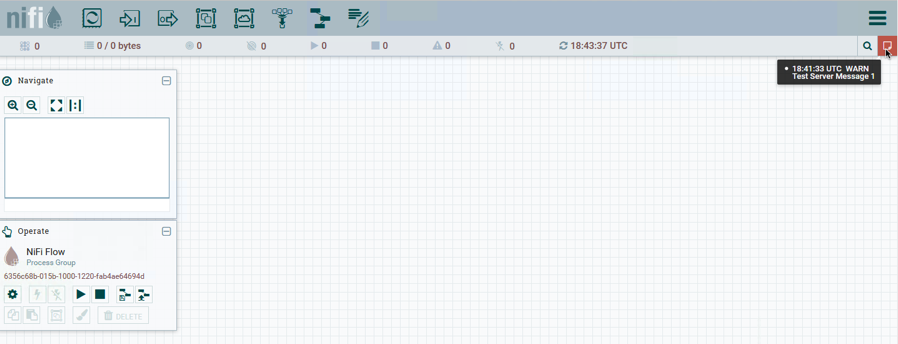
S2S
S2S is a command line tool (invoked as ./bin/s2s.sh or bin\s2s.bat) that can either read a list of DataPackets from stdin to send over site-to-site or write the received DataPackets to stdout.
Usage
To show help:
./bin/s2s.sh -h
The following are available options:
-
--batchCount <arg>Number of flow files in a batch -
--batchDuration <arg>Duration of a batch -
--batchSize <arg>Size of flow files in a batch -
-c,--compressionUse compression -
-d,--directionDirection (valid directions:SEND,RECEIVE) (default:SEND) -
-h,--helpHelp Text (optional) -
-i,--portIdentifier <arg>Port id -
--keystore <arg>Keystore -
--keyStorePassword <arg>Keystore password -
--keyStoreType <arg>Keystore type (default:JKS) -
-n,--portNamePort name -
-p,--transportProtocolSite to site transport protocol (default:RAW) -
--peerPersistenceFile <arg>File to write peer information to so it can be recovered on restart -
--penalization <arg>Penalization period -
--proxyHost <arg>Proxy hostname -
--proxyPassword <arg>Proxy password -
--proxyPort <arg>Proxy port -
--proxyUsername <arg>Proxy username -
--timeout <arg>Timeout -
--trustStore <arg>Truststore -
--trustStorePassword <arg>Truststore password -
--trustStoreType <arg>Truststore type (default:JKS) -
-u,--url <arg>NiFI URL to connect to (default:http://localhost:8080/nifi)
The s2s cli input/output format is a JSON list of DataPackets. They can have the following formats:
[{"attributes":{"key":"value"},"data":"aGVsbG8gbmlmaQ=="}]
where data is the base64 encoded value of the FlowFile content (always used for received data) or:
[{"attributes":{"key":"value"},"dataFile":"/Users/pvillard/Documents/GitHub/nifi/nifi-toolkit/nifi-toolkit-assembly/target/nifi-toolkit-1.9.0-SNAPSHOT-bin/nifi-toolkit-1.9.0-SNAPSHOT/bin/EXAMPLE"}]
where dataFile is a file to read the FlowFile content from.
Example usage to send a FlowFile with the contents of "hey nifi" to a local unsecured NiFi over http with an input port named "input":
echo '[{"data":"aGV5IG5pZmk="}]' | bin/s2s.sh -n input -p http
TLS Toolkit
In order to facilitate the secure setup of NiFi, you can use the tls-toolkit command line utility to automatically generate the required keystores, truststore, and relevant configuration files. This is especially useful for securing multiple NiFi nodes, which can be a tedious and error-prone process.
| Please note that there are new requirements for trusted certificates in macOS 10.15. Details can be found here, but of particular importance is that all TLS server certificates issued after July 1, 2019 must have a validity period of 825 days or less. |
Wildcard Certificates
Wildcard certificates (i.e. two nodes node1.nifi.apache.org and node2.nifi.apache.org being assigned the same certificate with a CN or SAN entry of *.nifi.apache.org) are not officially supported and not recommended. There are numerous disadvantages to using wildcard certificates, and a cluster working with wildcard certificates has occurred in previous versions out of lucky accidents, not intentional support. Wildcard SAN entries are acceptable if each cert maintains an additional unique SAN entry and CN entry.
Potential issues with wildcard certificates
-
In many places throughout the codebase, cluster communications use certificate identities many times to identify a node, and if the certificate simply presents a wildcard DN, that doesn’t resolve to a specific node
-
Admins may need to provide a custom node identity in authorizers.xml for
*.nifi.apache.orgbecause all proxy actions only resolve to the cert DN (see the User Authentication section in the System Administrator’s Guide for more information). -
Admins have no traceability into which node performed an action because they all resolve to the same DN
-
Admins running multiple instances on the same machine using different ports to identify them can accidentally put
node1hostname withnode2port, and the address will resolve fine because it’s using the same certificate, but the host header handler will block it because thenode1hostname is (correctly) not listed as an acceptable host fornode2instance -
If the wildcard certificate is compromised, all nodes are compromised
| JKS keystores and truststores are recommended for NiFi. This tool allows the specification of other keystore types on the command line but will ignore a type of PKCS12 for use as the truststore because that format has some compatibility issues between BouncyCastle and Oracle implementations. |
Operation Modes
The tls-toolkit command line tool has two primary modes of operation:
-
Standalone — generates the certificate authority, keystores, truststores, and nifi.properties files in one command.
-
Client/Server — uses a Certificate Authority Server that accepts Certificate Signing Requests from clients, signs them, and sends the resulting certificates back. Both client and server validate the other’s identity through a shared secret.
Standalone
Standalone mode is invoked by running ./bin/tls-toolkit.sh standalone or bin\tls-toolkit.sh standalone.
Usage
To show help:
./bin/tls-toolkit.sh standalone -h
The following are available options:
-
-a,--keyAlgorithm <arg>Algorithm to use for generated keys (default:RSA) -
--additionalCACertificate <arg>Path to additional CA certificate (used to sign toolkit CA certificate) in PEM format if necessary -
-B,--clientCertPassword <arg>Password for client certificate. Must either be one value or one for each client DN (auto-generate if not specified) -
-c,--certificateAuthorityHostname <arg>Hostname of NiFi Certificate Authority (default:localhost) -
-C,--clientCertDn <arg>Generate client certificate suitable for use in browser with specified DN (Can be specified multiple times) -
-d,--days <arg>Number of days issued certificate should be valid for (default:825) -
-f,--nifiPropertiesFile <arg>Base nifi.properties file to update (Embedded file identical to the one in a default NiFi install will be used if not specified) -
-g,--differentKeyAndKeystorePasswordsUse different generated password for the key and the keystore -
-G,--globalPortSequence <arg>Use sequential ports that are calculated for all hosts according to the provided hostname expressions (Can be specified multiple times, MUST BE SAME FROM RUN TO RUN) -
-h,--helpPrint help and exit -
-k,--keySize <arg>Number of bits for generated keys (default:2048) -
-K,--keyPassword <arg>Key password to use. Must either be one value or one for each host (auto-generate if not specified) -
-n,--hostnames <arg>Comma separated list of hostnames -
--nifiDnPrefix <arg>String to prepend to hostname(s) when determining DN (default:CN=) -
--nifiDnSuffix <arg>String to append to hostname(s) when determining DN (default:, OU=NIFI) -
-o,--outputDirectory <arg>The directory to output keystores, truststore, config files (default:../bin) -
-O,--isOverwriteOverwrite existing host output -
-P,--trustStorePassword <arg>Keystore password to use. Must either be one value or one for each host (auto-generate if not specified) -
-s,--signingAlgorithm <arg>Algorithm to use for signing certificates (default:SHA256WITHRSA) -
-S,--keyStorePassword <arg>Keystore password to use. Must either be one value or one for each host (auto-generate if not specified) -
--subjectAlternativeNames <arg>Comma-separated list of domains to use as Subject Alternative Names in the certificate -
-T,--keyStoreType <arg>The type of keystores to generate (default:jks)
"Hostname" and "Subject Alternative Name" Patterns:
-
Square brackets can be used in order to easily specify a range of hostnames or subject alternative names. Example:
[01-20] -
Parentheses can be used in order to specify that more than one NiFi instance will run on the given host(s). Example:
(5)
Examples:
Create 4 sets of keystore, truststore, nifi.properties for localhost along with a client certificate with the given DN:
bin/tls-toolkit.sh standalone -n 'localhost(4)' -C 'CN=username,OU=NIFI'
Create keystore, truststore, nifi.properties for 10 NiFi hostnames in each of 4 subdomains:
bin/tls-toolkit.sh standalone -n 'nifi[01-10].subdomain[1-4].domain'
Create 2 sets of keystore, truststore, nifi.properties for 10 NiFi hostnames in each of 4 subdomains along with a client certificate with the given DN:
bin/tls-toolkit.sh standalone -n 'nifi[01-10].subdomain[1-4].domain(2)' -C 'CN=username,OU=NIFI'
The same command with a range of subject alternate names:
bin/tls-toolkit.sh standalone -n 'nifi[01-10].subdomain[1-4].domain(2)' -C 'CN=username,OU=NIFI' --subjectAlternativeNames 'nifi[21-30].other[2-5].example.com(2)'
Client/Server
Client/Server mode relies on a long-running Certificate Authority (CA) to issue certificates. The CA can be stopped when you’re not bringing nodes online.
Server
CA server mode is invoked by running ./bin/tls-toolkit.sh server or bin\tls-toolkit.sh server.
Usage
To show help:
./bin/tls-toolkit.sh server -h
The following are available options:
-
-a,--keyAlgorithm <arg>Algorithm to use for generated keys (default:RSA) -
--configJsonIn <arg>The place to read configuration info from (defaults to the value of configJson), implies useConfigJson if set (default:configJsonvalue) -
-d,--days <arg>Number of days issued certificate should be valid for (default:825) -
-D,--dn <arg>The dn to use for the CA certificate (default:CN=YOUR_CA_HOSTNAME,OU=NIFI) -
-f,--configJson <arg>The place to write configuration info (default:config.json) -
-F,--useConfigJsonFlag specifying that all configuration is read fromconfigJsonto facilitate automated use (otherwiseconfigJsonwill only be written to) -
-g,--differentKeyAndKeystorePasswordsUse different generated password for the key and the keystore -
-h,--helpPrint help and exit -
-k,--keySize <arg>Number of bits for generated keys (default:2048) -
-p,--PORT <arg>The port for the Certificate Authority to listen on (default:9443) -
-s,--signingAlgorithm <arg>Algorithm to use for signing certificates (default:SHA256WITHRSA) -
-T,--keyStoreType <arg>The type of keystores to generate (default:jks) -
-t,--token <arg>The token to use to prevent MITM (required and must be same as one used by clients)
Client
The client can be used to request new Certificates from the CA. The client utility generates a keypair and Certificate Signing Request (CSR) and sends the CSR to the Certificate Authority. CA client mode is invoked by running ./bin/tls-toolkit.sh client or bin\tls-toolkit.sh client.
Usage
To show help:
./bin/tls-toolkit.sh client -h
The following are available options:
-
-a,--keyAlgorithm <arg>Algorithm to use for generated keys (default:RSA) -
-c,--certificateAuthorityHostname <arg>Hostname of NiFi Certificate Authority (default:localhost) -
-C,--certificateDirectory <arg>The directory to write the CA certificate (default:.) -
--configJsonIn <arg>The place to read configuration info from, impliesuseConfigJsonif set (default:configJsonvalue) -
-D,--dn <arg>The DN to use for the client certificate (default:CN=<localhost name>,OU=NIFI) (this is auto-populated by the tool) -
-f,--configJson <arg>The place to write configuration info (default:config.json) -
-F,--useConfigJsonFlag specifying that all configuration is read fromconfigJsonto facilitate automated use (otherwiseconfigJsonwill only be written to) -
-g,--differentKeyAndKeystorePasswordsUse different generated password for the key and the keystore -
-h,--helpPrint help and exit -
-k,--keySize <arg>Number of bits for generated keys (default:2048) -
-p,--PORT <arg>The port to use to communicate with the Certificate Authority (default:9443) -
--subjectAlternativeNames <arg>Comma-separated list of domains to use as Subject Alternative Names in the certificate -
-T,--keyStoreType <arg>The type of keystores to generate (default:jks) -
-t,--token <arg>The token to use to prevent MITM (required and must be same as one used by CA)
After running the client you will have the CA’s certificate, a keystore, a truststore, and a config.json with information about them as well as their passwords.
For a client certificate that can be easily imported into the browser, specify: -T PKCS12.
Using An Existing Intermediate Certificate Authority (CA)
In some enterprise scenarios, a security/IT team may provide a signing certificate that has already been signed by the organization’s certificate authority (CA). This intermediate CA can be used to sign the node (sometimes referred to as leaf) certificates that will be installed on each NiFi node, or the client certificates used to identify users. In order to inject the existing signing certificate into the toolkit process, follow these steps:
-
Generate or obtain the signed intermediate CA keys in the following format (see additional commands below):
-
Public certificate in PEM format:
nifi-cert.pem -
Private key in PEM format:
nifi-key.key
-
-
Place the files in the toolkit working directory. This is the directory where the tool is configured to output the signed certificates. This is not necessarily the directory where the binary is located or invoked.
-
For example, given the following scenario, the toolkit command can be run from its location as long as the output directory
-ois../hardcoded/, and the existingnifi-cert.pemandnifi-key.keywill be used.-
e.g.
$ ./toolkit/bin/tls-toolkit.sh standalone -o ./hardcoded/ -n 'node4.nifi.apache.org' -P thisIsABadPassword -S thisIsABadPassword -Owill result in a new directory at./hardcoded/node4.nifi.apache.orgwith a keystore and truststore containing a certificate signed by./hardcoded/nifi-key.key
-
-
If the
-oargument is not provided, the default working directory (.) must containnifi-cert.pemandnifi-key.key-
e.g.
$ cd ./hardcoded/ && ../toolkit/bin/tls-toolkit.sh standalone -n 'node5.nifi.apache.org' -P thisIsABadPassword -S thisIsABadPassword -O
-
-
# Example directory structure *before* commands above are run

🔓 0s @ 18:07:58 $ tree -L 2
.
├── hardcoded
│   ├── CN=myusername.hardcoded_OU=NiFi.p12
│   ├── CN=myusername.hardcoded_OU=NiFi.password
│   ├── nifi-cert.pem
│   ├── nifi-key.key
│   ├── node1.nifi.apache.org
│   ├── node2.nifi.apache.org
│   └── node3.nifi.apache.org
└── toolkit
    ├── LICENSE
    ├── NOTICE
    ├── README
    ├── bin
    ├── conf
    ├── docs
    └── lib
The nifi-cert.pem and nifi-key.key files should be ASCII-armored (Base64-encoded ASCII) files containing the CA public certificate and private key respectively. Here are sample files of each to show the expected format:
nifi-cert.pem
# The first command shows the actual content of the encoded file, and the second parses it and shows the internal values

.../certs $ more nifi-cert.pem
-----BEGIN CERTIFICATE-----
MIIDZTCCAk2gAwIBAgIKAWTeM3kDAAAAADANBgkqhkiG9w0BAQsFADAxMQ0wCwYD
VQQLDAROSUZJMSAwHgYDVQQDDBduaWZpLWNhLm5pZmkuYXBhY2hlLm9yZzAeFw0x
ODA3MjgwMDA0MzJaFw0yMTA3MjcwMDA0MzJaMDExDTALBgNVBAsMBE5JRkkxIDAe
BgNVBAMMF25pZmktY2EubmlmaS5hcGFjaGUub3JnMIIBIjANBgkqhkiG9w0BAQEF
AAOCAQ8AMIIBCgKCAQEAqkVrrC+AkFbjnCpupSy84tTFDsRVUIWYj/k2pVwC145M
3bpr0pRCzLuzovAjFCmT5L+isTvNjhionsqif07Ebd/M2psYE/Rih2MULsX6KgRe
1nRUiBeKF08hlmSBMGDFPj39yDzE/V9edxV/KGjRqVgw/Qy0vwaS5uWdXnLDhzoV
4/Mz7lGmYoMasZ1uexlH93jjBl1+EFL2Xoa06oLbEojJ9TKaWhpG8ietEedf7WM0
zqBEz2kHo9ddFk9yxiCkT4SUKnDWkhwc/o6us1vEXoSw+tmufHY/A3gVihjWPIGz
qyLFl9JuN7CyJepkVVqTdskBG7S85G/kBlizUj5jOwIDAQABo38wfTAOBgNVHQ8B
Af8EBAMCAf4wDAYDVR0TBAUwAwEB/zAdBgNVHQ4EFgQUKiWBKbMMQ1zUabD4gI7L
VOWOcy0wHwYDVR0jBBgwFoAUKiWBKbMMQ1zUabD4gI7LVOWOcy0wHQYDVR0lBBYw
FAYIKwYBBQUHAwIGCCsGAQUFBwMBMA0GCSqGSIb3DQEBCwUAA4IBAQAxfHFIZLOw
mwIqnSI/ir8f/uzDMq06APHGdhdeIKV0HR74BtK95KFg42zeXxAEFeic98PC/FPV
tKpm2WUa1slMB+oP27cRx5Znr2+pktaqnM7f2JgMeJ8bduNH3RUkr9jwgkcJRwyC
I4fwHC9k18aizNdOf2q2UgQXxNXaLYPe17deuNVwwrflMgeFfVrwbT2uPJTMRi1D
FQyc6haF4vsOSSRzE6OyDoc+/1PpyPW75OeSXeVCbc3AEAvRuTZMBQvBQUqVM51e
MDG+K3rCeieSBPOnGNrEC/PiA/CvaMXBEog+xPAw1SgYfuCz4rlM3BdRa54z3+oO
lc8xbzd7w8Q3
-----END CERTIFICATE-----
.../certs $ openssl x509 -in nifi-cert.pem -text -noout
Certificate:
    Data:
        Version: 3 (0x2)
        Serial Number:
            01:64:de:33:79:03:00:00:00:00
    Signature Algorithm: sha256WithRSAEncryption
        Issuer: OU=NIFI, CN=nifi-ca.nifi.apache.org
        Validity
            Not Before: Jul 28 00:04:32 2018 GMT
            Not After : Jul 27 00:04:32 2021 GMT
        Subject: OU=NIFI, CN=nifi-ca.nifi.apache.org
        Subject Public Key Info:
            Public Key Algorithm: rsaEncryption
                Public-Key: (2048 bit)
                Modulus:
                    00:aa:45:6b:ac:2f:80:90:56:e3:9c:2a:6e:a5:2c:
                    bc:e2:d4:c5:0e:c4:55:50:85:98:8f:f9:36:a5:5c:
                    02:d7:8e:4c:dd:ba:6b:d2:94:42:cc:bb:b3:a2:f0:
                    23:14:29:93:e4:bf:a2:b1:3b:cd:8e:18:a8:9e:ca:
                    a2:7f:4e:c4:6d:df:cc:da:9b:18:13:f4:62:87:63:
                    14:2e:c5:fa:2a:04:5e:d6:74:54:88:17:8a:17:4f:
                    21:96:64:81:30:60:c5:3e:3d:fd:c8:3c:c4:fd:5f:
                    5e:77:15:7f:28:68:d1:a9:58:30:fd:0c:b4:bf:06:
                    92:e6:e5:9d:5e:72:c3:87:3a:15:e3:f3:33:ee:51:
                    a6:62:83:1a:b1:9d:6e:7b:19:47:f7:78:e3:06:5d:
                    7e:10:52:f6:5e:86:b4:ea:82:db:12:88:c9:f5:32:
                    9a:5a:1a:46:f2:27:ad:11:e7:5f:ed:63:34:ce:a0:
                    44:cf:69:07:a3:d7:5d:16:4f:72:c6:20:a4:4f:84:
                    94:2a:70:d6:92:1c:1c:fe:8e:ae:b3:5b:c4:5e:84:
                    b0:fa:d9:ae:7c:76:3f:03:78:15:8a:18:d6:3c:81:
                    b3:ab:22:c5:97:d2:6e:37:b0:b2:25:ea:64:55:5a:
                    93:76:c9:01:1b:b4:bc:e4:6f:e4:06:58:b3:52:3e:
                    63:3b
                Exponent: 65537 (0x10001)
        X509v3 extensions:
            X509v3 Key Usage: critical
                Digital Signature, Non Repudiation, Key Encipherment, Data Encipherment, Key Agreement, Certificate Sign, CRL Sign
            X509v3 Basic Constraints:
                CA:TRUE
            X509v3 Subject Key Identifier:
                2A:25:81:29:B3:0C:43:5C:D4:69:B0:F8:80:8E:CB:54:E5:8E:73:2D
            X509v3 Authority Key Identifier:
                keyid:2A:25:81:29:B3:0C:43:5C:D4:69:B0:F8:80:8E:CB:54:E5:8E:73:2D

            X509v3 Extended Key Usage:
                TLS Web Client Authentication, TLS Web Server Authentication
    Signature Algorithm: sha256WithRSAEncryption
         31:7c:71:48:64:b3:b0:9b:02:2a:9d:22:3f:8a:bf:1f:fe:ec:
         c3:32:ad:3a:00:f1:c6:76:17:5e:20:a5:74:1d:1e:f8:06:d2:
         bd:e4:a1:60:e3:6c:de:5f:10:04:15:e8:9c:f7:c3:c2:fc:53:
         d5:b4:aa:66:d9:65:1a:d6:c9:4c:07:ea:0f:db:b7:11:c7:96:
         67:af:6f:a9:92:d6:aa:9c:ce:df:d8:98:0c:78:9f:1b:76:e3:
         47:dd:15:24:af:d8:f0:82:47:09:47:0c:82:23:87:f0:1c:2f:
         64:d7:c6:a2:cc:d7:4e:7f:6a:b6:52:04:17:c4:d5:da:2d:83:
         de:d7:b7:5e:b8:d5:70:c2:b7:e5:32:07:85:7d:5a:f0:6d:3d:
         ae:3c:94:cc:46:2d:43:15:0c:9c:ea:16:85:e2:fb:0e:49:24:
         73:13:a3:b2:0e:87:3e:ff:53:e9:c8:f5:bb:e4:e7:92:5d:e5:
         42:6d:cd:c0:10:0b:d1:b9:36:4c:05:0b:c1:41:4a:95:33:9d:
         5e:30:31:be:2b:7a:c2:7a:27:92:04:f3:a7:18:da:c4:0b:f3:
         e2:03:f0:af:68:c5:c1:12:88:3e:c4:f0:30:d5:28:18:7e:e0:
         b3:e2:b9:4c:dc:17:51:6b:9e:33:df:ea:0e:95:cf:31:6f:37:
         7b:c3:c4:37
nifi-key.key
# The first command shows the actual content of the encoded file, and the second parses it and shows the internal values

.../certs $ more nifi-key.key
-----BEGIN RSA PRIVATE KEY-----
MIIEpAIBAAKCAQEAqkVrrC+AkFbjnCpupSy84tTFDsRVUIWYj/k2pVwC145M3bpr
0pRCzLuzovAjFCmT5L+isTvNjhionsqif07Ebd/M2psYE/Rih2MULsX6KgRe1nRU
iBeKF08hlmSBMGDFPj39yDzE/V9edxV/KGjRqVgw/Qy0vwaS5uWdXnLDhzoV4/Mz
7lGmYoMasZ1uexlH93jjBl1+EFL2Xoa06oLbEojJ9TKaWhpG8ietEedf7WM0zqBE
z2kHo9ddFk9yxiCkT4SUKnDWkhwc/o6us1vEXoSw+tmufHY/A3gVihjWPIGzqyLF
l9JuN7CyJepkVVqTdskBG7S85G/kBlizUj5jOwIDAQABAoIBAAdWRnV89oVBuT0Z
dvsXGmyLzpH8U9DMcO6DRp+Jf3XaY+WKCutgCCDaVbtHrbtIr17EAzav5QOifGGb
SbVCp6Q0aJdi5360oSpEUrJRRZ5Z4dxL1vimSwUGG+RnIEn9YYJ1GWJve+2PFnr7
KieLnL03V6UPzxoMJnhcnJNdTp+dBwzSazVQwye2csSJlVMk49t2lxBwce7ohuh+
9fL7G3HU5S9d08QT1brknMHahcw1SYyJd0KSjRJCB6wAxnAZmJYJ1jQCI8YICq0j
RX2rhxEXuEMXQcaiFQXzCrmQEXreKUISDvNeu/h7YU9UvJWPZSFGnEGgnMP2XvQm
EjK3rQECgYEA5+OkpLsiLNMHGzj72PiBkq82sTLQJ2+8udYp6PheOGkhjjXoBse5
YynyHlQt6CnVpJQ33mQUkJ+3ils0SMFtmI3rz3udzleek1so2L2J3+CI4kt7fFCb
FFbVXv+dLNrm+tOw68J48asyad8kEnHYq9Us+/3MLDmFJYTthkgzCpECgYEAu/ml
lQaWaZAQcQ8UuVeasxMYoN8zMmzfrkxc8AfNwKxF9nc44ywo4nJr+u/UVRGYpRgM
rdll5vz0Iq68qk03spaW7vDJn8hJQhkReQw1it9Fp/51r9MHzGTVarORJGa2oZ0g
iNe8LNizD3bQ19hEvju9mn0x9Q62Q7dapVpffwsCgYEAtC1TPpQQ59dIjERom5vr
wffWfTTIO/w8HgFkKxrgyuAVLJSCJtKFH6H1+M7bpKrsz6ZDCs+kkwMm76ASLf3t
lD2h3mNkqHG4SzLnuBD90jB666pO1rci6FjYDap7i+DC3F4j9+vxYYXt9Aln09UV
z94hx+LaA/rlk9OHY3EyB6ECgYBA/cCtNNjeaKv2mxM8PbjD/289d85YueHgfpCH
gPs3iZiq7W+iw8ri+FKzMSaFvw66zgTcOtULtxulviqG6ym9umk29dOQRgxmKQqs
gnckq6uGuOjxwJHqrlZHjQw6vLSaThxIk+aAzu+iAh+U8TZbW4ZjmrOiGdMUuJlD
oGpyHwKBgQCRjfqQjRelYVtU7j6BD9BDbCfmipwaRNP0CuAGOVtS+UnJuaIhsXFQ
QGEBuOnfFijIvb7YcXRL4plRYPMvDqYRNObuI6A+1xNtr000nxa/HUfzKVeI9Tsn
9AKMWnXS8ZcfStsVf3oDFffXYRqCaWeuhpMmg9TwdXoAuwfpE5GCmw==
-----END RSA PRIVATE KEY-----
.../certs $ openssl rsa -in nifi-key.key -text -noout
Private-Key: (2048 bit)
modulus:
    00:aa:45:6b:ac:2f:80:90:56:e3:9c:2a:6e:a5:2c:
    bc:e2:d4:c5:0e:c4:55:50:85:98:8f:f9:36:a5:5c:
    02:d7:8e:4c:dd:ba:6b:d2:94:42:cc:bb:b3:a2:f0:
    23:14:29:93:e4:bf:a2:b1:3b:cd:8e:18:a8:9e:ca:
    a2:7f:4e:c4:6d:df:cc:da:9b:18:13:f4:62:87:63:
    14:2e:c5:fa:2a:04:5e:d6:74:54:88:17:8a:17:4f:
    21:96:64:81:30:60:c5:3e:3d:fd:c8:3c:c4:fd:5f:
    5e:77:15:7f:28:68:d1:a9:58:30:fd:0c:b4:bf:06:
    92:e6:e5:9d:5e:72:c3:87:3a:15:e3:f3:33:ee:51:
    a6:62:83:1a:b1:9d:6e:7b:19:47:f7:78:e3:06:5d:
    7e:10:52:f6:5e:86:b4:ea:82:db:12:88:c9:f5:32:
    9a:5a:1a:46:f2:27:ad:11:e7:5f:ed:63:34:ce:a0:
    44:cf:69:07:a3:d7:5d:16:4f:72:c6:20:a4:4f:84:
    94:2a:70:d6:92:1c:1c:fe:8e:ae:b3:5b:c4:5e:84:
    b0:fa:d9:ae:7c:76:3f:03:78:15:8a:18:d6:3c:81:
    b3:ab:22:c5:97:d2:6e:37:b0:b2:25:ea:64:55:5a:
    93:76:c9:01:1b:b4:bc:e4:6f:e4:06:58:b3:52:3e:
    63:3b
publicExponent: 65537 (0x10001)
privateExponent:
    07:56:46:75:7c:f6:85:41:b9:3d:19:76:fb:17:1a:
    6c:8b:ce:91:fc:53:d0:cc:70:ee:83:46:9f:89:7f:
    75:da:63:e5:8a:0a:eb:60:08:20:da:55:bb:47:ad:
    bb:48:af:5e:c4:03:36:af:e5:03:a2:7c:61:9b:49:
    b5:42:a7:a4:34:68:97:62:e7:7e:b4:a1:2a:44:52:
    b2:51:45:9e:59:e1:dc:4b:d6:f8:a6:4b:05:06:1b:
    e4:67:20:49:fd:61:82:75:19:62:6f:7b:ed:8f:16:
    7a:fb:2a:27:8b:9c:bd:37:57:a5:0f:cf:1a:0c:26:
    78:5c:9c:93:5d:4e:9f:9d:07:0c:d2:6b:35:50:c3:
    27:b6:72:c4:89:95:53:24:e3:db:76:97:10:70:71:
    ee:e8:86:e8:7e:f5:f2:fb:1b:71:d4:e5:2f:5d:d3:
    c4:13:d5:ba:e4:9c:c1:da:85:cc:35:49:8c:89:77:
    42:92:8d:12:42:07:ac:00:c6:70:19:98:96:09:d6:
    34:02:23:c6:08:0a:ad:23:45:7d:ab:87:11:17:b8:
    43:17:41:c6:a2:15:05:f3:0a:b9:90:11:7a:de:29:
    42:12:0e:f3:5e:bb:f8:7b:61:4f:54:bc:95:8f:65:
    21:46:9c:41:a0:9c:c3:f6:5e:f4:26:12:32:b7:ad:
    01
prime1:
    00:e7:e3:a4:a4:bb:22:2c:d3:07:1b:38:fb:d8:f8:
    81:92:af:36:b1:32:d0:27:6f:bc:b9:d6:29:e8:f8:
    5e:38:69:21:8e:35:e8:06:c7:b9:63:29:f2:1e:54:
    2d:e8:29:d5:a4:94:37:de:64:14:90:9f:b7:8a:5b:
    34:48:c1:6d:98:8d:eb:cf:7b:9d:ce:57:9e:93:5b:
    28:d8:bd:89:df:e0:88:e2:4b:7b:7c:50:9b:14:56:
    d5:5e:ff:9d:2c:da:e6:fa:d3:b0:eb:c2:78:f1:ab:
    32:69:df:24:12:71:d8:ab:d5:2c:fb:fd:cc:2c:39:
    85:25:84:ed:86:48:33:0a:91
prime2:
    00:bb:f9:a5:95:06:96:69:90:10:71:0f:14:b9:57:
    9a:b3:13:18:a0:df:33:32:6c:df:ae:4c:5c:f0:07:
    cd:c0:ac:45:f6:77:38:e3:2c:28:e2:72:6b:fa:ef:
    d4:55:11:98:a5:18:0c:ad:d9:65:e6:fc:f4:22:ae:
    bc:aa:4d:37:b2:96:96:ee:f0:c9:9f:c8:49:42:19:
    11:79:0c:35:8a:df:45:a7:fe:75:af:d3:07:cc:64:
    d5:6a:b3:91:24:66:b6:a1:9d:20:88:d7:bc:2c:d8:
    b3:0f:76:d0:d7:d8:44:be:3b:bd:9a:7d:31:f5:0e:
    b6:43:b7:5a:a5:5a:5f:7f:0b
exponent1:
    00:b4:2d:53:3e:94:10:e7:d7:48:8c:44:68:9b:9b:
    eb:c1:f7:d6:7d:34:c8:3b:fc:3c:1e:01:64:2b:1a:
    e0:ca:e0:15:2c:94:82:26:d2:85:1f:a1:f5:f8:ce:
    db:a4:aa:ec:cf:a6:43:0a:cf:a4:93:03:26:ef:a0:
    12:2d:fd:ed:94:3d:a1:de:63:64:a8:71:b8:4b:32:
    e7:b8:10:fd:d2:30:7a:eb:aa:4e:d6:b7:22:e8:58:
    d8:0d:aa:7b:8b:e0:c2:dc:5e:23:f7:eb:f1:61:85:
    ed:f4:09:67:d3:d5:15:cf:de:21:c7:e2:da:03:fa:
    e5:93:d3:87:63:71:32:07:a1
exponent2:
    40:fd:c0:ad:34:d8:de:68:ab:f6:9b:13:3c:3d:b8:
    c3:ff:6f:3d:77:ce:58:b9:e1:e0:7e:90:87:80:fb:
    37:89:98:aa:ed:6f:a2:c3:ca:e2:f8:52:b3:31:26:
    85:bf:0e:ba:ce:04:dc:3a:d5:0b:b7:1b:a5:be:2a:
    86:eb:29:bd:ba:69:36:f5:d3:90:46:0c:66:29:0a:
    ac:82:77:24:ab:ab:86:b8:e8:f1:c0:91:ea:ae:56:
    47:8d:0c:3a:bc:b4:9a:4e:1c:48:93:e6:80:ce:ef:
    a2:02:1f:94:f1:36:5b:5b:86:63:9a:b3:a2:19:d3:
    14:b8:99:43:a0:6a:72:1f
coefficient:
    00:91:8d:fa:90:8d:17:a5:61:5b:54:ee:3e:81:0f:
    d0:43:6c:27:e6:8a:9c:1a:44:d3:f4:0a:e0:06:39:
    5b:52:f9:49:c9:b9:a2:21:b1:71:50:40:61:01:b8:
    e9:df:16:28:c8:bd:be:d8:71:74:4b:e2:99:51:60:
    f3:2f:0e:a6:11:34:e6:ee:23:a0:3e:d7:13:6d:af:
    4d:34:9f:16:bf:1d:47:f3:29:57:88:f5:3b:27:f4:
    02:8c:5a:75:d2:f1:97:1f:4a:db:15:7f:7a:03:15:
    f7:d7:61:1a:82:69:67:ae:86:93:26:83:d4:f0:75:
    7a:00:bb:07:e9:13:91:82:9b
Signing with Externally-signed CA Certificates
To sign generated certificates with a certificate authority (CA) generated outside of the TLS Toolkit, ensure the necessary files are in the right format and location (see Additional Certificate Commands). For example, an organization Large Organization has an internal CA (CN=ca.large.org, OU=Certificate Authority). This root CA is offline and only used to sign other internal CAs. The Large IT team generates an intermediate CA (CN=nifi_ca.large.org, OU=NiFi, OU=Certificate Authority) to be used to sign all NiFi node certificates (CN=node1.nifi.large.org, OU=NiFi, CN=node2.nifi.large.org, OU=NiFi, etc.).
To use the toolkit to generate these certificates and sign them using the intermediate CA, ensure that the following files are present (see Additional Certificate Commands):
-
nifi-cert.pem— the public certificate of the intermediate CA in PEM format -
nifi-key.key— the Base64-encoded private key of the intermediate CA in PKCS #1 PEM format
If the intermediate CA was the root CA, it would be self-signed — the signature over the certificate would be issued from the same key. In that case (the same as a toolkit-generated CA), no additional arguments are necessary. However, because the intermediate CA is signed by the root CA, the public certificate of the root CA needs to be provided as well to validate the signature. The --additionalCACertificate parameter is used to specify the path to the signing public certificate. The value should be the absolute path to the root CA public certificate.
Example:
# Generate cert signed by intermediate CA (which is signed by root CA) -- WILL FAIL

$ ./bin/tls-toolkit.sh standalone -n 'node1.nifi.apache.org' \
-P passwordpassword \
-S passwordpassword \
-o /opt/certs/externalCA \
-O

2018/08/02 18:48:11 INFO [main] org.apache.nifi.toolkit.tls.standalone.TlsToolkitStandaloneCommandLine: No nifiPropertiesFile specified, using embedded one.
2018/08/02 18:48:12 INFO [main] org.apache.nifi.toolkit.tls.standalone.TlsToolkitStandalone: Running standalone certificate generation with output directory /opt/certs/externalCA
2018/08/02 18:48:12 INFO [main] org.apache.nifi.toolkit.tls.util.TlsHelper: Verifying the certificate signature for CN=nifi_ca.large.org, OU=Certificate Authority
2018/08/02 18:48:12 INFO [main] org.apache.nifi.toolkit.tls.util.TlsHelper: Attempting to verify certificate CN=nifi_ca.large.org, OU=NiFi, OU=Certificate Authority signature with CN=nifi_ca.large.org, OU=NiFi, OU=Certificate Authority
2018/08/02 18:48:12 WARN [main] org.apache.nifi.toolkit.tls.util.TlsHelper: Certificate CN=nifi_ca.large.org, OU=NiFi, OU=Certificate Authority not signed by CN=nifi_ca.large.org, OU=NiFi, OU=Certificate Authority [certificate does not verify with supplied key]
Error generating TLS configuration. (The signing certificate was not signed by any known certificates)

# Provide additional CA certificate path for signature verification of intermediate CA

$ ./bin/tls-toolkit.sh standalone -n 'node1.nifi.apache.org' \
-P passwordpassword \
-S passwordpassword \
-o /opt/certs/externalCA \
--additionalCACertificate /opt/certs/externalCA/root.pem \
-O

2018/08/02 18:48:44 INFO [main] org.apache.nifi.toolkit.tls.standalone.TlsToolkitStandaloneCommandLine: No nifiPropertiesFile specified, using embedded one.
2018/08/02 18:48:44 INFO [main] org.apache.nifi.toolkit.tls.standalone.TlsToolkitStandalone: Running standalone certificate generation with output directory /opt/certs/externalCA
2018/08/02 18:48:44 INFO [main] org.apache.nifi.toolkit.tls.util.TlsHelper: Verifying the certificate signature for CN=nifi_ca.large.org, OU=NiFi, OU=Certificate Authority
2018/08/02 18:48:44 INFO [main] org.apache.nifi.toolkit.tls.util.TlsHelper: Attempting to verify certificate CN=nifi_ca.large.org, OU=NiFi, OU=Certificate Authority signature with CN=ca.large.org, OU=Certificate Authority
2018/08/02 18:48:44 INFO [main] org.apache.nifi.toolkit.tls.util.TlsHelper: Certificate was signed by CN=ca.large.org, OU=Certificate Authority
2018/08/02 18:48:44 INFO [main] org.apache.nifi.toolkit.tls.standalone.TlsToolkitStandalone: Using existing CA certificate /opt/certs/externalCA/nifi-cert.pem and key /opt/certs/externalCA/nifi-key.key
2018/08/02 18:48:44 INFO [main] org.apache.nifi.toolkit.tls.standalone.TlsToolkitStandalone: Writing new ssl configuration to /opt/certs/externalCA/node1.nifi.apache.org
2018/08/02 18:48:44 INFO [main] org.apache.nifi.toolkit.tls.standalone.TlsToolkitStandalone: Successfully generated TLS configuration for node1.nifi.apache.org 1 in /opt/certs/externalCA/node1.nifi.apache.org
2018/08/02 18:48:44 INFO [main] org.apache.nifi.toolkit.tls.standalone.TlsToolkitStandalone: No clientCertDn specified, not generating any client certificates.
2018/08/02 18:48:44 INFO [main] org.apache.nifi.toolkit.tls.standalone.TlsToolkitStandalone: tls-toolkit standalone completed successfully
Additional Certificate Commands
-
To convert from DER encoded public certificate (
cert.der) to PEM encoded (cert.pem):-
If the DER file contains both the public certificate and private key, remove the private key with this command:
-
perl -pe 'BEGIN{undef $/;} s|-----BEGIN PRIVATE KEY-----.*?-----END PRIVATE KEY-----|Removed private key|gs' cert.der > cert.pem
-
-
If the DER file only contains the public certificate, use this command:
-
openssl x509 -inform der -in cert.der -out cert.pem
-
-
-
To convert from a PKCS12 keystore (
keystore.p12) containing both the public certificate and private key into PEM encoded files ($PASSWORDis the keystore password):-
openssl pkcs12 -in keystore.p12 -nodes -clcerts -nokeys -out cert.pem -password "pass:$PASSWORD" -
openssl pkcs12 -in keystore.p12 -nodes -nocerts -out key.key -password "pass:$PASSWORD"
-
-
To convert from a Java Keystore (
keystore.jks) containing private key into PEM encoded files ($P12_PASSWORDis the PKCS12 keystore password,$JKS_PASSWORDis the Java keystore password you want to set, and$ALIAScan be any value — the NiFi default isnifi-key):-
keytool -importkeystore -srckeystore keystore.jks -destkeystore keystore.p12 -srcstoretype JKS -deststoretype PKCS12 -destkeypass "$P12_PASSWORD" -deststorepass "$P12_PASSWORD" -srcstorepass "$JKS_PASSWORD" -srcalias "$ALIAS" -destalias "$ALIAS" -
Follow the steps above to convert from
keystore.p12tocert.pemandkey.key
-
-
To convert from PKCS #8 PEM format to PKCS #1 PEM format:
-
If the private key is provided in PKCS #8 format (the file begins with
-----BEGIN PRIVATE KEY-----rather than-----BEGIN RSA PRIVATE KEY-----), the following command will convert it to PKCS #1 format, move the original tonifi-key-pkcs8.key, and rename the PKCS #1 version asnifi-key.key:-
openssl rsa -in nifi-key.key -out nifi-key-pkcs1.key && mv nifi-key.key nifi-key-pkcs8.key && mv nifi-key-pkcs1.key nifi-key.key
-
-
-
To combine a private key in PEM format (
private.key) and public certificate in PEM format (certificate.pem) into PKCS12 keystore:-
The following command will create the PKCS12 keystore (
keystore.p12) from the two independent files. A Java keystore (JKS) cannot be formed directly from the PEM files:-
openssl pkcs12 -export -out keystore.p12 -inkey private.key -in certificate.pem
-
-
-
To convert a PKCS12 keystore (
keystore.p12) to JKS keystore (keystore.jks):-
The following command will create the JKS keystore (
keystore.jks). The-destaliasflag is optional, as NiFi does not currently read from a specific alias in the keystore. The user will be prompted for a keystore password, which must be set and have minimum 8 characters, and a key password, which can be the same as the keystore password or different:-
keytool -importkeystore -srckeystore keystore.p12 -srcstoretype pkcs12 -destkeystore keystore.jks
-deststoretype jks -destalias nifi-key
-
-
ZooKeeper Migrator
You can use the zk-migrator tool to perform the following tasks:
-
Moving ZooKeeper information from one ZooKeeper cluster to another
-
Migrating ZooKeeper node ownership
For example, you may want to use the ZooKeeper Migrator when you are:
-
Upgrading from NiFi 0.x to NiFi 1.x in which embedded ZooKeepers are used
-
Migrating from an embedded ZooKeeper in NiFi 0.x or 1.x to an external ZooKeeper
-
Upgrading from NiFi 0.x with an external ZooKeeper to NiFi 1.x with the same external ZooKeeper
-
Migrating from an external ZooKeeper to an embedded ZooKeeper in NiFi 1.x
Usage
The zk-migrator tool is invoked as ./bin/zk-migrator.sh or bin\zk-migrator.bat.
To show help:
./bin/zk-migrator.sh -h
The following are available options:
-
-a,--auth <username:password>Allows the specification of a username and password for authentication with ZooKeeper. This option is mutually exclusive with the-k,--krb-confoption. -
-f,--file <filename>The file used for ZooKeeper data serialized as JSON. When used with the-r,--receiveoption, data read from ZooKeeper will be stored in the given filename. When used with the-s,--sendoption, the data in the file will be sent to ZooKeeper. -
-h,--helpPrints help, displays available parameters with descriptions -
--ignore-sourceAllows the ZooKeeper Migrator to write to the ZooKeeper and path from which the data was obtained. -
-k,--krb-conf <jaas-filename>Allows the specification of a JAAS configuration file to allow authentication with a ZooKeeper configured to use Kerberos. This option is mutually exclusive with the-a,--authoption. -
-r,--receiveReceives data from ZooKeeper and writes to the given filename (if the-f,--fileoption is provided) or standard output. The data received will contain the full path to each node read from ZooKeeper. This option is mutually exclusive with the-s,--sendoption. -
-s,--sendSends data to ZooKeeper that is read from the given filename (if the-f,--fileoption is provided) or standard input. The paths for each node in the data being sent to ZooKeeper are absolute paths, and will be stored in ZooKeeper under the path portion of the-z,--zookeeperargument. Typically, the path portion of the argument can be omitted, which will store the nodes at their absolute paths. This option is mutually exclusive with the-r,--receiveoption. -
--use-existing-aclAllows the ZooKeeper Migrator to write ACL values retrieved from the source ZooKeeper server to destination server. Default action will apply Open rights for unsecured destinations or Creator Only rights for secured destinations. -
-z,--zookeeper <zookeeper-endpoint>The ZooKeeper server(s) to use, specified by a connect string, comprised of one or more comma-separated host:port pairs followed by a path, in the format of host:port[,host2:port…,hostn:port]/znode/path.
Migrating Between Source and Destination ZooKeepers
Before you begin, confirm that:
-
You have installed the destination ZooKeeper cluster.
-
You have installed and configured a NiFi cluster to use the destination ZooKeeper cluster.
-
If you are migrating ZooKeepers due to upgrading NiFi from 0.x to 1.x,, you have already followed appropriate NiFi upgrade steps.
-
You have configured Kerberos as needed.
-
You have not started processing any dataflow (to avoid duplicate data processing).
-
If one of the ZooKeeper clusters you are using is configured with Kerberos, you are running the ZooKeeper Migrator from a host that has access to NiFi’s ZooKeeper client jaas configuration file (see the Kerberizing NiFi’s ZooKeeper Client section in the System Administrator’s Guide for more information).
ZooKeeper Migration Steps
-
Collect the following information:
Required Information
Description
Source ZooKeeper hostname (sourceHostname)
The hostname must be one of the hosts running in the ZooKeeper ensemble, which can be found in <NiFi installation dir>/conf/zookeeper.properties. Any of the hostnames declared in the
server.Nproperties can be used.Destination ZooKeeper hostname (destinationHostname)
The hostname must be one of the hosts running in the ZooKeeper ensemble, which can be found in <NiFi installation dir>/conf/zookeeper.properties. Any of the hostnames declared in the
server.Nproperties can be used.Source ZooKeeper port (sourceClientPort)
This can be found in <NiFi installation dir>/conf/zookeeper.properties. The port is specified in the
clientPortproperty or at the end of the server string.Destination ZooKeeper port (destinationClientPort)
This can be found in <NiFi installation dir>/conf/zookeeper.properties. The port is specified in the
clientPortproperty or at the end of the server string.Export data path
Determine the path that will store a json file containing the export of data from ZooKeeper. It must be readable and writable by the user running the zk-migrator tool.
Source ZooKeeper Authentication Information
This information is in <NiFi installation dir>/conf/state-management.xml. For NiFi 0.x, if Creator Only is specified in state-management.xml, you need to supply authentication information using the
-a,--authargument with the values from the Username and Password properties in state-management.xml. For NiFi 1.x, supply authentication information using the-k,--krb-confargument.If the state-management.xml specifies Open, no authentication is required.
Destination ZooKeeper Authentication Information
This information is in <NiFi installation dir>/conf/state-management.xml. For NiFi 0.x, if Creator Only is specified in state-management.xml, you need to supply authentication information using the
-a,--authargument with the values from the Username and Password properties in state-management.xml. For NiFi 1.x, supply authentication information using the-k,--krb-confargument.If the state-management.xml specifies Open, no authentication is required.
Root path to which NiFi writes data in Source ZooKeeper (sourceRootPath)
This information can be found in
<NiFi installation dir>/conf/state-management.xmlunder the Root Node property in the cluster-provider element. (default:/nifi)Root path to which NiFi writes data in Destination ZooKeeper (destinationRootPath)
This information can be found in <NiFi installation dir>/conf/state-management.xml under the Root Node property in the cluster-provider element.
As of NiFi 1.10.x, because of an upgrade to ZooKeeper 3.5.x, the migrator may have a permission error "NoAuthException: KeeperErrorCode = NoAuth for /zookeeper/config"when attempting to use/as the destination root path. This is because the/zookeeper/configznode has read-only permissions. Instead use a destination path of/nifi/componentsor similar. -
Stop all processors in the NiFi flow. If you are migrating between two NiFi installations, the flows on both must be stopped.
-
Export the NiFi component data from the source ZooKeeper. The following command reads from the specified ZooKeeper running on the given hostname:port, using the provided path to the data, and authenticates with ZooKeeper using the given username and password. The data read from ZooKeeper is written to the file provided.
-
For NiFi 0.x
-
For an open ZooKeeper:
-
zk-migrator.sh -r -z sourceHostname:sourceClientPort/sourceRootPath/components -f /path/to/export/zk-source-data.json
-
-
For a ZooKeeper using username:password for authentication:
-
zk-migrator.sh -r -z sourceHostname:sourceClientPort/sourceRootPath/components -a <username:password> -f /path/to/export/zk-source-data.json
-
-
-
For NiFi 1.x
-
For an open ZooKeeper:
-
zk-migrator.sh -r -z sourceHostname:sourceClientPort/sourceRootPath/components -f /path/to/export/zk-source-data.json
-
-
For a ZooKeeper using Kerberos for authentication:
-
zk-migrator.sh -r -z sourceHostname:sourceClientPort/sourceRootPath/components -k /path/to/jaasconfig/jaas-config.conf -f /path/to/export/zk-source-data.json
-
-
-
-
(Optional) If you have used the new NiFi installation to do any processing, you can also export its ZooKeeper data as a backup prior to performing the migration.
-
For an open ZooKeeper:
-
zk-migrator.sh -r -z destinationHostname:destinationClientPort/destinationRootPath/components -f /path/to/export/zk-destination-backup-data.json
-
-
For a ZooKeeper using Kerberos for authentication:
-
zk-migrator.sh -r -z destinationHostname:destinationClientPort/destinationRootPath/components -k /path/to/jaasconfig/jaas-config.conf -f /path/to/export/zk-destination-backup-data.json
-
-
-
Migrate the ZooKeeper data to the destination ZooKeeper. If the source and destination ZooKeepers are the same, the
--ignore-sourceoption can be added to the following examples.-
For an open ZooKeeper:
-
zk-migrator.sh -s -z destinationHostname:destinationClientPort/destinationRootPath/components -f /path/to/export/zk-source-data.json
-
-
For a ZooKeeper using Kerberos for authentication:
-
zk-migrator.sh -s -z destinationHostname:destinationClientPort/destinationRootPath/components -k /path/to/jaasconfig/jaas-config.conf -f /path/to/export/zk-source-data.json
-
-
-
Once the migration has completed successfully, start the processors in the NiFi flow. Processing should continue from the point at which it was stopped when the NiFi flow was stopped.
Kafka Processor Migrator
With NiFi version 1.15.3, Kafka processor versions 0.8, 0.9, 0.10 and 0.11 were removed. In large flows having many numbers of components it is challenging to replace these processors manually. This tool can be used to update a flow in an automated way.
Usage
Running the script requires 3 mandatory and 1 optional parameters:
-
Input file, the full path of the flow.xml.gz in which the replacement is required.
-
Output file, the full path of the file where the results should be saved.
-
Transaction, whether the new processors should be configured with or without transaction usage.
-
Optional: Kafka Brokers, a comma separated list of Kafka Brokers in <host>:<port> format.
Different input and output files must be used. Kafka Broker argument can be omitted if flow does not contain GetKafka or PutKafka processors.
-
Run script, a possible example:
./bin/kafka-migrator.sh -i "/tmp/flow/flow.xml.gz" -o "/tmp/flow/flow_result.xml.gz" -t false -k "mykafkaserver1:1234,mykafkaserver2:1235"
-
Rename flow_result.xml.gz file to flow.xml.gz, do not overwrite your input file.
-
Copy flow.xml.gz file to all the NiFi nodes conf directory
-
Start NiFi
-
Verify the results.
Expected Behaviour
-
Flow replacement:
-
For all replaced processors:
-
changing class and artifact
-
configure transaction as true
-
'Delivery Guarantee' property will be set to 'Replicated'
-
if 'Honor-Transactions' and 'Use-Transactions' properties are present in the file they will be set to true
-
if 'Honor-Transactions' and 'Use-Transactions' not present they will be translated as true in NiFi
-
-
configure transaction as false
-
'Delivery Guarantee' property will keep its original setting.
-
'Honor-Transactions' and 'Use-Transactions' will be set to false
-
-
-
For version 0.8 processors (when kafka broker list argument provided)
-
remove all version 0.8 properties
-
add version 2.0 properties with default value except for 'Topic Name', 'Group ID', 'Partition', 'Kafka Key', 'Delivery Guarantee' (if transaction false) and 'Compression Codec' values which will be copied over
-
-
Template replacement:
-
For all replaced processors:
-
changing type and artifact
-
configure transaction as true
-
'Delivery Guarantee' property will be set to 'Replicated'
-
if 'Honor-Transactions' and 'Use-Transactions' properties are present in the file they will be set to true
-
if 'Honor-Transactions' and 'Use-Transactions' not present they will be translated as true in NiFi
-
-
configure transaction as false
-
'Delivery Guarantee' property will keep its original setting.
-
'Honor-Transactions' and 'Use-Transactions' will be set to false
-
-
-
For version 0.8 processors (when kafka broker list argument provided)
-
remove all version 0.8 properties and descriptors
-
add version 2.0 properties with default value except for 'Topic Name', 'Group ID', 'Partition', 'Kafka Key', 'Delivery Guarantee' (if transaction false) and 'Compression Codec' values which will be copied over
-
add version 2.0 descriptors
-
-
Limitations
-
All deprecated Kafka processors will be replaced with version 2.0 processors.
-
Script will not rename the processors, only their type will be changed.
-
Transaction setting will be applied to all the replaced processors.
-
The flow.xml.gz file needs to be fit in memory and process time depends on the file size.
-
Processors in templates will be replaced as well, please download the original templates if desired.