Who is This Guide For?
This guide is written for users who have basic experience with NiFi but have little familiarity with the NiFi Registry. This guide is not intended to be an exhaustive instruction manual or a reference guide. The NiFi Registry User Guide and NiFi User Guide provide a great deal more information about using the Registry and integrating it with NiFi. This guide, in comparison, is intended to provide users with just the information needed in order to understand how to configure NiFi Registry, connect with NiFi and start using versioned NiFi dataflows.
Terminology Used in This Guide
In order to talk about NiFi Registry, there are a few key terms that readers should be familiar with:
Flow: A process group level NiFi dataflow that has been placed under version control and saved to the Registry.
Bucket: A container that stores and organizes flows.
Downloading and Installing NiFi Registry
NiFi Registry can be downloaded from the NiFi Registry Page. There are two packaging options available: a tarball and a zip file. Supported operating systems include Linux, Unix and Mac OS X.
For users who are not running OS X, after downloading NiFi Registry simply extract the archive to the location that you wish to run the application from. The registry is unsecured by default.
For information on how to configure an instance of NiFi Registry (for example, to implement security or change the port that NiFi Registry is running on), see the System Administrator’s Guide.
Starting NiFi Registry
Once NiFi Registry has been downloaded and installed as described above, it can be started by using the mechanism appropriate for your operating system.
For Linux/Unix/Mac OS X users
Use a Terminal window to navigate to the directory where NiFi Registry was installed. To run NiFi Registry in the foreground, run bin/nifi-registry.sh run. This will leave the application running until the user presses Ctrl-C. At that time, it will initiate shutdown of the application.
To run NiFi Registry in the background, instead run bin/nifi-registry.sh start. This will initiate the application to begin running. To check the status and see if NiFi Registry is currently running, execute the command bin/nifi-registry.sh status.
NiFi Registry can be shutdown by executing the command bin/nifi-registry.sh stop.
Installing as a Service
To install the application as a service, navigate to the installation directory in a Terminal window and execute the command bin/nifi-registry.sh install to install the service with the default name nifi-registry. To specify a custom name for the service, execute the command with an optional second argument that is the name of the service. For example, to install NiFi Registry as a service with the name flow-registry, use the command bin/nifi-registry.sh install flow-registry.
Once installed, the service can be started and stopped using the appropriate commands, such as sudo service nifi-registry start and sudo service nifi-registry stop. Additionally, the running status can be checked via sudo service nifi-registry status.
I Started NiFi Registry. Now What?
Now that NiFi Registry has been started, we can bring up the User Interface (UI). To get started, open a web browser and navigate to
http://localhost:18080/nifi-registry. The port can be changed by editing the nifi-registry.properties file in the NiFi Registry conf directory, but the default port is 18080.
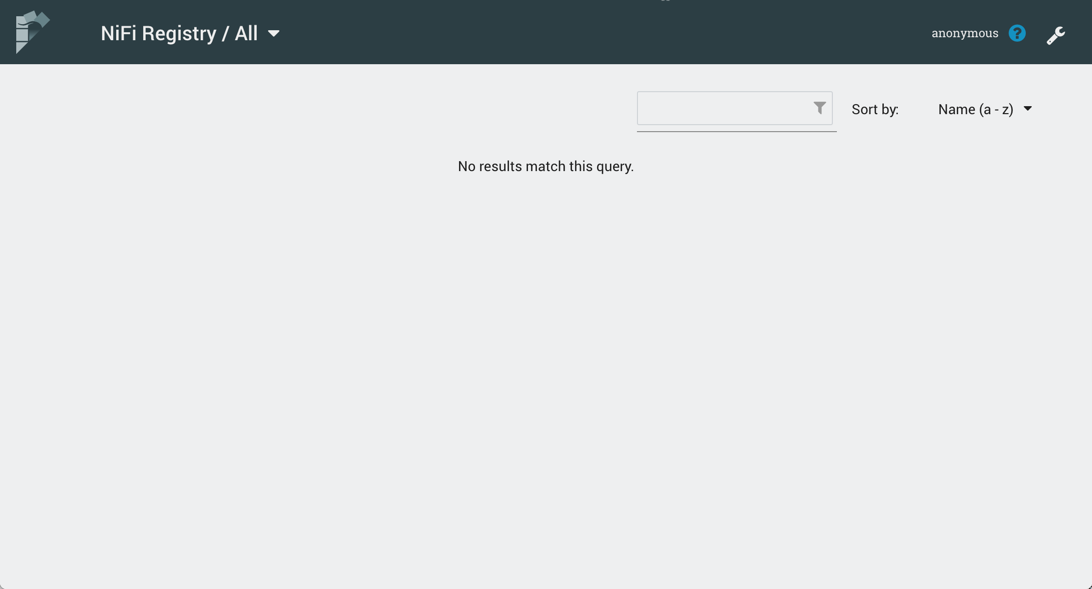
This will bring up the Registry UI, which at this point is empty as there are no flow resources available to share yet:
Create a Bucket
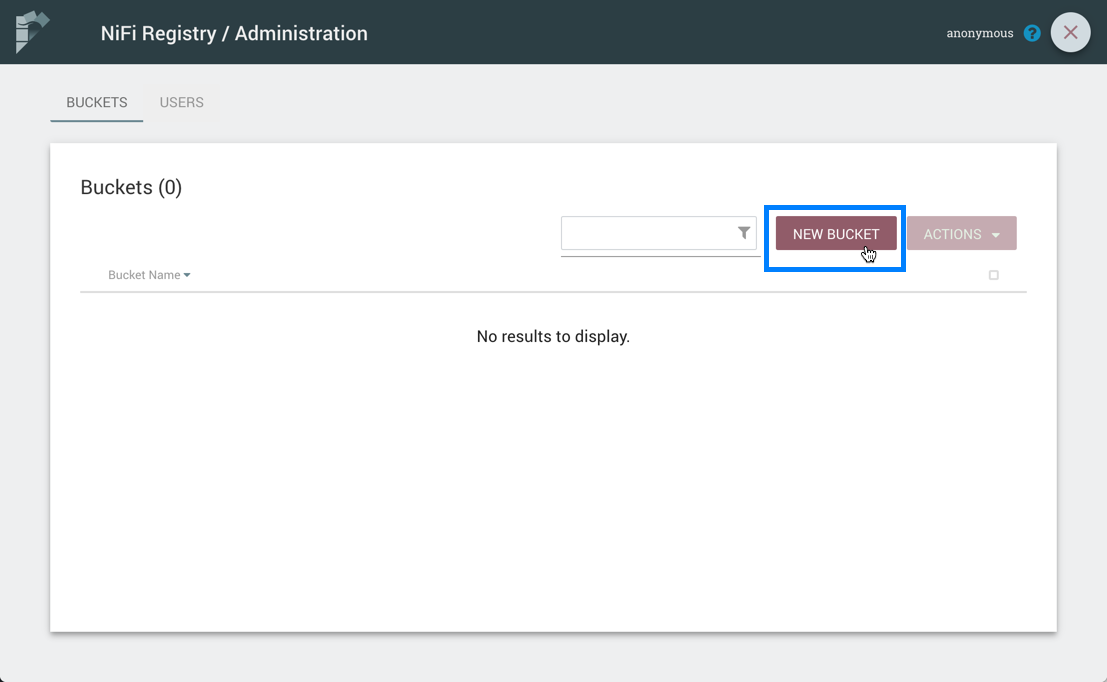
A bucket is needed in our registry to store and organize NiFi dataflows. To create one, select the Settings icon ( )in the top right corner of the screen. In the Buckets window, select the "New Bucket" button.
Enter the bucket name "Test" and select the "Create" button.
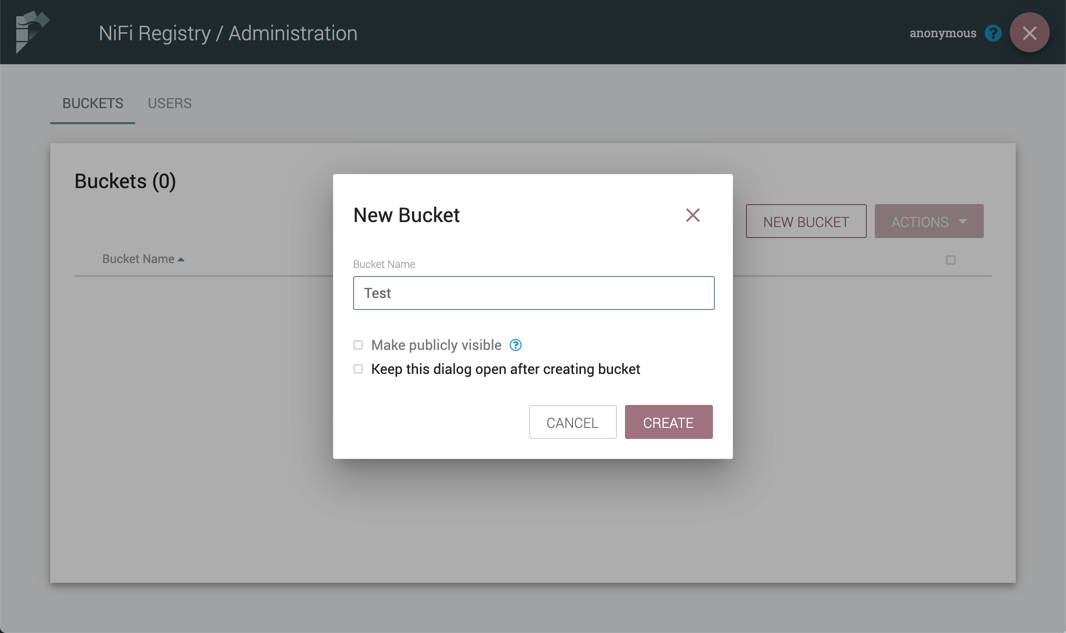
The "Test" bucket is created:

There are no permissions configured by default, so anyone is able to view, create and modify buckets in this instance. For information on securing the system, see the System Administrator’s Guide.
Connect NiFi to the Registry
Now it is time to tell NiFi about the local registry instance.
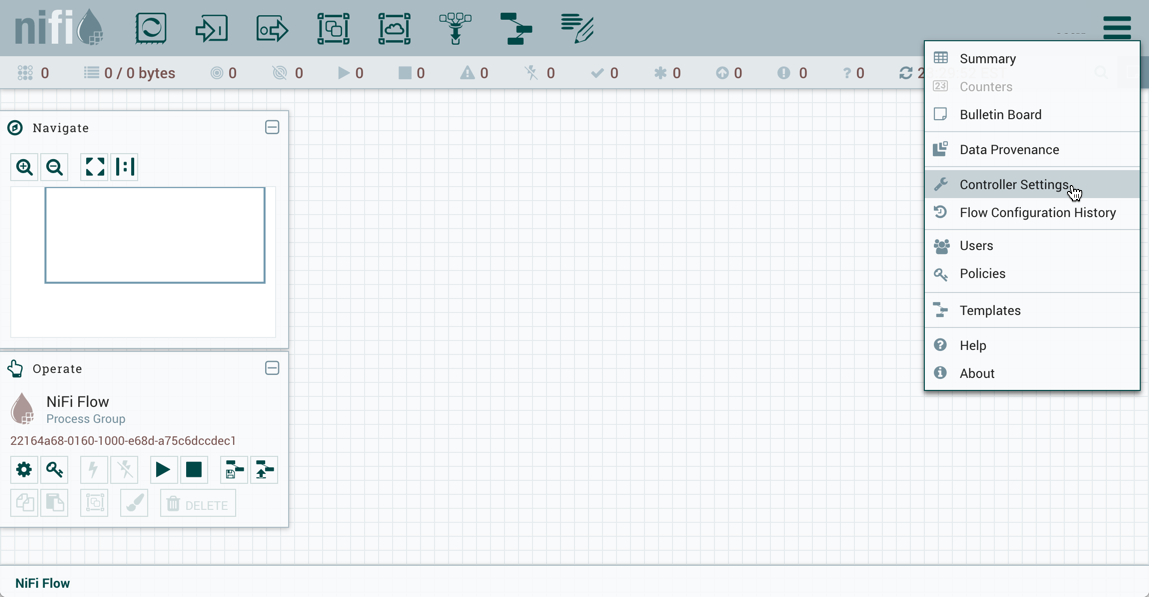
Start a NiFi instance if one isn’t already running and bring up the UI. Go to controller settings from the top-right menu:
Select the Registry Clients tab and add a new Registry Client giving it a name and selecting a type:
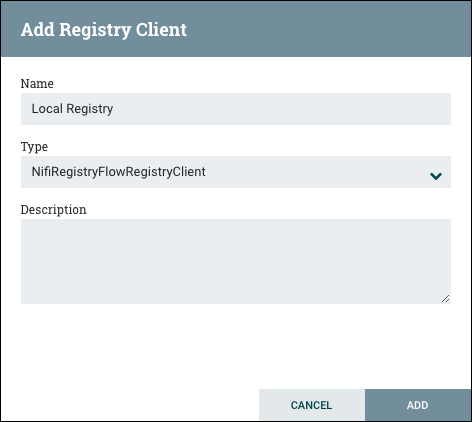
Click "Add".
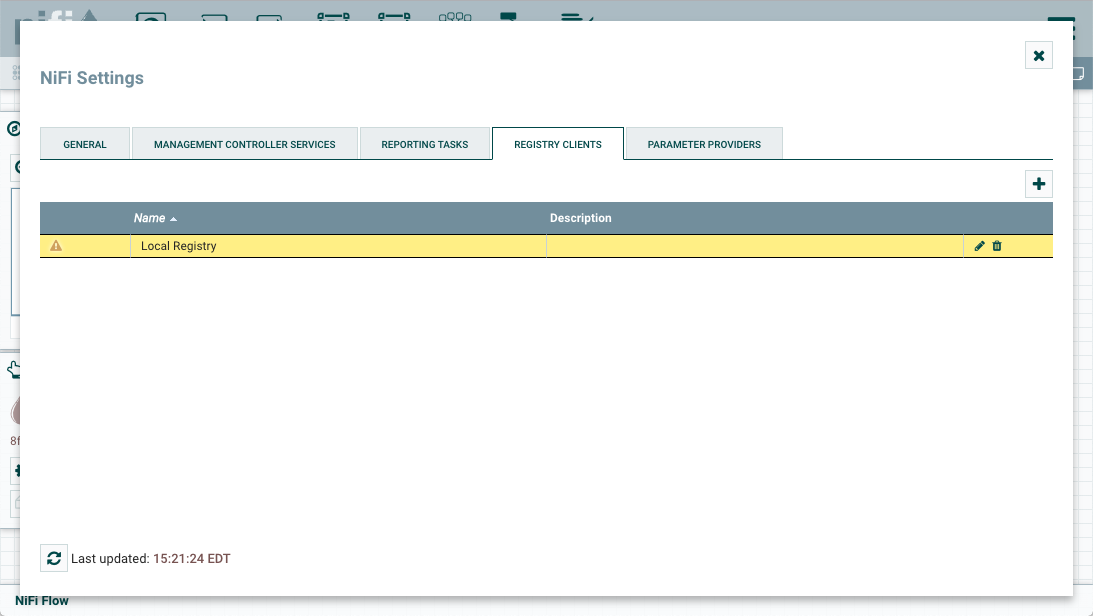
Once a Registry Client has been added, configure it by clicking the "Edit" button ( ) in the far-right column. In the Edit Registry Client window, select the Properties tab and enter a URL of
 http://localhost:18080:

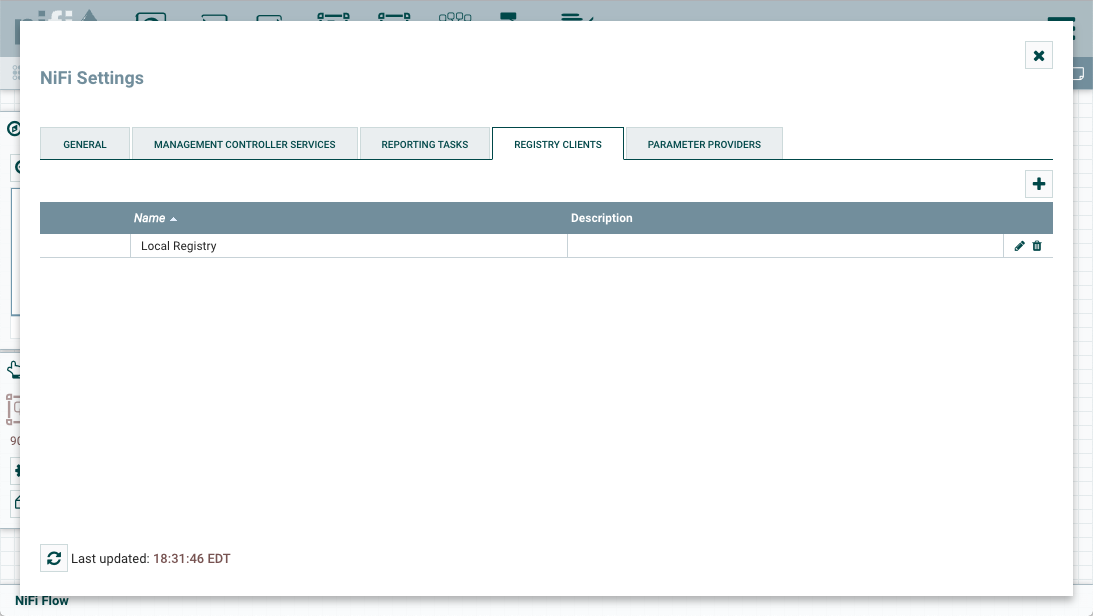
Click "Update" to save the configuration and close the window:
Start Version Control on a Process Group
With NiFi connected to a NiFi Registry, dataflows can be version controlled on the process group level.
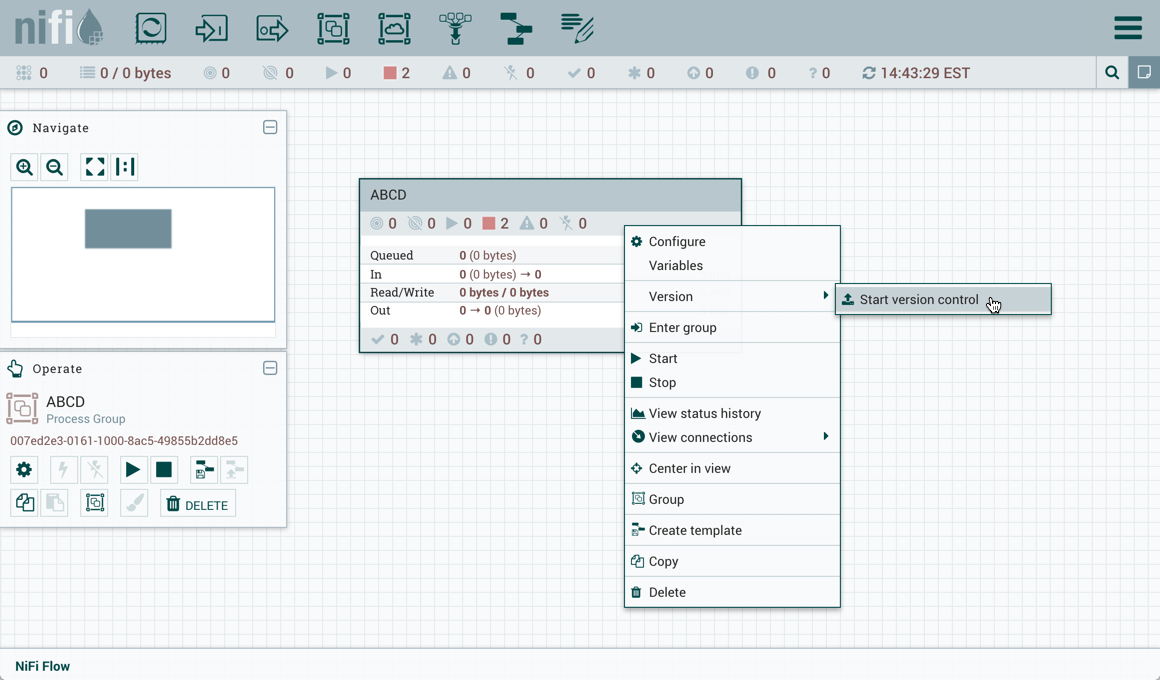
Right-click on a process group and select "Version→Start version control" from the context menu:
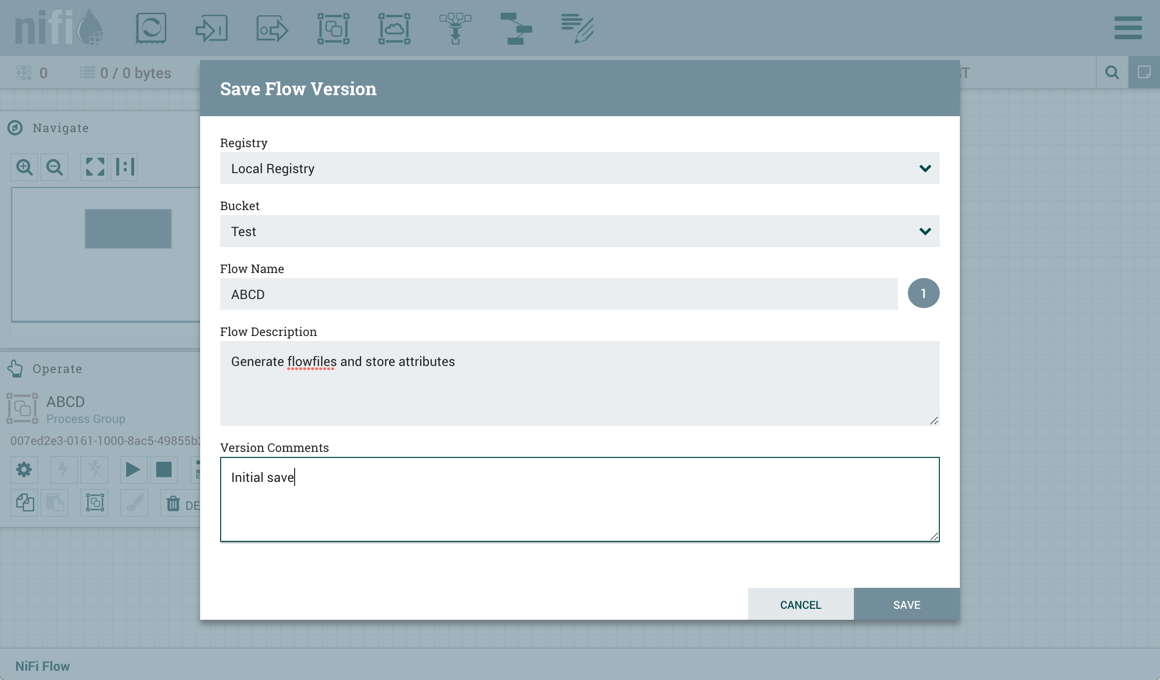
The local registry instance and "Test" bucket are chosen by default to store your flow since they are the only registry connected and bucket available. Enter a flow name, flow description, comments and select "Save":
As indicated by the Version State icon ( ) in the top left corner of the component, the process group is now saved as a versioned flow in the registry.

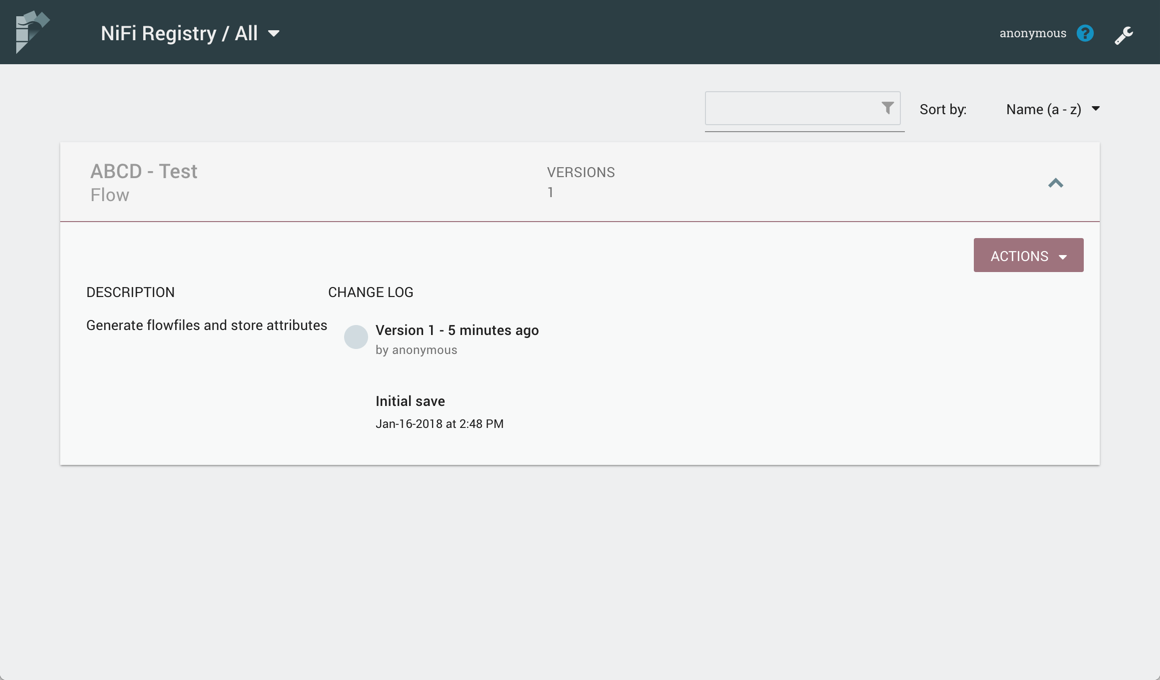
Go back to the Registry UI and return to the main page to see the versioned flow you just saved (a refresh may be required):
Save Changes to a Versioned Flow
Changes made to the versioned process group can be reviewed, reverted or saved.
For example, if changes are made to the ABCD flow, the Version State changes to "Locally modified" ( ). The right-click menu will now show the options "Commit local changes", "Show local changes" or "Revert local changes":

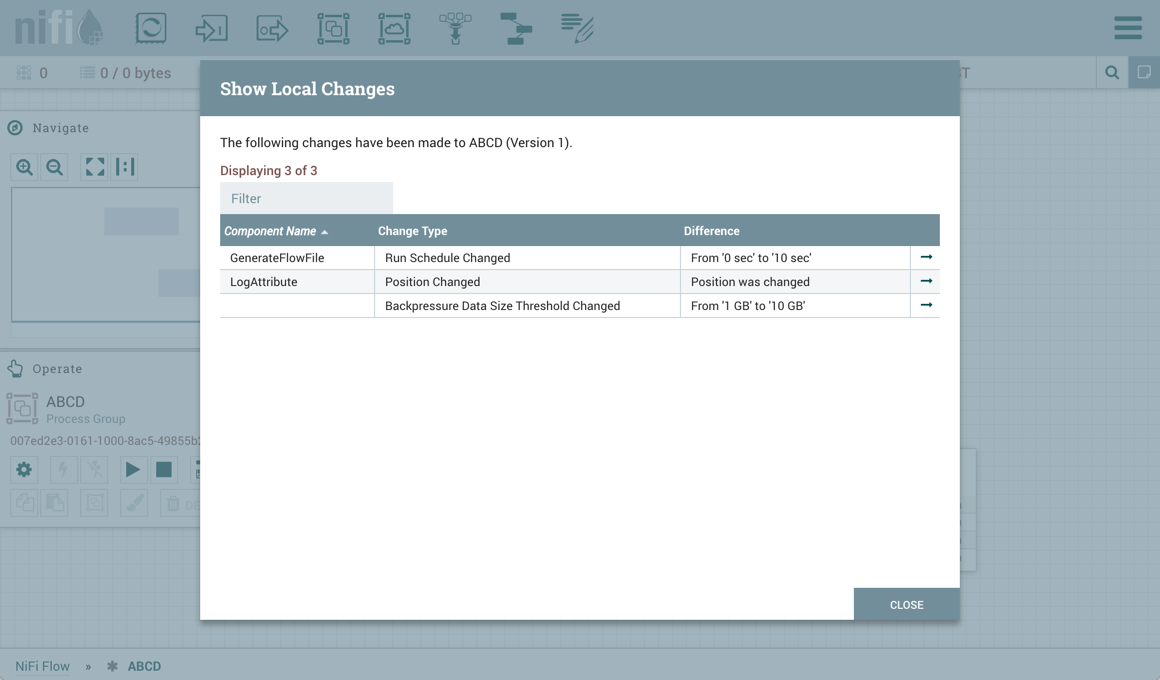
Select "Show local changes" to see the details of the changes made:
Select "Commit local changes", enter comments and select "Save" to save the changes:
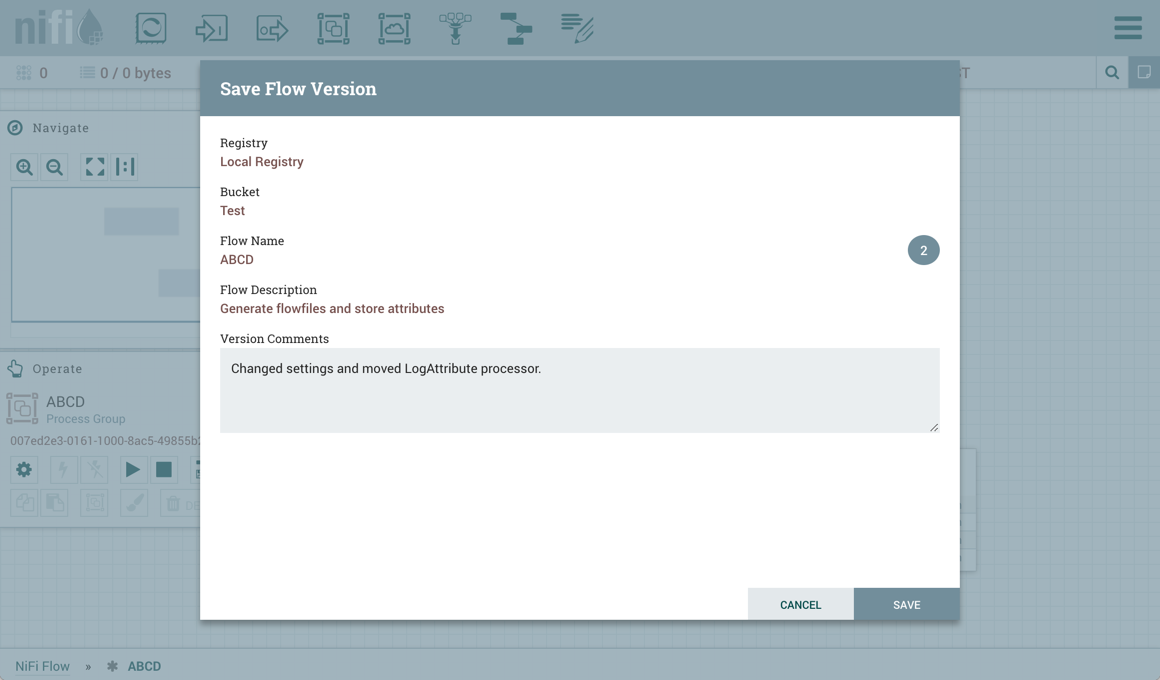
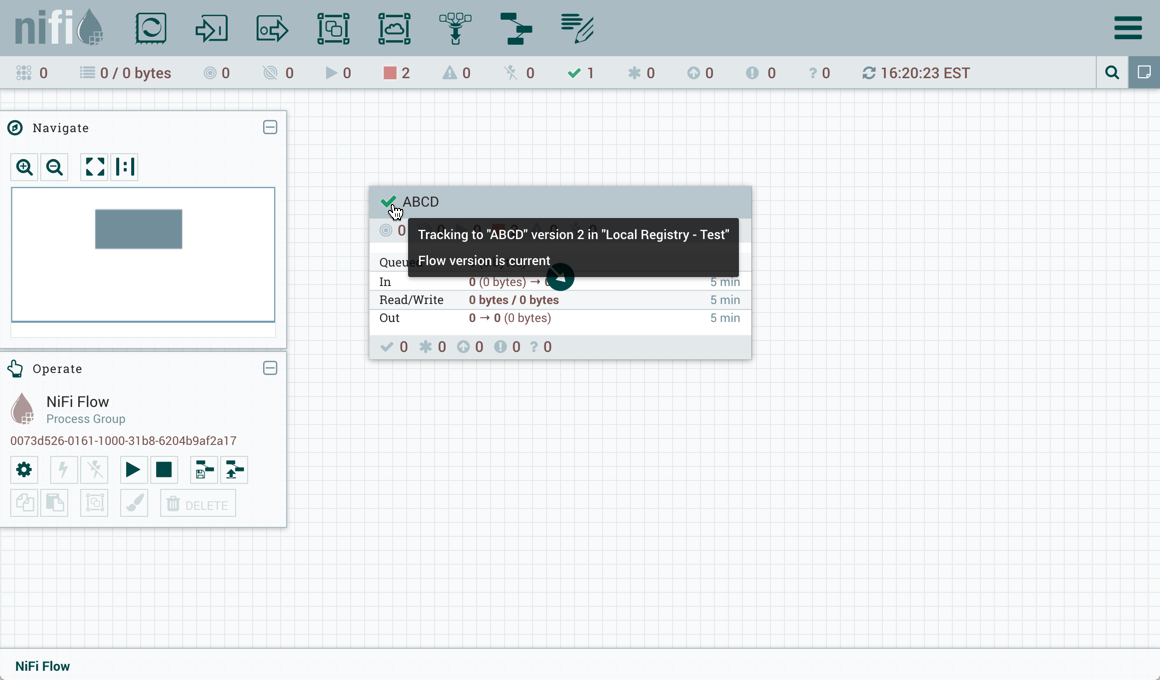
Version 2 of the flow is saved:
Import a Versioned Flow
With a flow existing in the registry, we can use it to illustrate how to import a versioned process group.
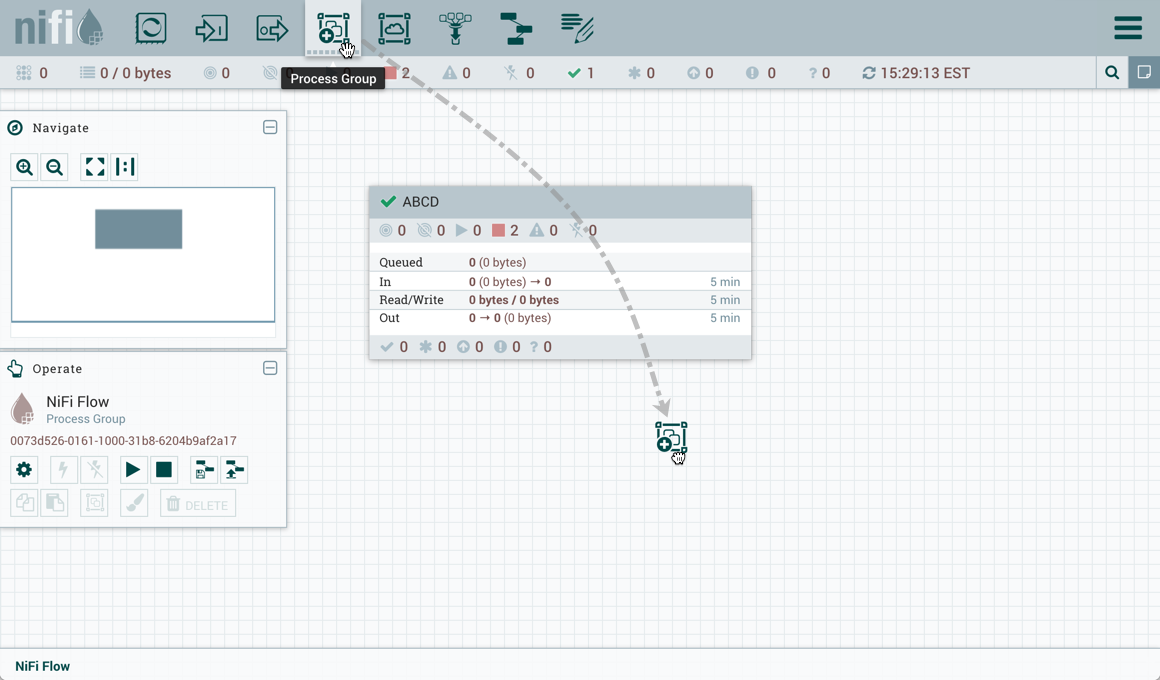
In NiFi, select Process Group from the Components toolbar and drag it onto the canvas:
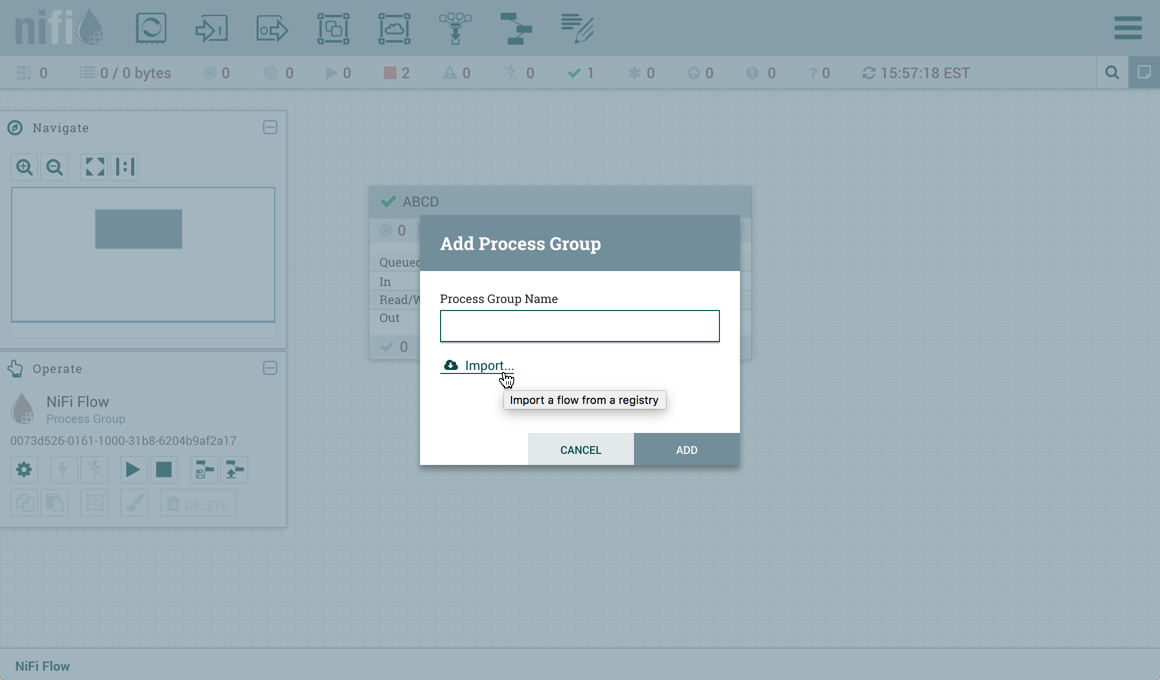
Instead of entering a name, click the Import link:
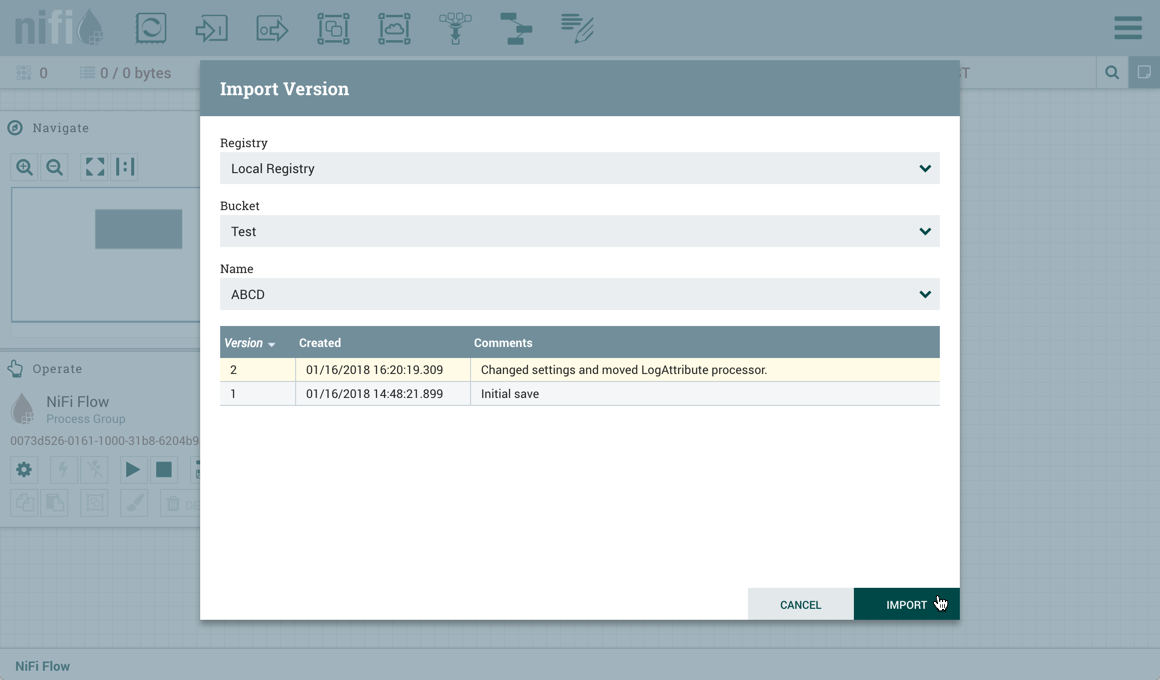
Choose the version of the flow you want imported and select "Import":
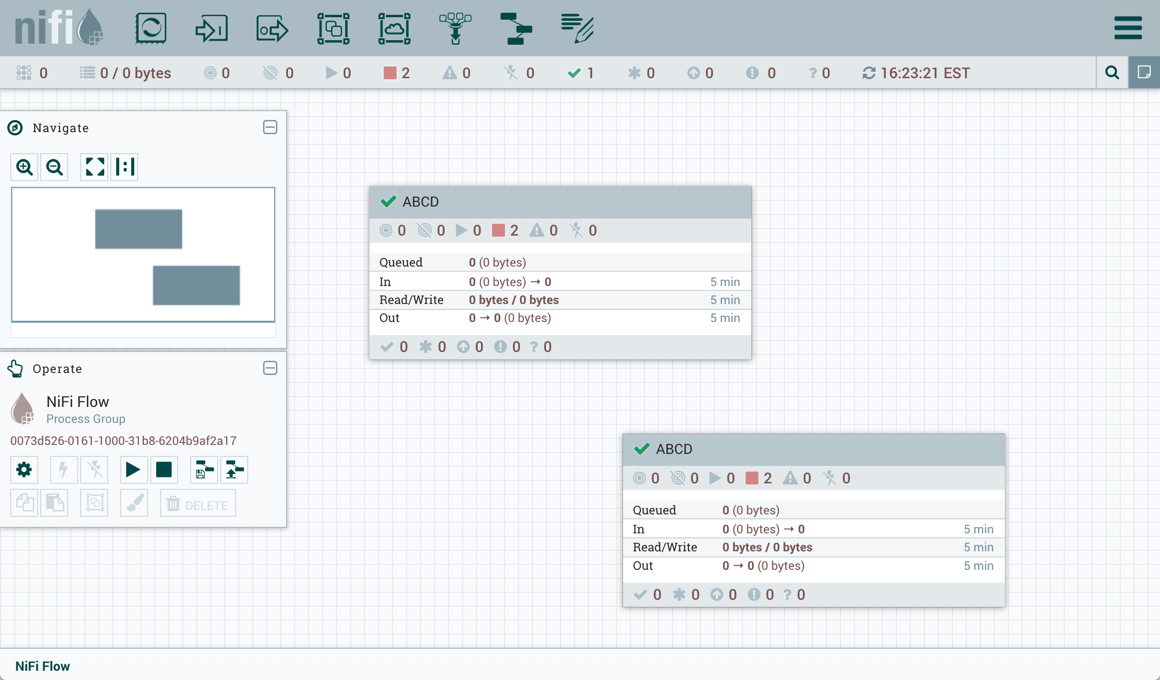
A second identical PG is now added:
Where To Go For More Information
In addition to this Getting Started Guide, more information about NiFi Registry and related features in NiFi can be found in the following guides:
-
Apache NiFi Registry User Guide - This guide provides information on how to navigate the Registry UI and explains in detail how to manage flows/policies/special privileges and configure users/groups when the Registry is secured.
-
Apache NiFi Registry System Administrator’s Guide - A guide for setting up and administering Apache NiFi Registry. Topics covered include: system requirements, security configuration, user authentication, authorization, proxy configuration and details about the different system-level settings.
-
Apache NiFi User Guide - A fairly extensive guide that is often used more as a Reference Guide, as it provides information on each of the different components available in NiFi and explains how to use the different features provided by the application. It includes the section "Versioning a Dataflow" which covers the integration of NiFi with NiFi Registry. Topics covered include: connecting to a registry, version states, importing a versioned flow and managing local changes.
-
Contributor’s Guide - A guide for explaining how to contribute work back to the Apache NiFi community so that others can make use of it.
In addition to the guides provided here, you can browse the different NiFi Mailing Lists or send an e-mail to one of the mailing lists at users@nifi.apache.org or dev@nifi.apache.org.
Many of the members of the NiFi community are also available on Twitter and actively monitor for tweets that mention @apachenifi.